Adding Companies #
To learn how you can Add your desired Companies in the Contacts section, follow the steps with the screenshots below –
After enabling the Company Module feature, go to Companies from the Contacts section dropdown.
Remember, you will not get this “Companies” option inside the Contacts section if you do not activate/enable the company module.

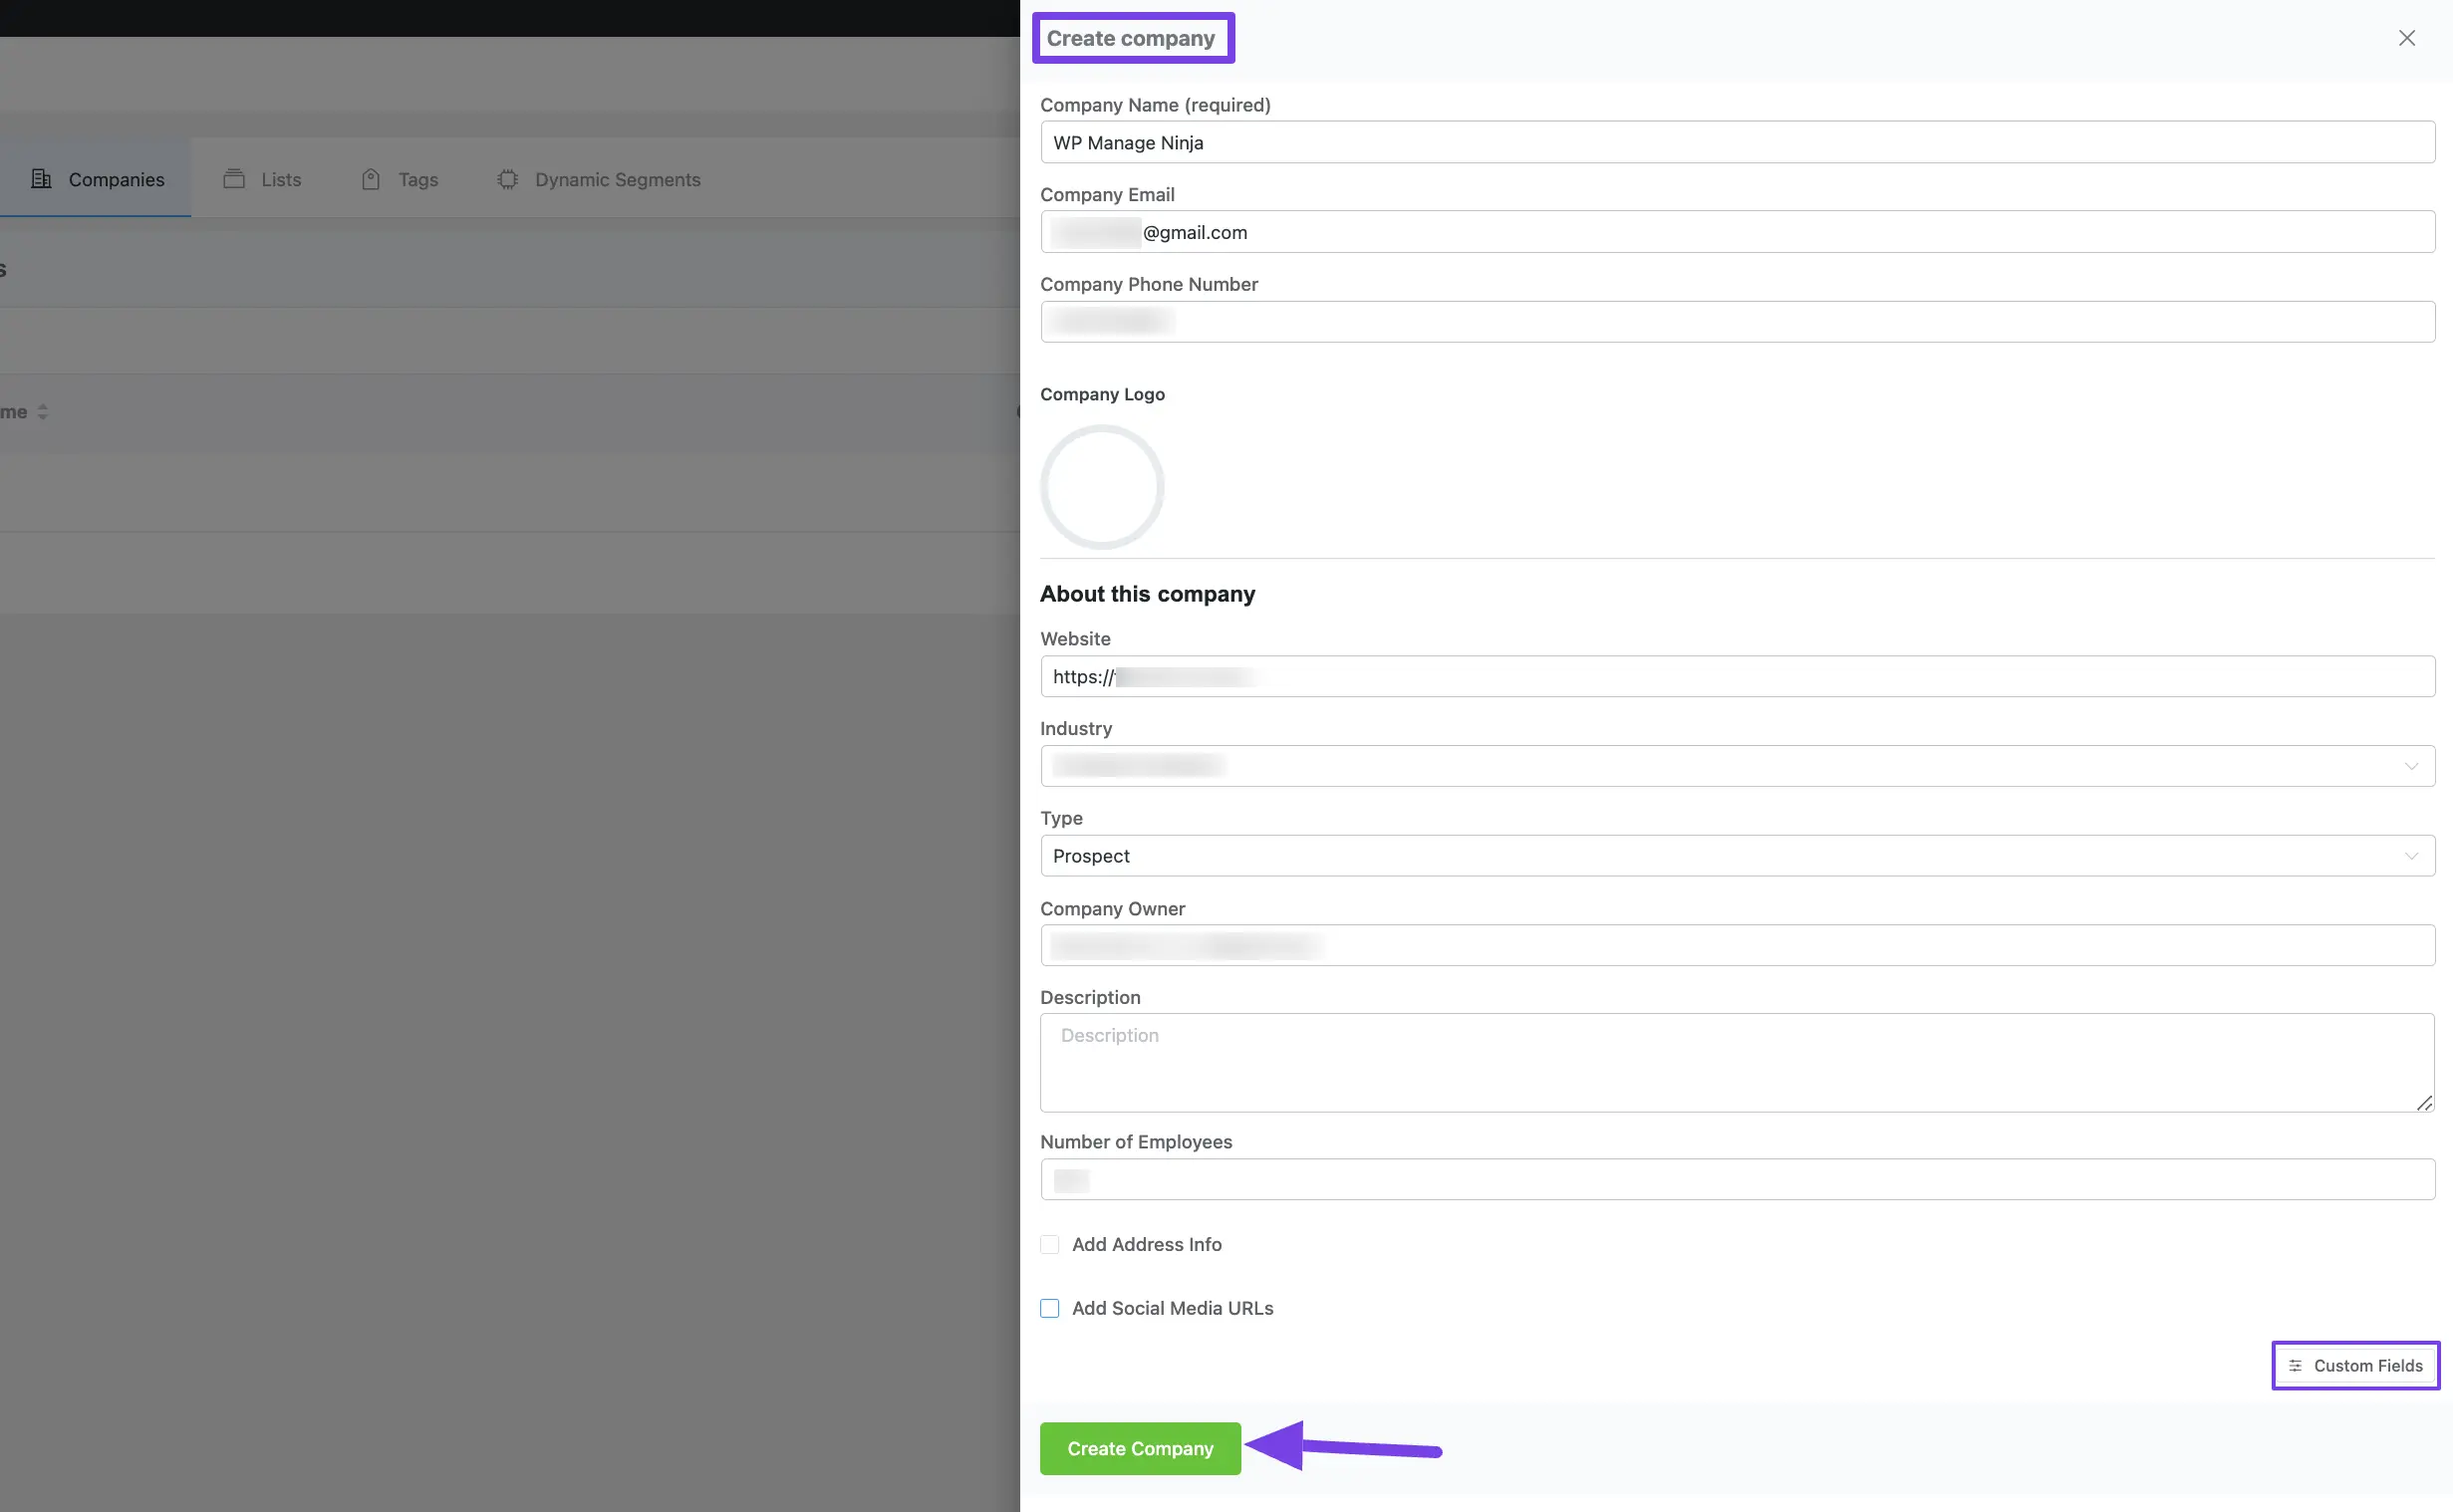
To add company details, simply click the + Add Company button and a pop-up will appear where you can enter the company details.
You can also import company details from a CSV file by clicking the Import button.
Or, conveniently export company details to a CSV file by clicking the Export button.

After providing all the necessary information, click the Create Company button.
Once you add the company, you will get Three major options. These are:
Contacts is for adding and organizing the contacts under a single company, and Notes & Activities and Custom Fields for adding the essential information to the company.
- Contacts
- Notes & Activities
- Custom Fields
Contacts #
Now, you can easily add contacts for the added companies. To learn how to add contacts, follow the screenshots below –
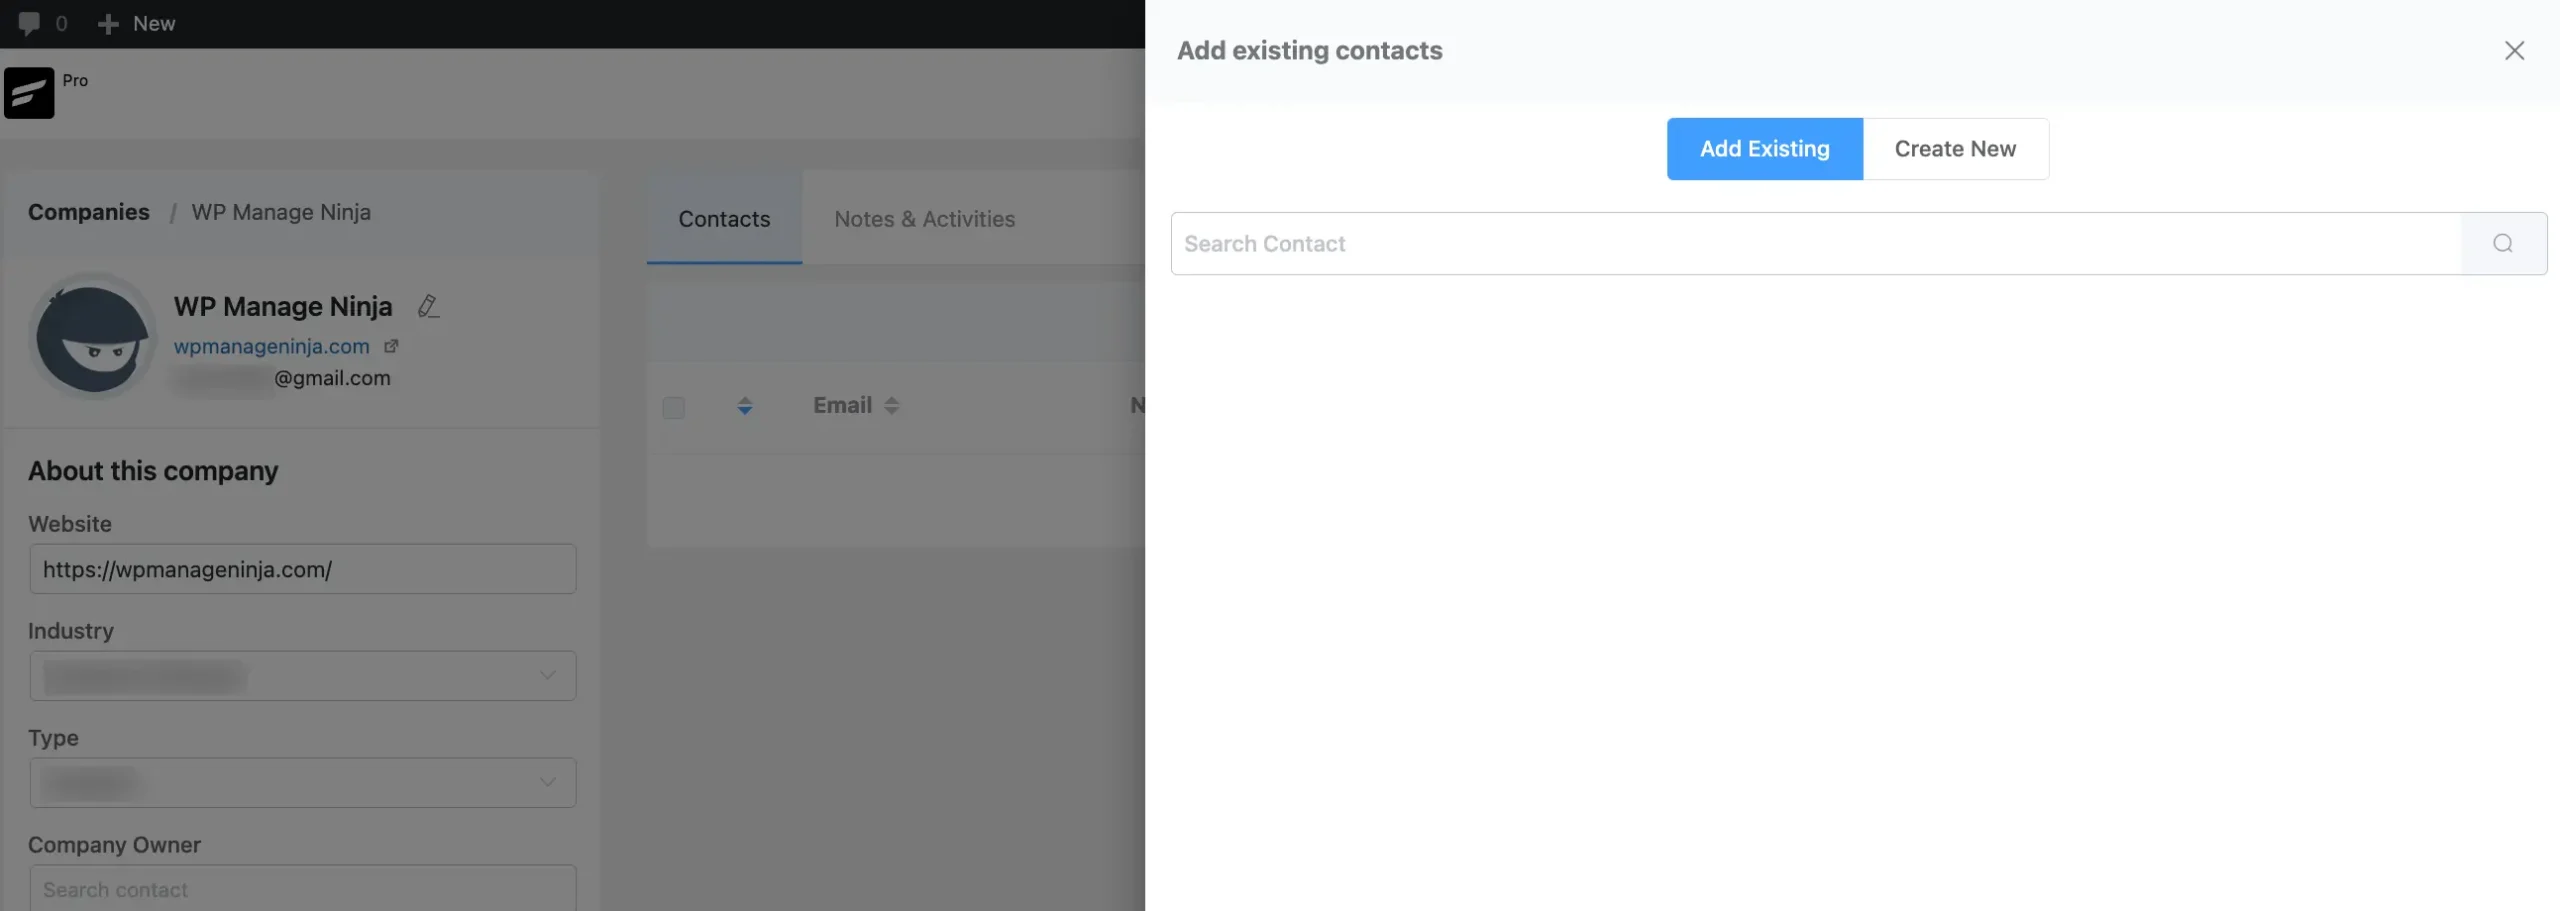
Click the + Contacts button, and a pop-up will appear.

Here, you can add existing contacts or create new ones for the company from the pop-up window.
Notes & Activities #
You can also add notes and activities for the company using the “Notes & Activities” section.
The data for the Notes & Activities under Companies are independent from the Individual Contacts’ Notes & Activities data.
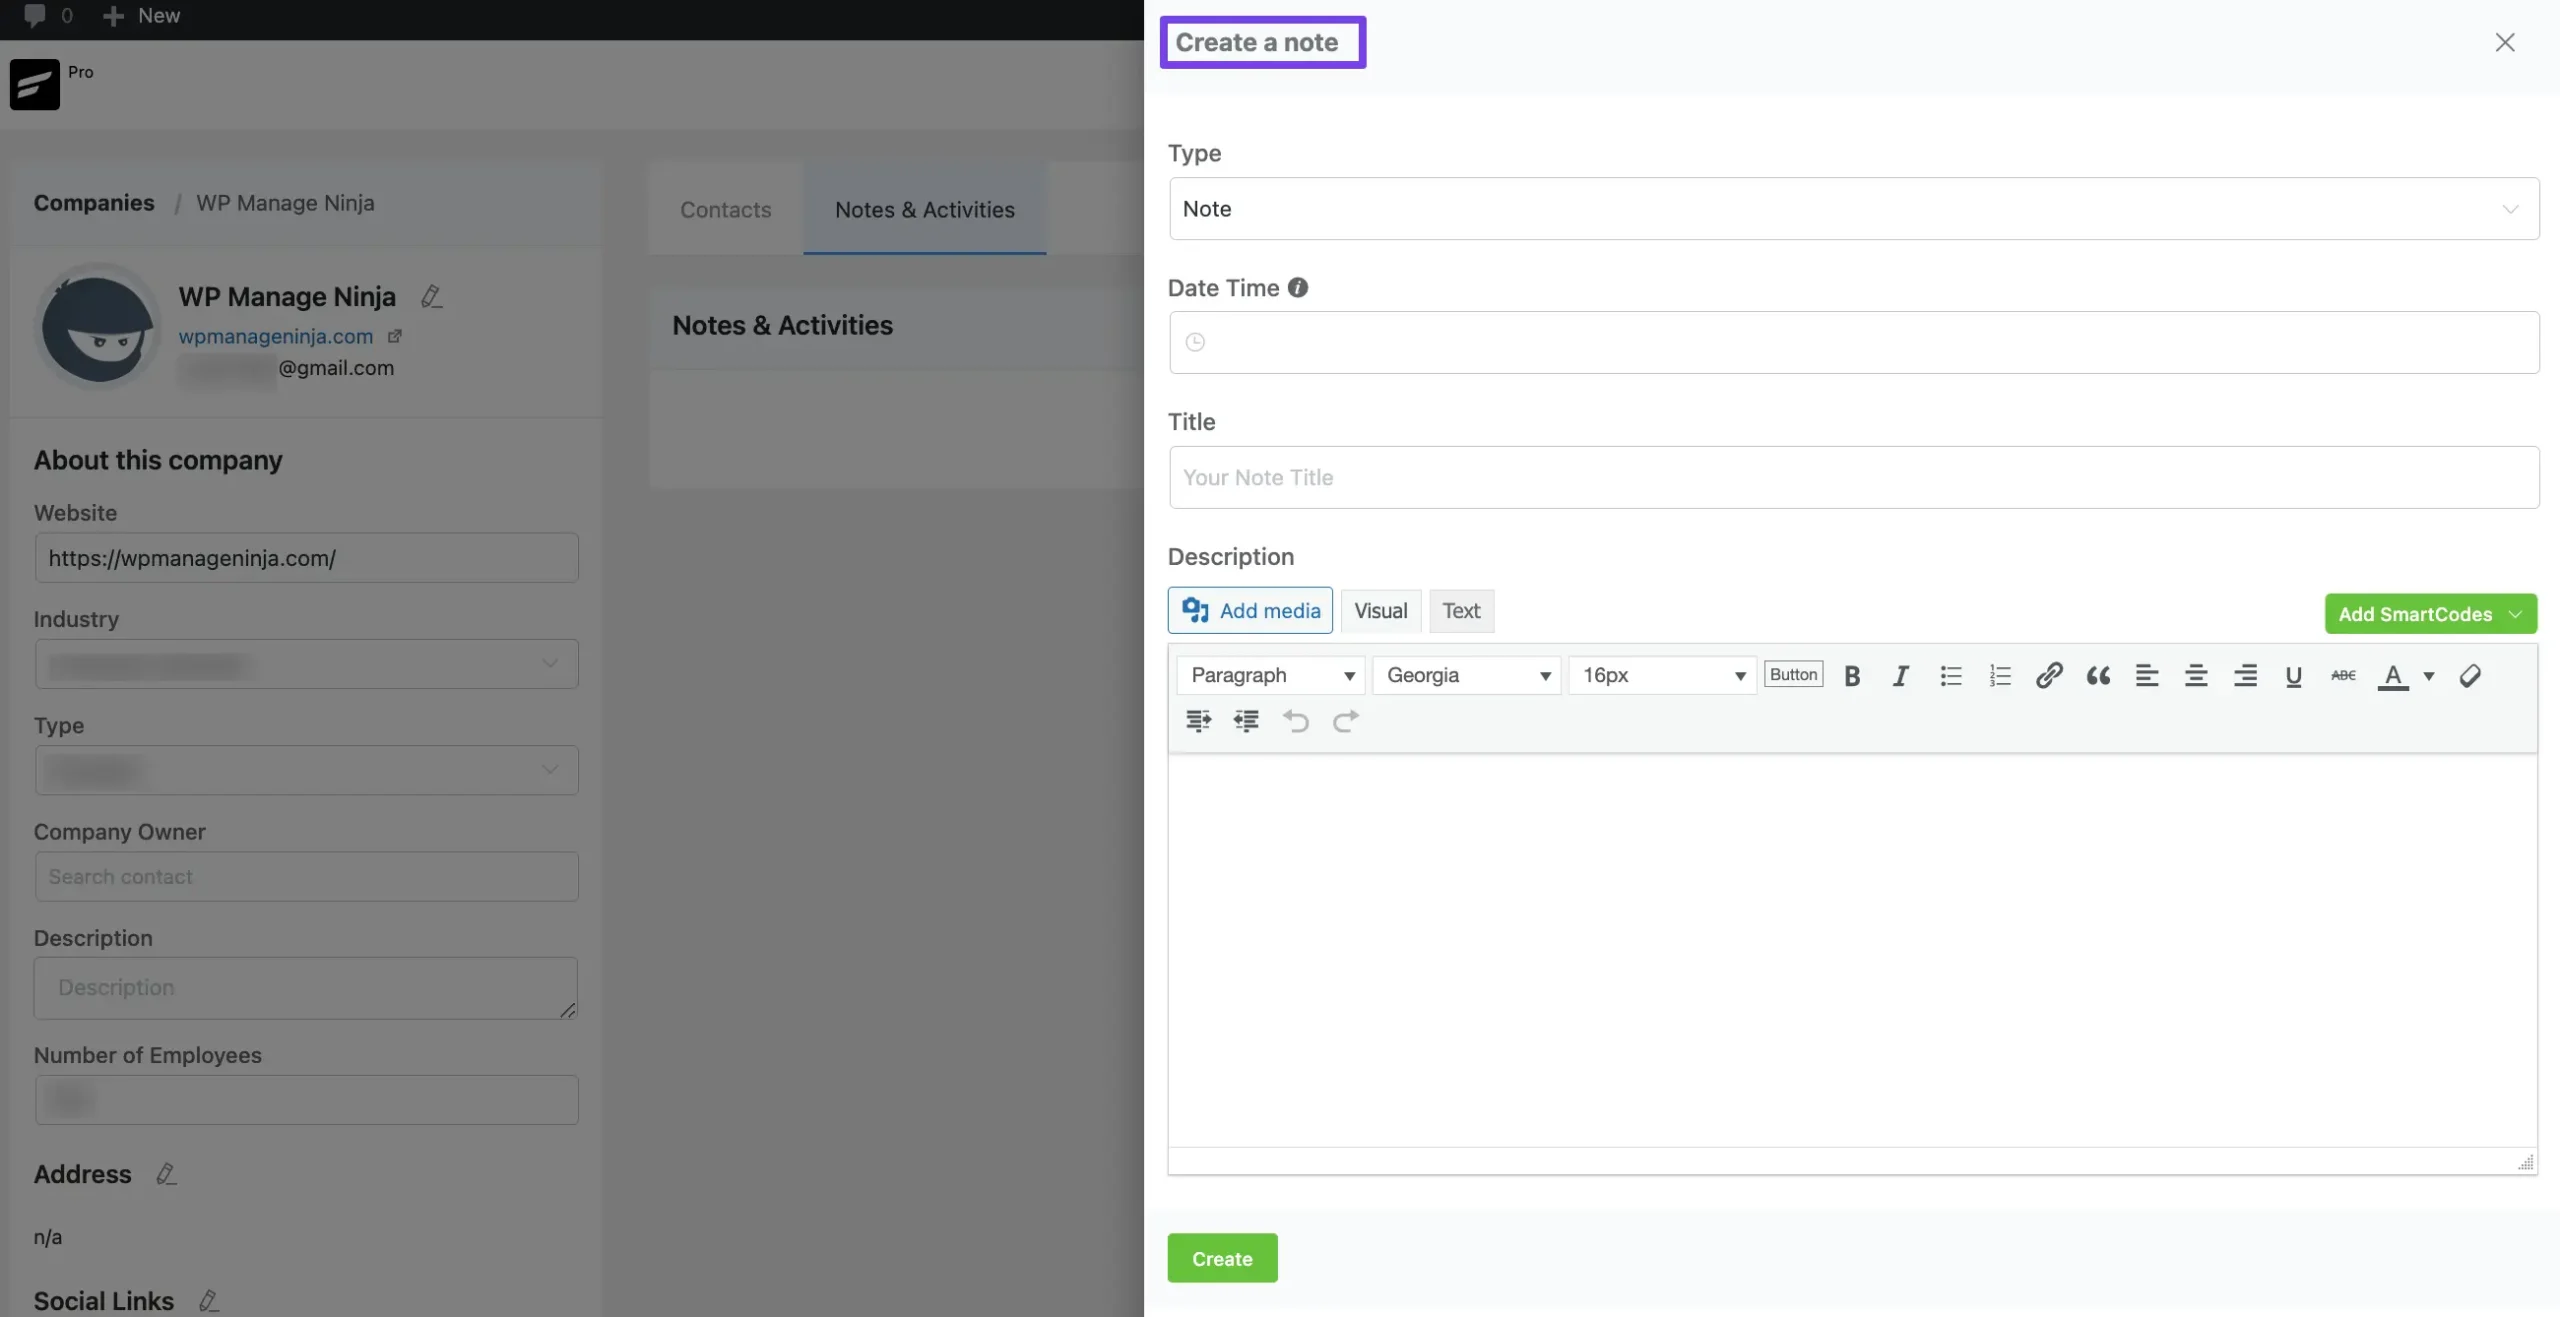
Click on the Add New button to add notes for the company and a pop-up will appear.

Here, you can add notes for the company from the pop-up window.
Custom Fields #
Mainflow doesn’t have any designated field for adding additional data to your company details. But you can do it easily with the Custom Field feature of mainflow.
The data for the Custom Fields under Companies are independent from the Individual Contacts’ Custom Fields data.
To learn how to add Custom Fields in Companies, follow the steps with screenshots below –
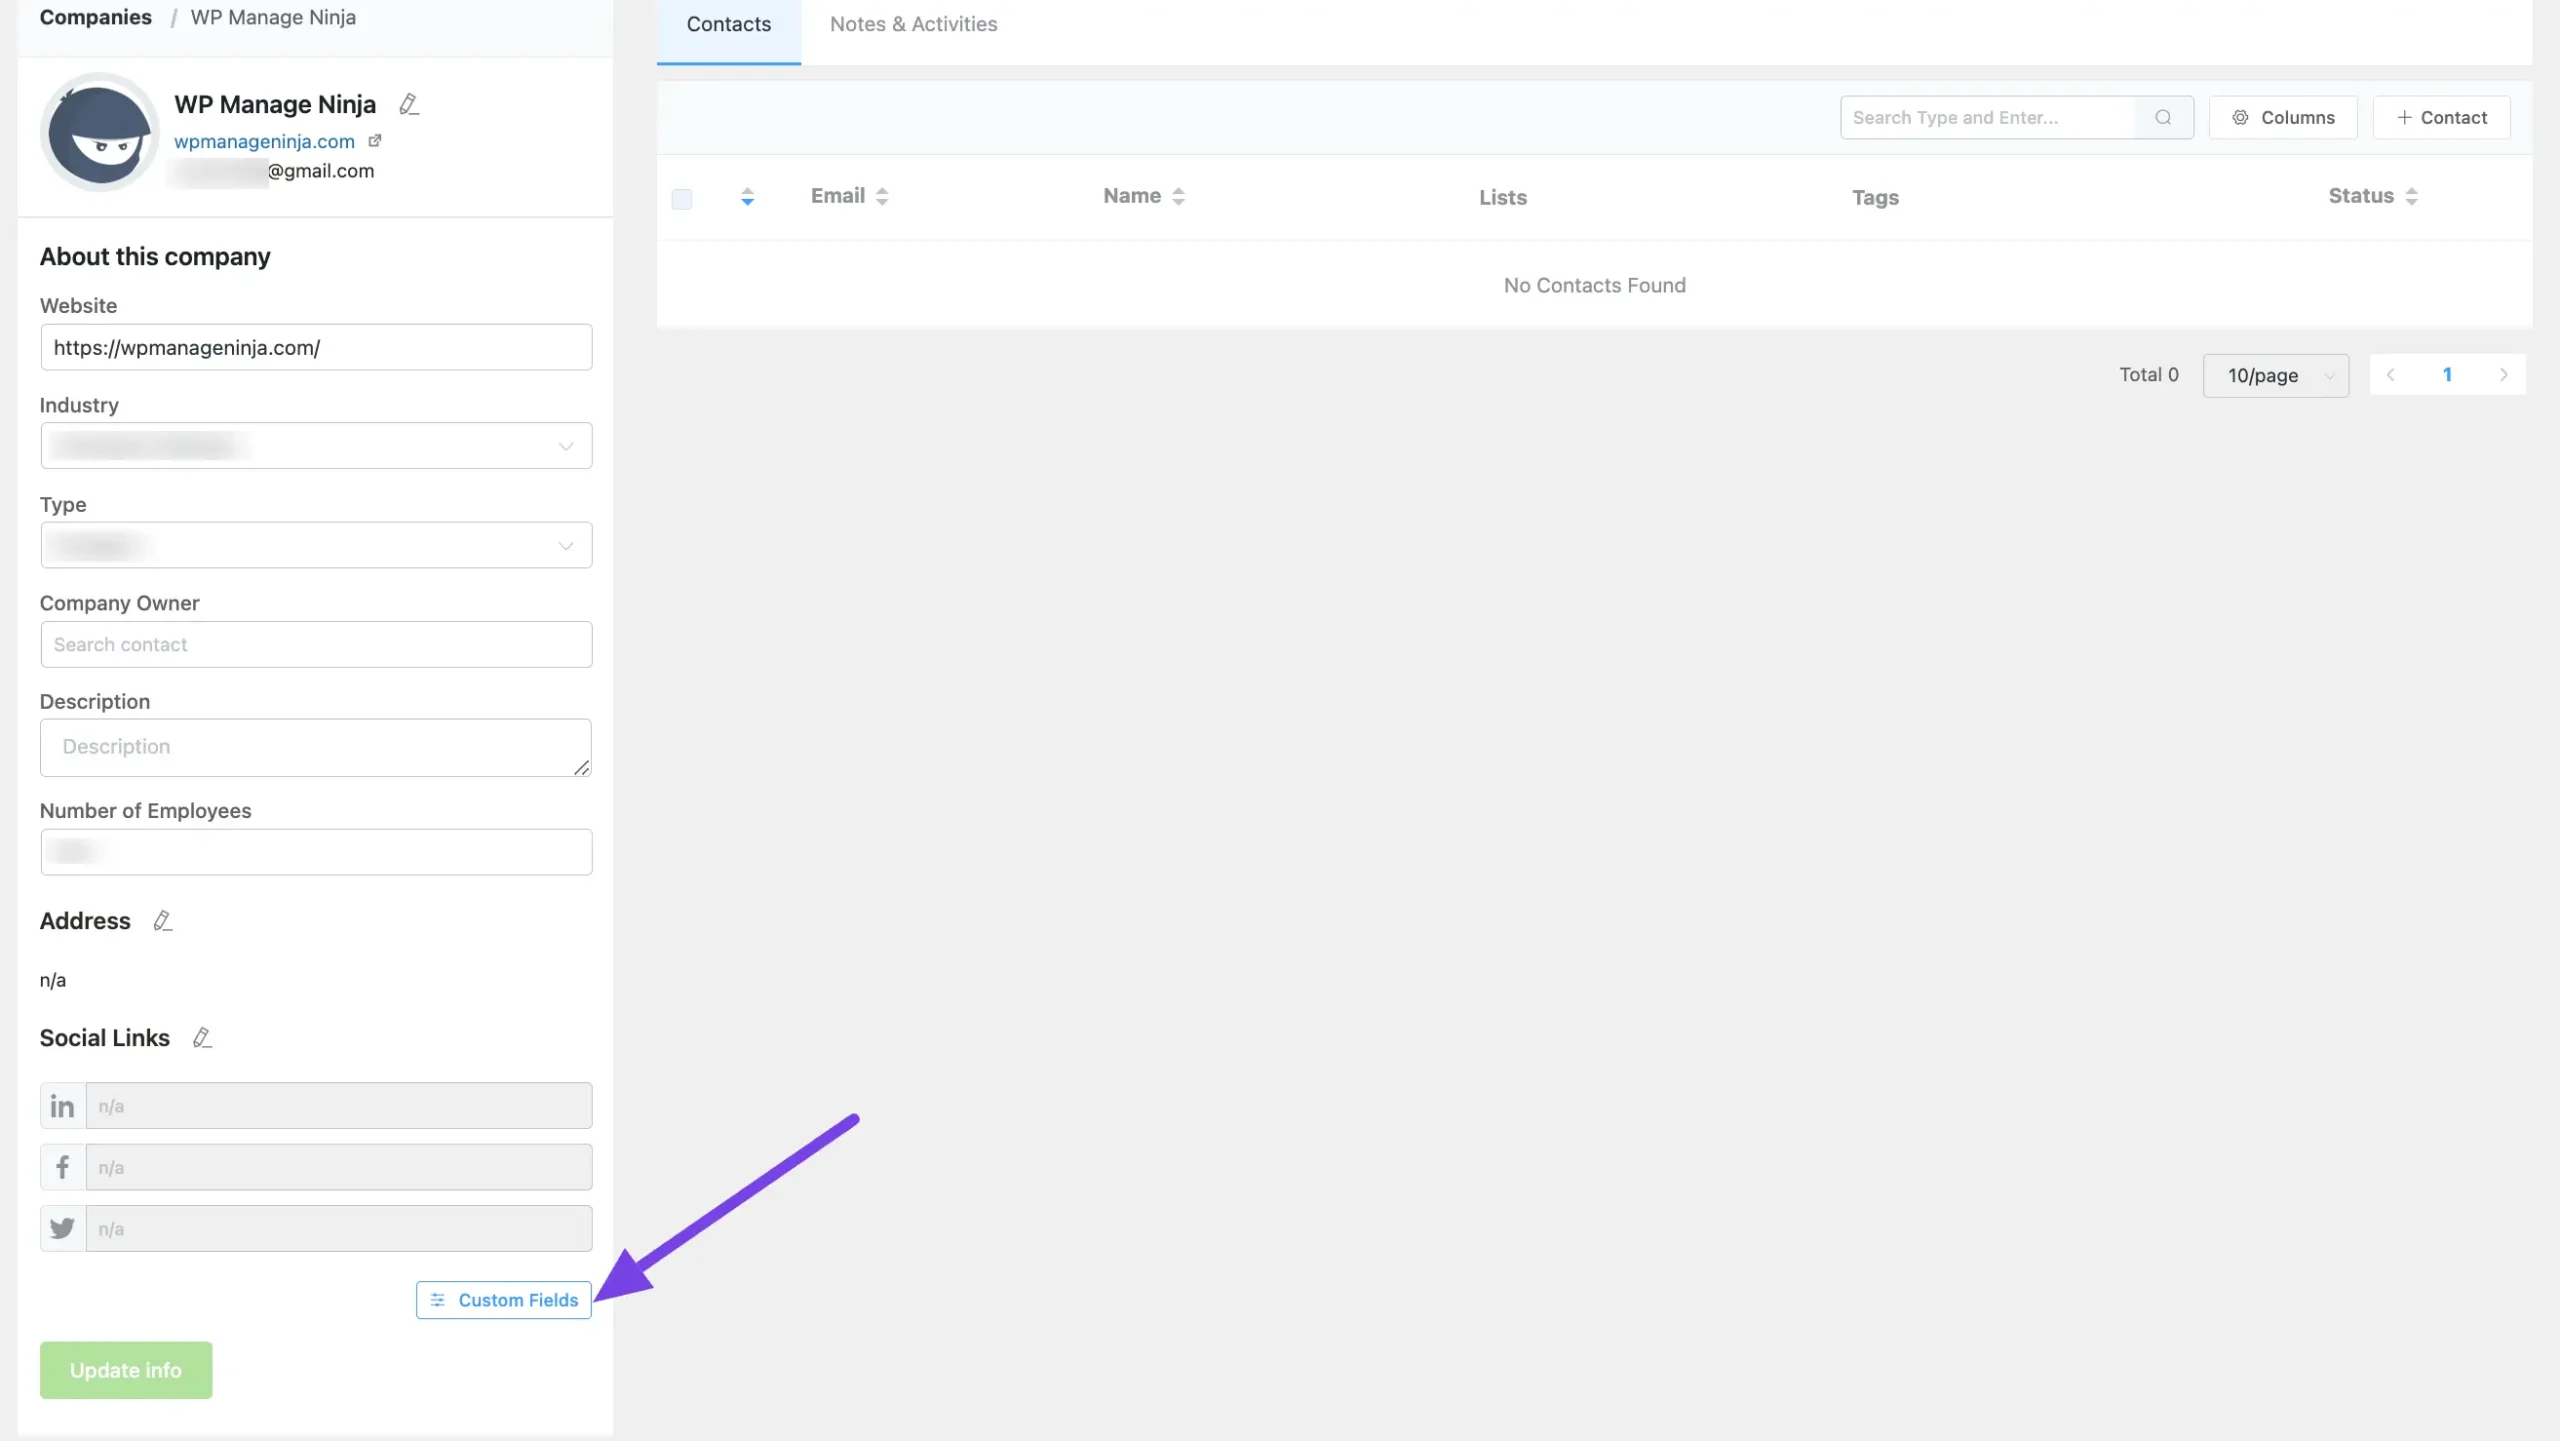
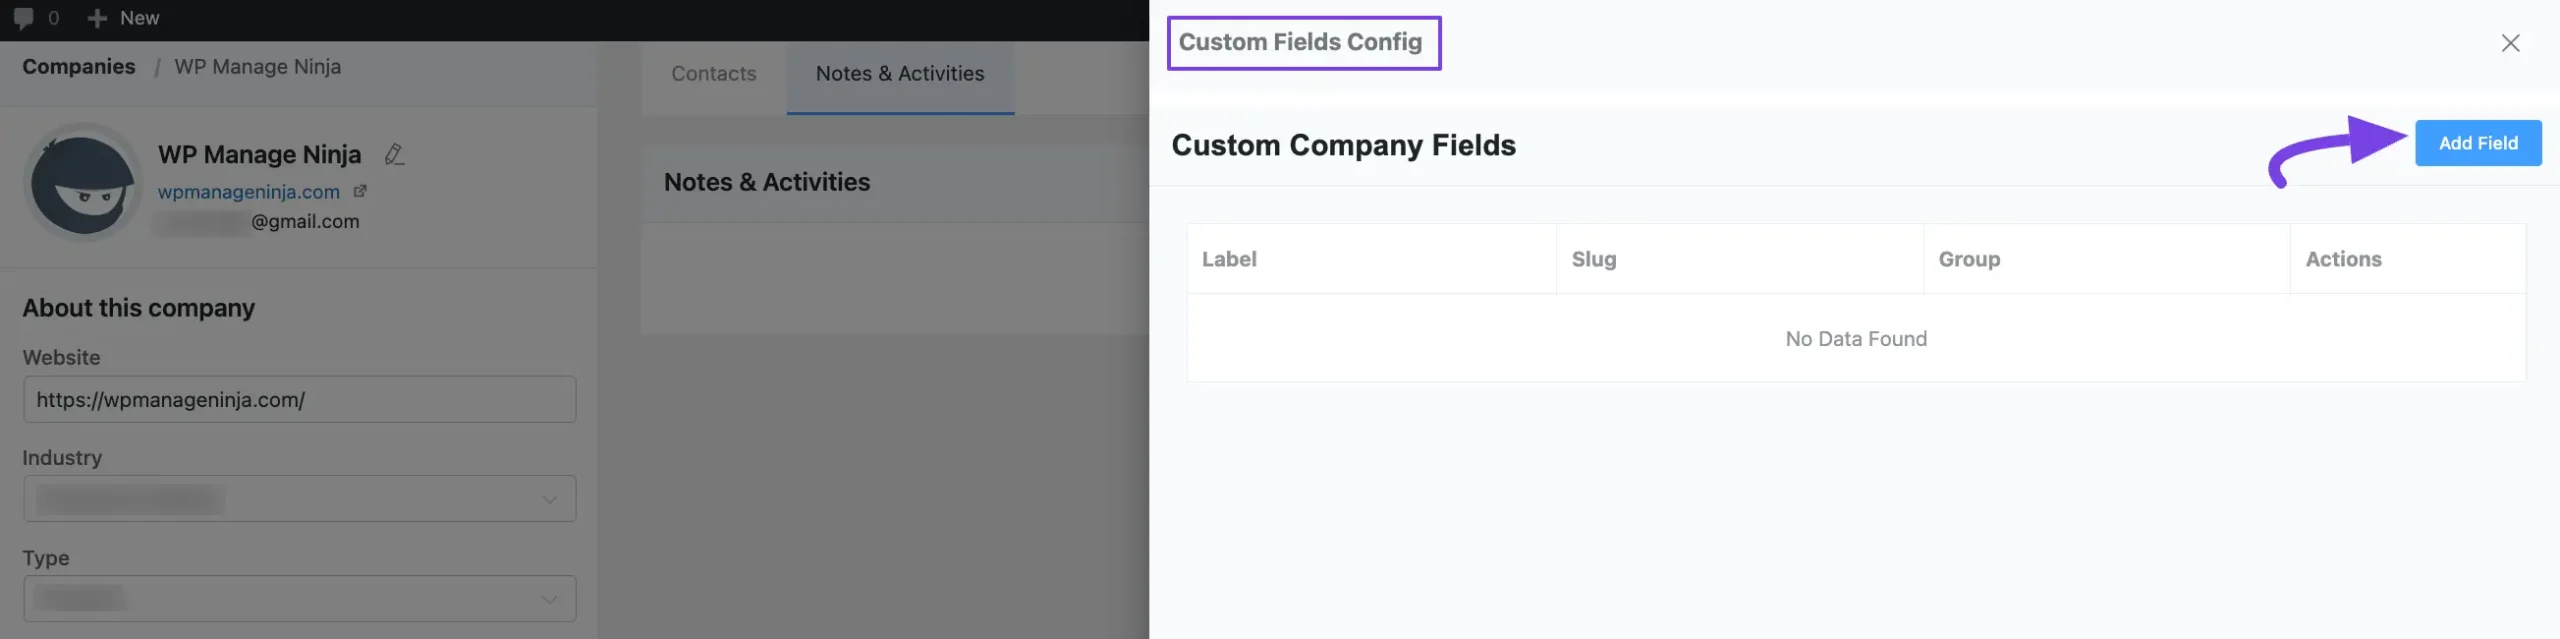
From the left sidebar, click the Custom Fields button, and a pop-up page will appear on the right-hand side.
Now, click the Add Field button to add the new field for your company.
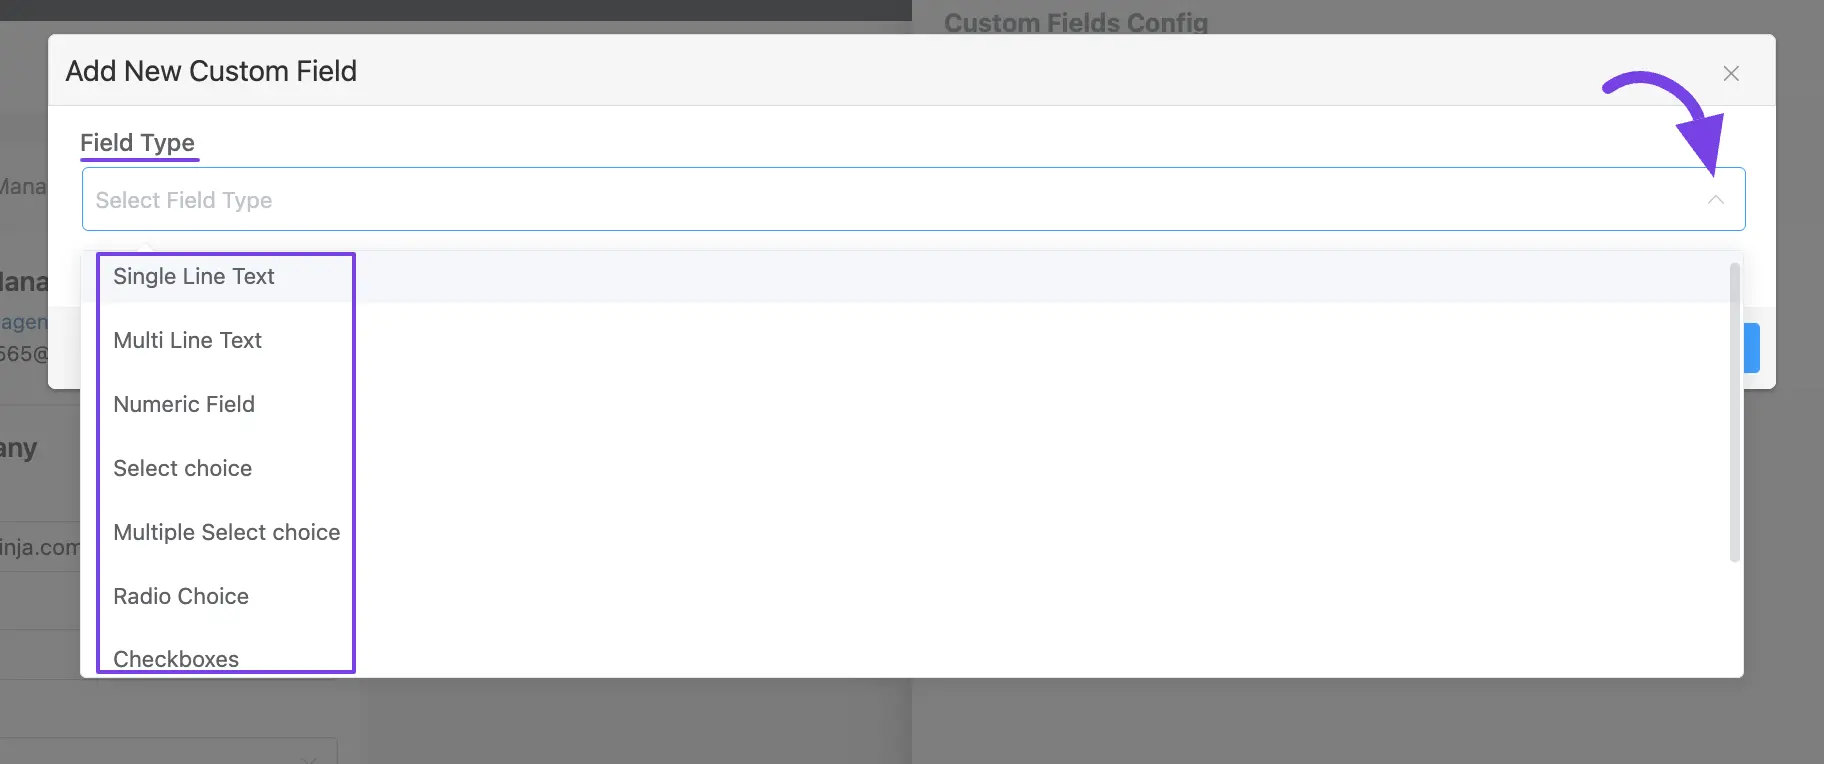
Then, choose the Field Type from the dropdown menu that suits your needs and click the Add button and a popup page will appear.
You will get the following Field Types from the Dropdown List to add the desired Information:
- Single Line Text: Used for adding one-liner entries.
- Multi-Line Text: Used for adding descriptive information.
- Numeric Fields: Used for adding numerical inputs.
- Select Choice: Used for selecting one input as a choice from multiple values.
- Multiple Select Choice: Used for selecting multiple inputs as choices.
- Radio Choice: Used for adding radio button choices.
- Checkboxes: Used for adding multiple/single tick inputs.
- Date: Used for adding date information from the calendar.
- Date and Time: Used for adding the exact time with the date information.
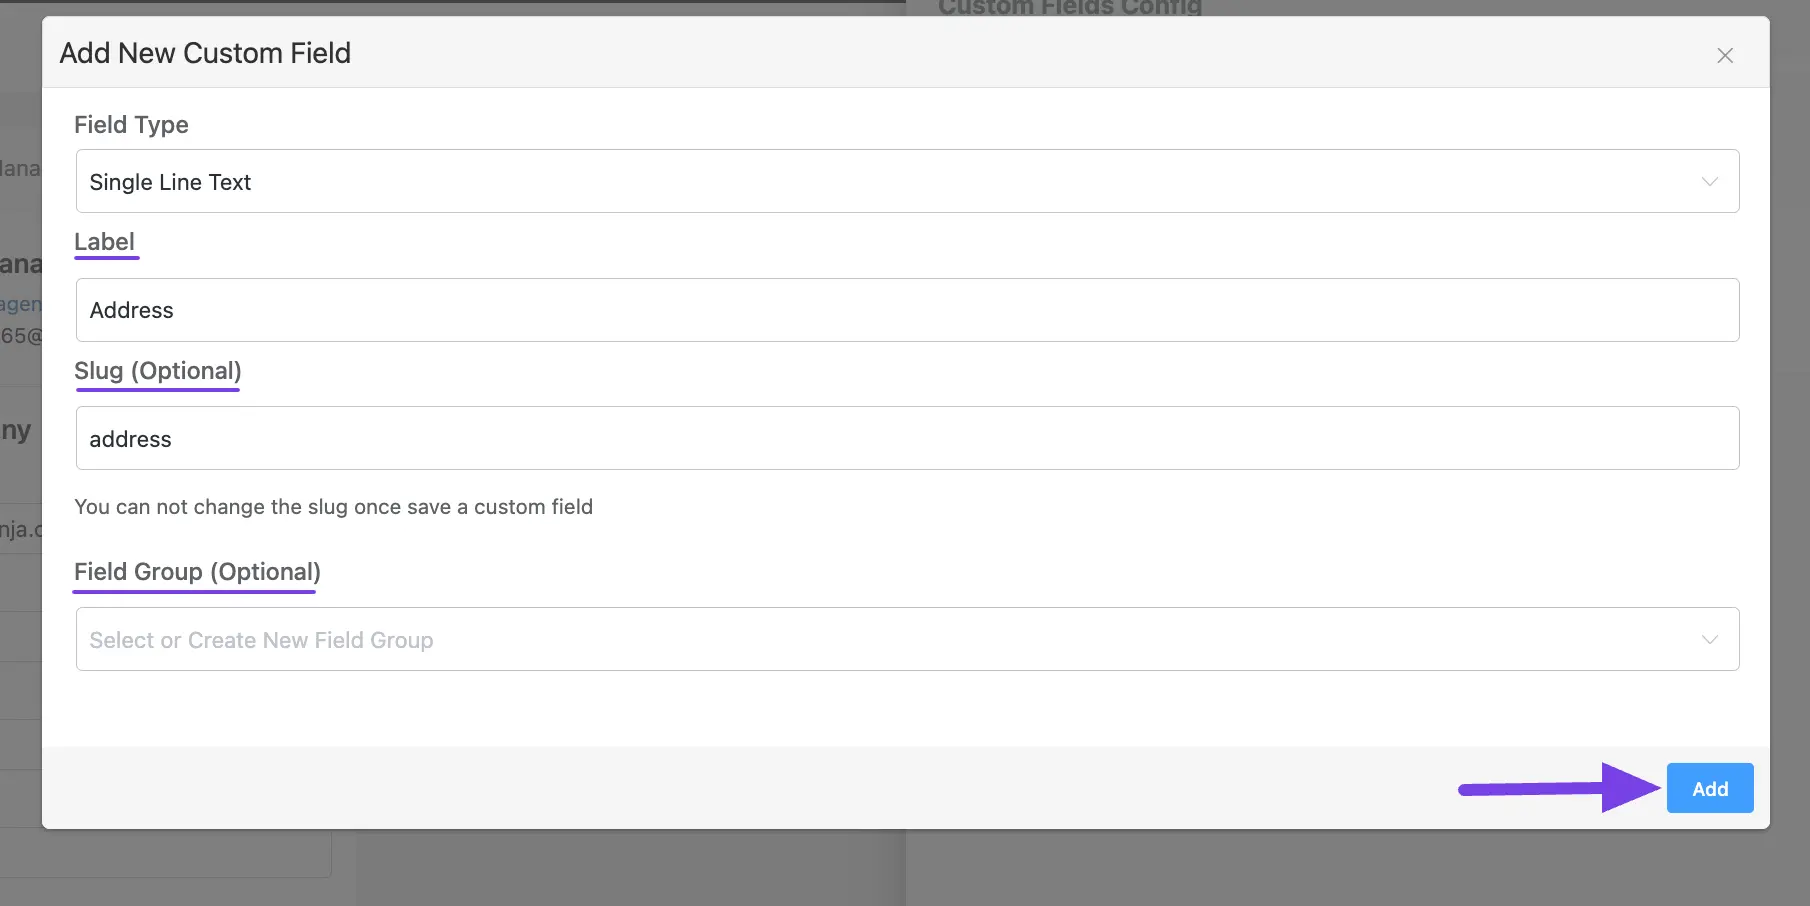
After selecting the Field Type, configure all the additional information according to your necessity.
For example, here, I am choosing the Single Line Text field type for adding the custom field. You can choose anyone according to your needs.
You will get the following additional fields for almost each field type –
- Labels: Used to name the field for general users in the mainflow interface.
- Slug (Optional): Slugs can be used to call up custom fields in code.
- Field Group (optional): This option is for adding sub-fields under a main field. For example, under the Address field, you can add sub-fields like City, Postcode, and Country.
Once you are done, click the Add button and your custom field will be added.
You can add as many custom fields as you want according to your needs by following the same process.
If you have any further questions, concerns, or suggestions, please do not hesitate to contact our support team. Thank you.


