Mainflow allows you to create Labels to organize and filter your email campaigns. This article will guide you through creating and managing the Labels for Email Campaigns.
Creating Labels #
To learn how to create the Labels in mainflow, follow the steps with the screenshots below –
First, go to the Campaigns section from mainflow‘s left sidebar or select All Campaigns under the Emails section from the mainflow Navbar.
Then, click the Three-dot-icon in the top right corner, and press the Manage Labels button.

Click the Create New Label button to create new labels.
Here, you can also find all your existing labels. You can edit any labels by clicking the Pencil Icon or delete by clicking the Trash Icon at any time if needed.
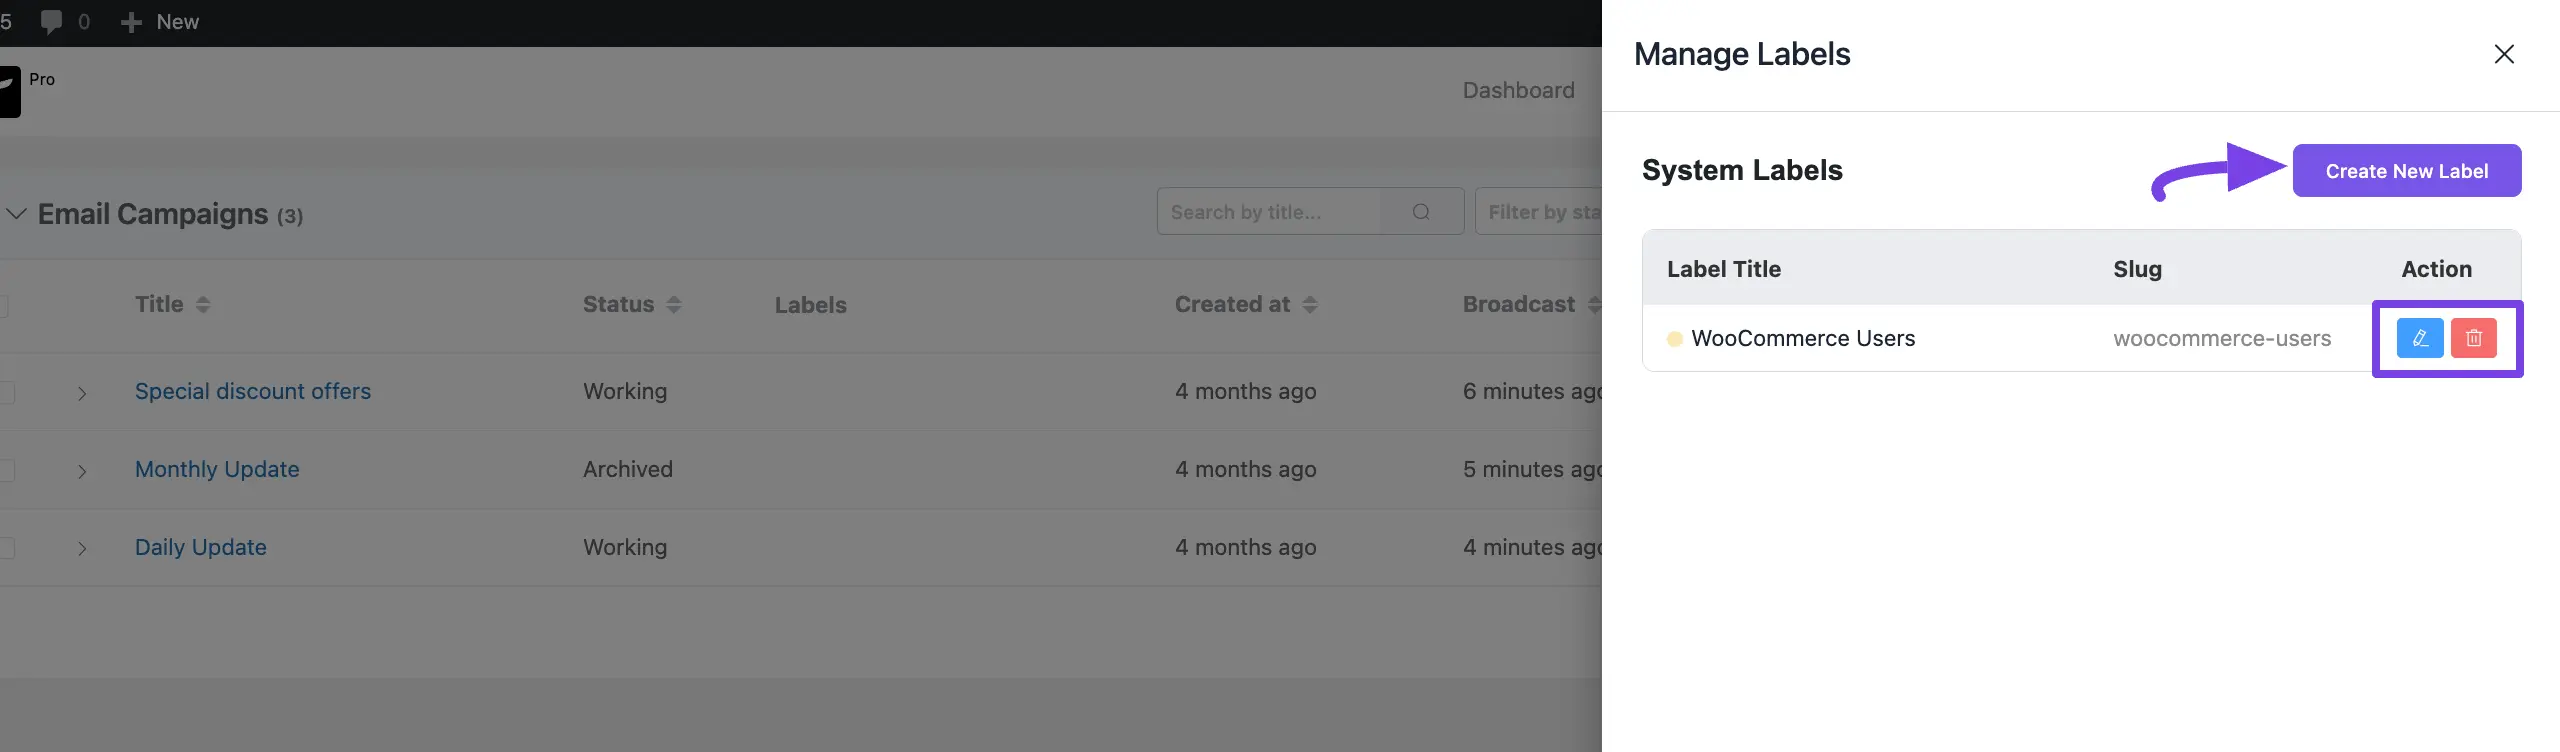
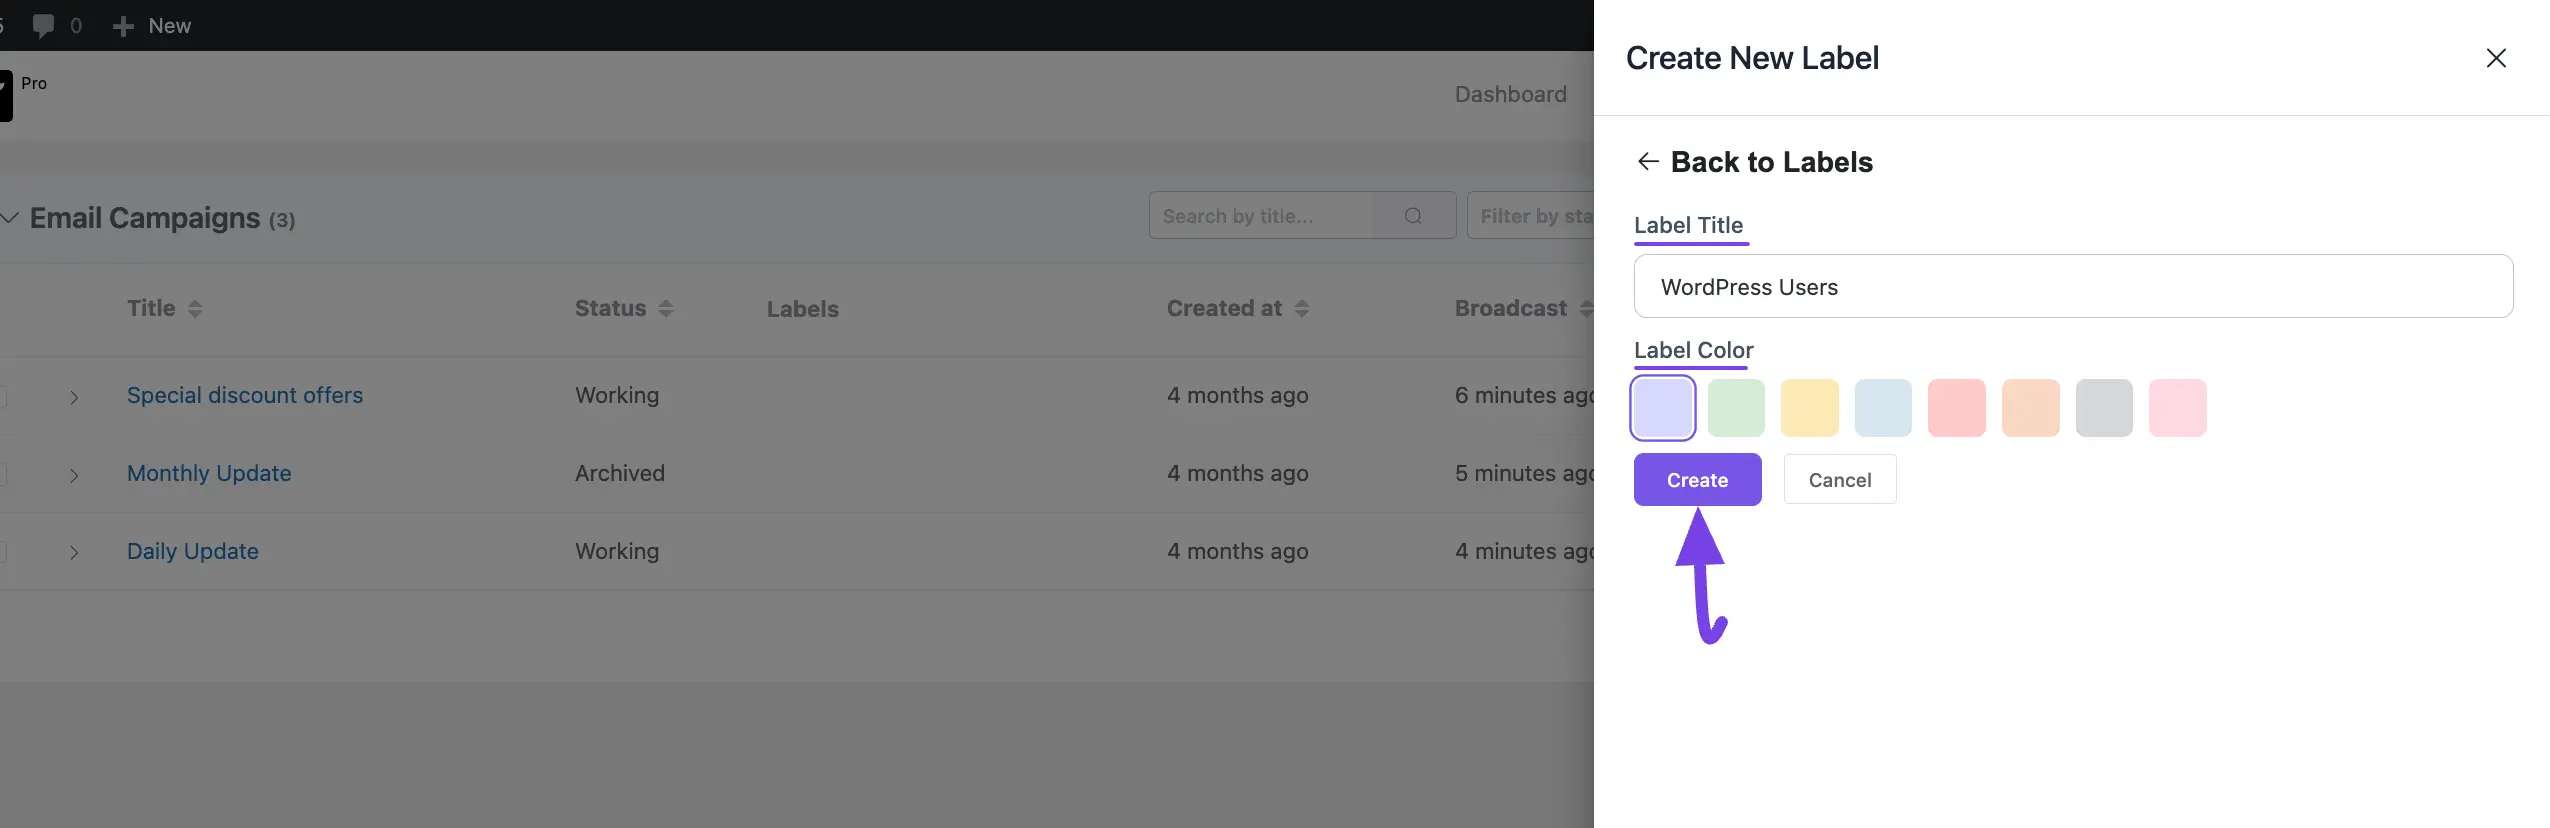
Now, provide a Name, select any desired Color, and click the Create button.
And, your Label will be created to help you categorize your Email Campaigns!
Applying Labels #
Return to the All Campaigns section from the mainflow Navbar and select the Campaign/s where you want to apply the Labels.
You can select the campaigns individually by clicking their Checkboxes, or select all at once using the Checkbox at the top left beside the Title column.
Once you select the desired Campaign/s, you will get the Select Action box in the top left corner.
Now, click the Dropdown Arrow and select the Apply Labels action.
Then, choose the desired Labels (single or multiple according to your needs) from the Select Labels box by clicking the Dropdown Arrow.
Finally, click the Apply Label button and the labels will be applied.

Here, you can see the selected labels have appeared with their chosen Email Campaigns under the Labels column.

Filtering Email Campaigns by Labels #
You can also filter the list of Email Campaigns by the applied labels.
To do this, click the Arrow Icon of the Filter by Labels box and choose the desired label from the dropdown list.


For example, here I chose the WordPress Users label from the list and all the Email Campaigns with WordPress Users labels have appeared.

Deleting Labels #
If you want to delete any existing label/s, click the Cross Icon next to the Label Name, and press the Yes button.
This way you can remove the labels from the desired campaigns.

If you have any further questions, concerns, or suggestions, please do not hesitate to contact our support team. Thank you.


