Mainflow allows you to add Links to any specific Space. This article covers the detailed process of adding the Links for Spaces.
Add Link in a Space #
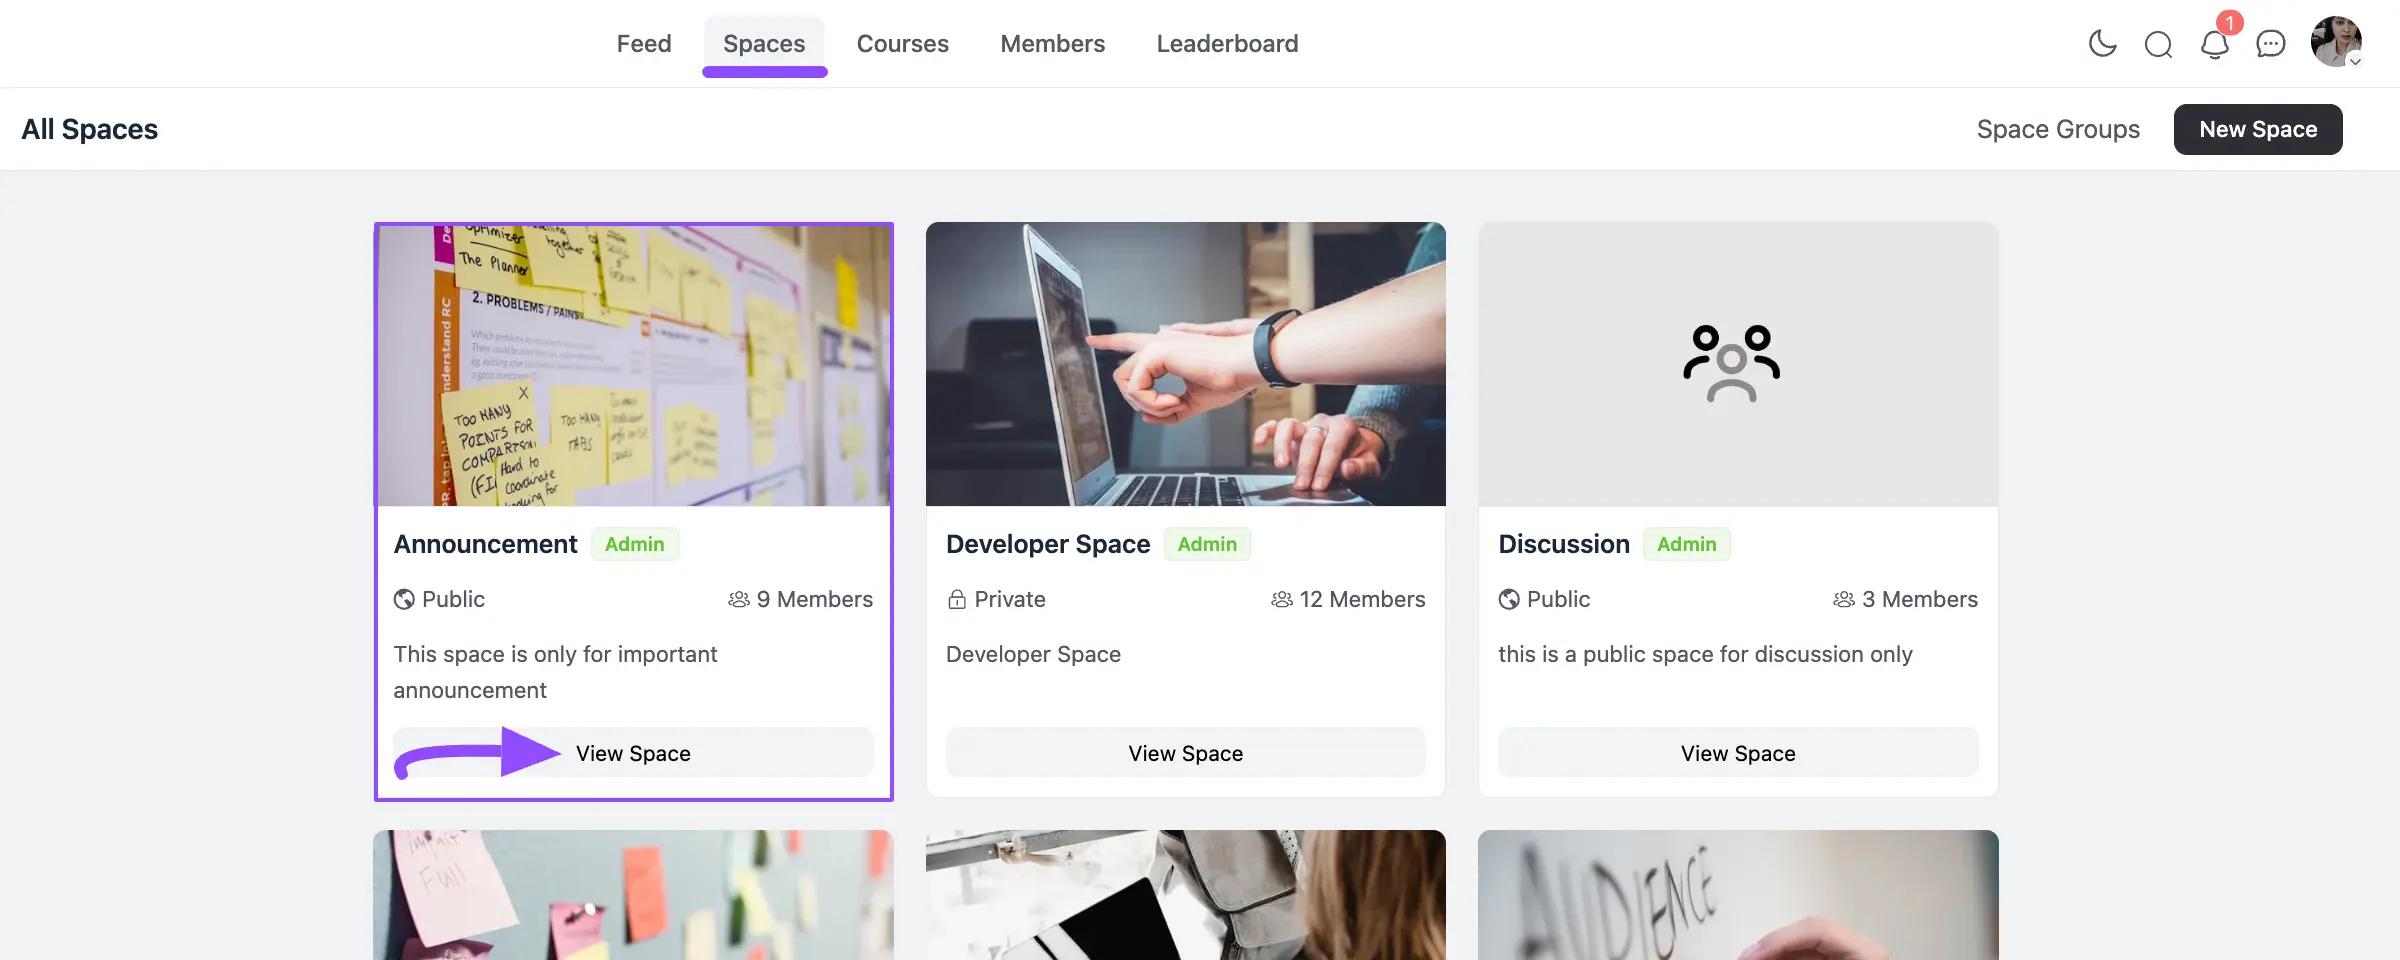
First, go to the Spaces section from the mainflow navbar and open a Desired Space by clicking the View Space button where you want to set the Link.
Go to the Space Settings option by clicking the three-dot button in the top right corner.

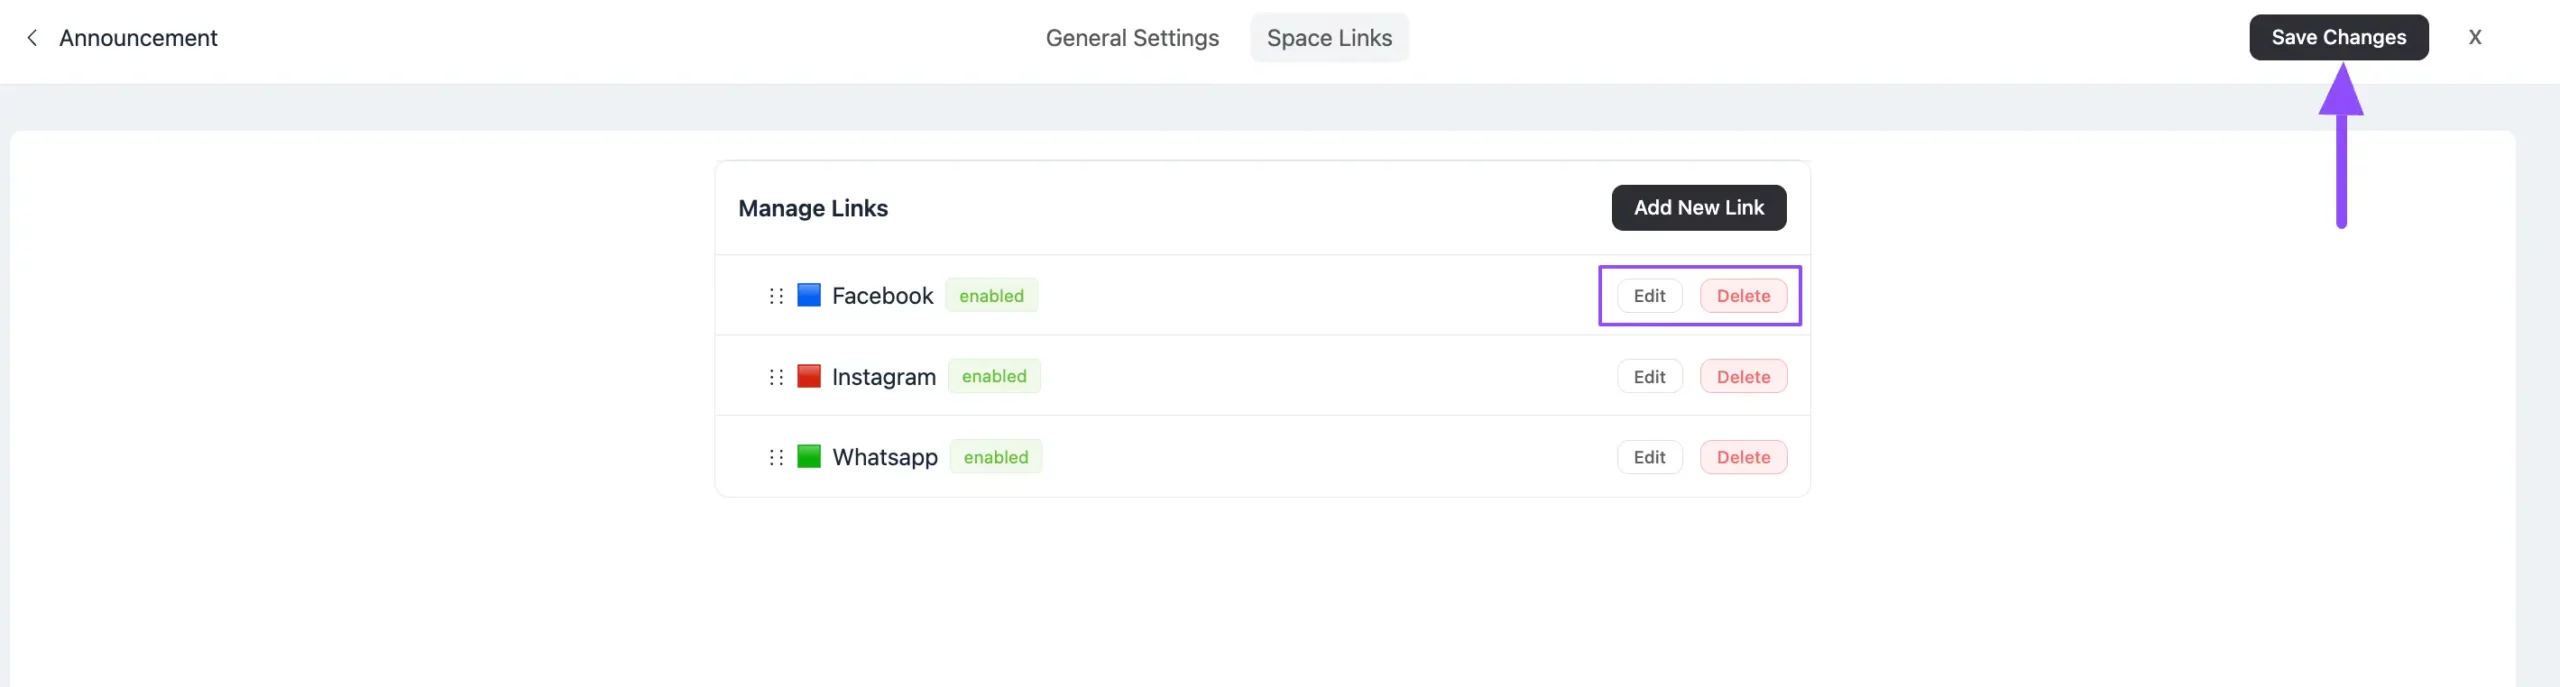
Now, go to the Space Links tab and click the Add New Link button.

Then, a popup will appear where you should give the necessary information to add a new Link.
Once you are done, click the Save button to save all the changes.

A brief explanation of the options mentioned above is given below –
- Name of the Link: Here, type the name you want to set for your link.
Also, you can add an Icon beside the Link Name. To do this click the Empty Box beside the Name of the Link field and a popup will appear.
Here, you can set Emoji, Shape, Custom SVG, or Custom Image as the Icon.
- URL: Here, provide the URL of the Link where you want to redirect users after clicking the link.
- Enable this Link: By default, this option is checked (i.e., the link is enabled). If you want to disable the link and keep it as a draft, Uncheck the Box.
- Open this link in a new tab: This one is also checked by default. If you don’t want to open the link in a new tab, Uncheck the Box.
Once you added the Links, click the Save Changes button and the links will be added to your desired Space.
Also, you can Edit/Delete any Link at anytime by clicking the Edit/Delete button.
Here, you can see all the Links are added in the Top Navbar under the chosen Space.

If you have any further questions, concerns, or suggestions, please do not hesitate to contact our support team.


