Mainflow provides an excellent contact dashboard that represents all the necessary summaries of the activities. This article will guide you through the process of Adding a new contact manually and Managing contacts in bulk in detail.
Adding New Contacts #
To learn how to add a new contact manually, follow the steps with the screenshots below –
First, go to All Contacts from the Contacts section of mainflow Navbar.

Now, click on the + Add Contact button on the top right corner of the dashboard to add a new contact manually.
Here you can see the full All Contacts Dashboard. To learn more detail use about it, read this documentation.

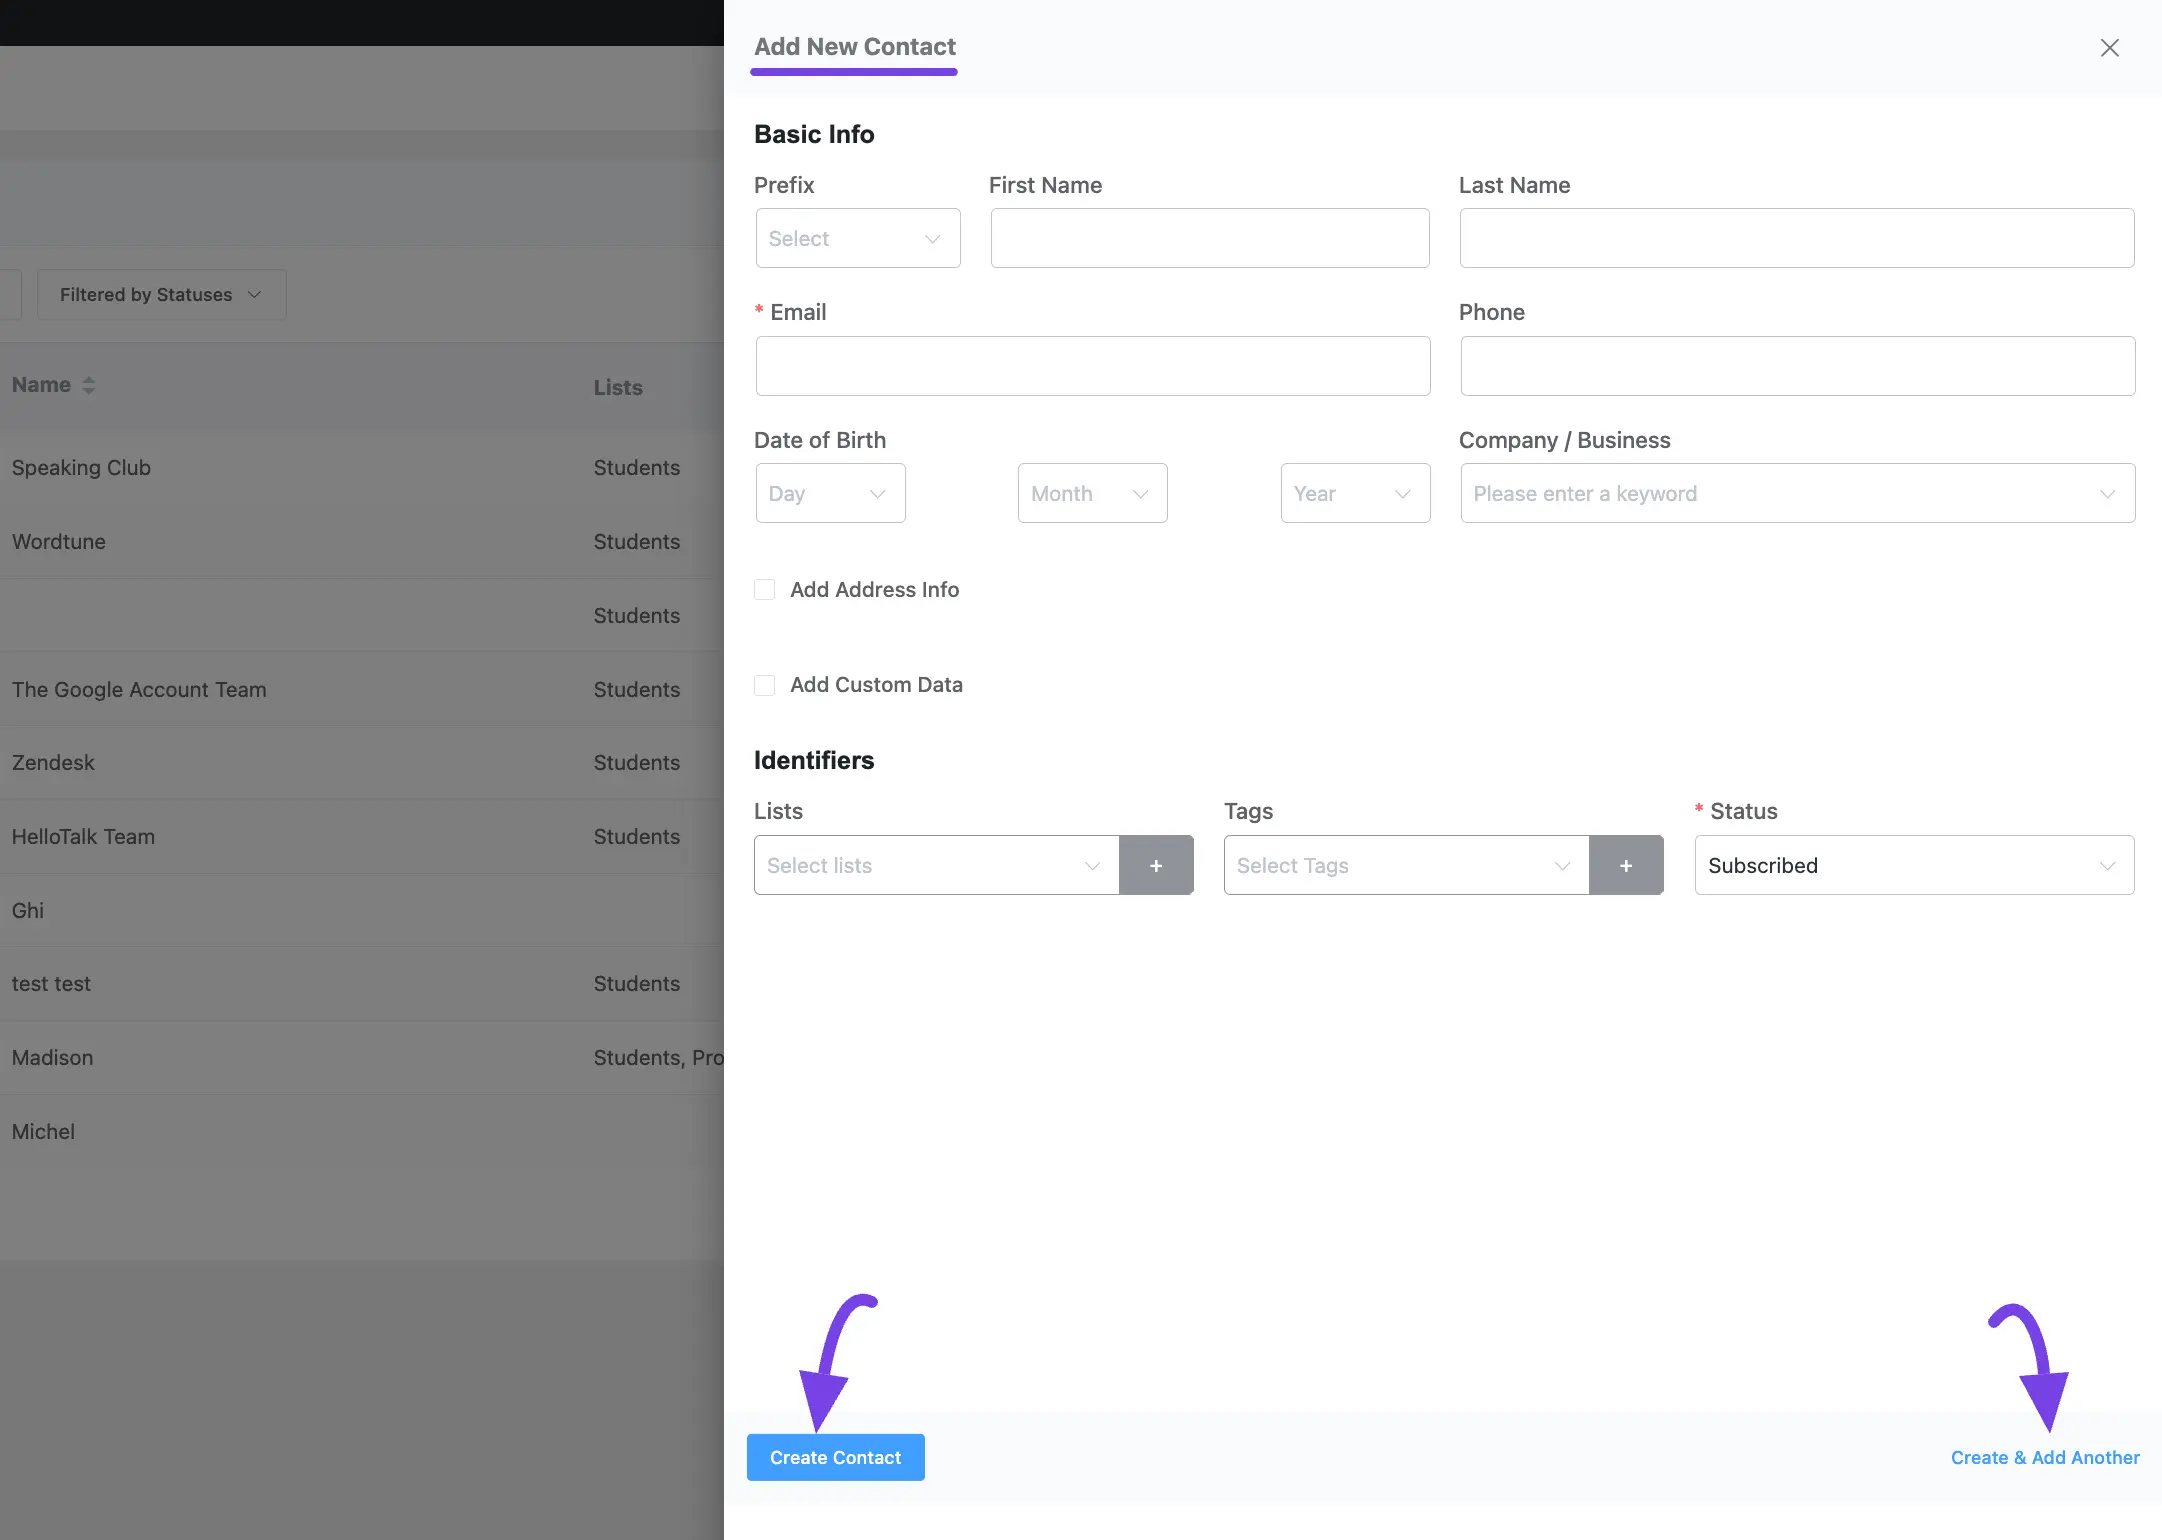
Then, a modal will appear on the right-hand side with a few contact fields for storing information about the contact. These are:
- Basic Info: Here, you will get all these fields (Prefix, First Name, Last Name, Email, Phone, Date of Birth, and Company/business) to input the basic information about your contacts.
- Address Info: Here, you will get all these fields (Address Line 1, Address Line 2, City, State, Postal Code, Country) to input the address info about your contacts.
- Add Custom Data: Here you will get all the custom contact fields you have in your mainflow plugin to add a few extra customized information about your contacts if needed. To learn how to add custom contact fields in mainflow, read this documentation.
- Identifiers: Here you will get all these fields (Lists, Tags, and Status) to sort your contacts by including them in a single or multiple lists, putting a tag, and selecting their subscription status.
Once you are done providing and selecting all the necessary information, click on the Create Contact or Create & Add Another button and your contact will be added.
Managing Contacts In Single or Bulk #
Mainflow also provides an easy way to apply various actions against single or multiple contacts upon selection. To learn how to manage a single contact or multiple contacts in bulk, follow the steps with the screenshots below –
First, select the desired contact/s you want to manage, a Select Action dropdown field will appear click on it and you will get all the Actions for managing your contact/s.
All the available Actions for Managing your Contact/s mentioned below are briefly explained below:
- Add to Tags: Attach a Tag or multiple Tags to the contact/s.
- Add to Lists: Assign a List or multiple Lists to the contact/s.
- Remove From Tags: Remove the contact/s from a Tag or multiple Tags.
- Remove From Lists: Remove the contact/s from a List or multiple Lists.
- Change Contact Status: Change the contact subscription status for contact/s.
- Change Contact Type: Change the type (e.g., lead, customer, etc.) for the contact/s.
- Add to Email Sequence: Add the contact/s to an Email Sequence.
- Add to Automation Funnel: Add the contact/s to an Automation Funnel.
- Add to Company: Add the contact/s to a selected company.
- Remove from Company: Remove the contact/s from any company.
- Send Double Opt-in Confirmation: Once you select contact/s, can send a Double Opt-in Confirmation Email to the pending status contact/s.
- Delete Contact: You can also delete a single contact or multiple contacts based on your selection.
Additionally, you can also import or export your mainflow contact/s based on your selection.

If you have any further questions, concerns, or suggestions, please do not hesitate to contact our support team. Thank you.


