Mainflow provides triggers for E-commerce Platforms like WooCommerce, SureCart, Easy Digital Downloads, and AffiliateWP, allowing you to start an automation funnel based on user behavior. This article will provide detailed information about all E-commerce Triggers of mainflow Automation.
E-Commerce Triggers #
To learn how you can use all the E-commerce Triggers of your mainflow, follow the steps with screenshots below –
First, go to the Automation section from the mainflow Navbar, and click + New Automation.
To learn the detailed process of creating a new automation funnel, read this documentation.

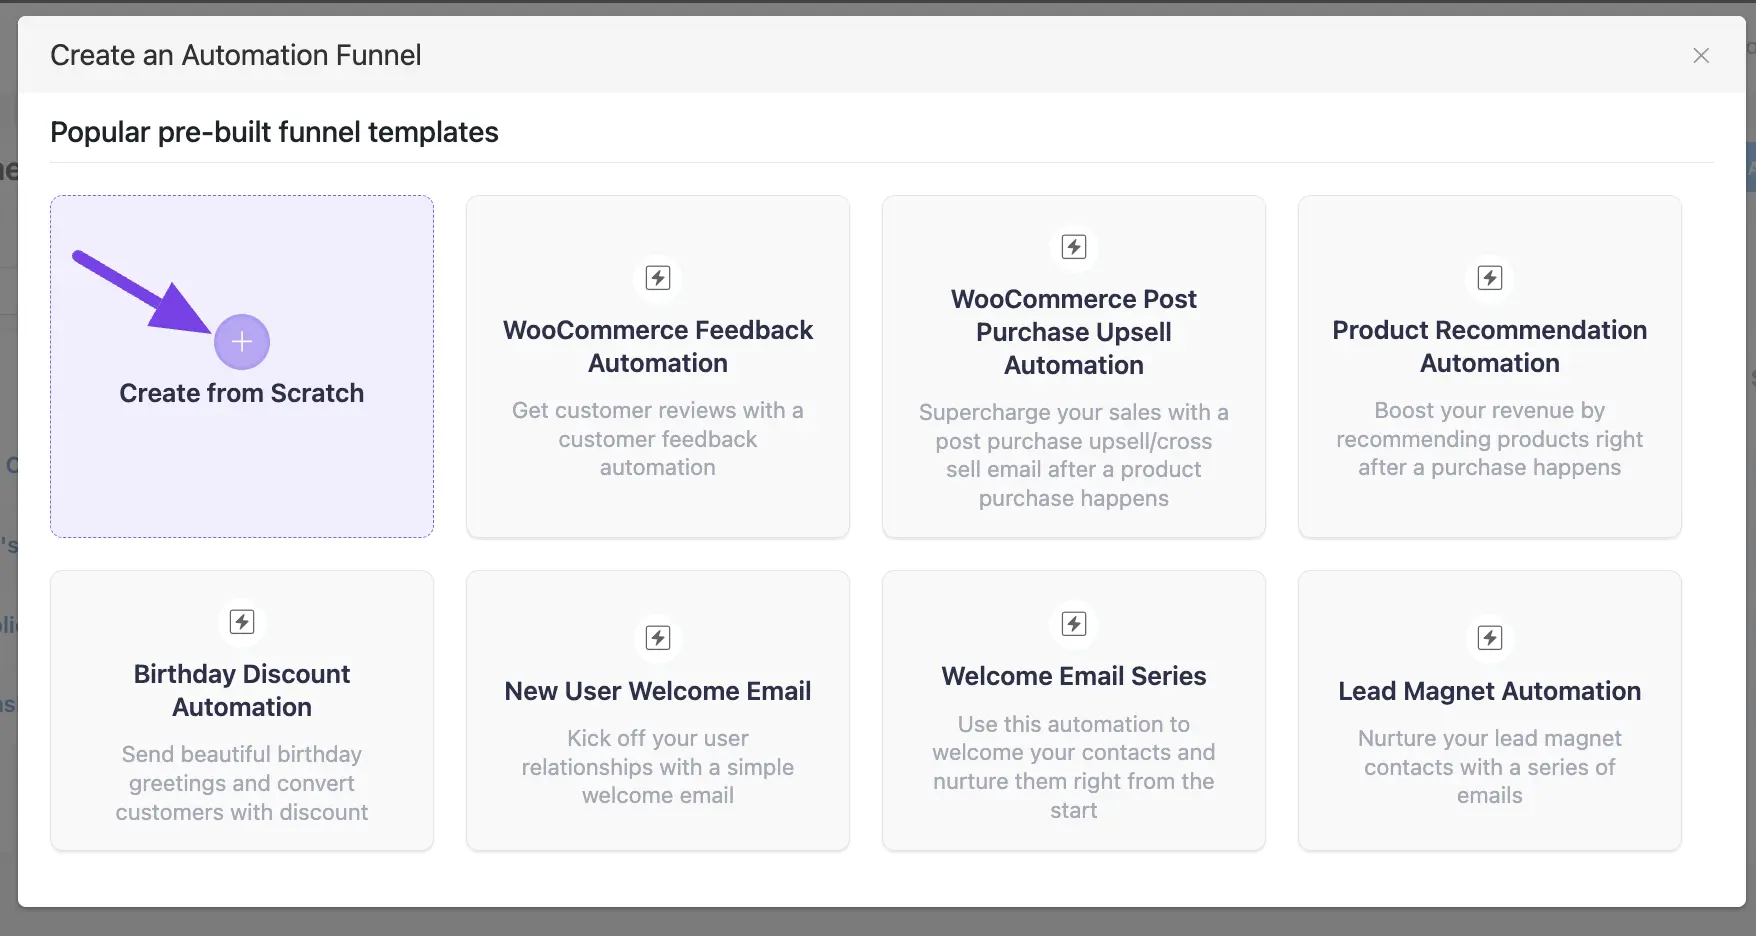
Now, a pop-up page will appear with all the Popular Pre-built Funnel Templates for creating automation.
You just need to click on the desired templates, which will redirect you to the automation editor where the full funnel diagram will automatically be ready.
Alternatively, if you want to create your automation funnel from scratch, simply click on the Create from Scratch tab.
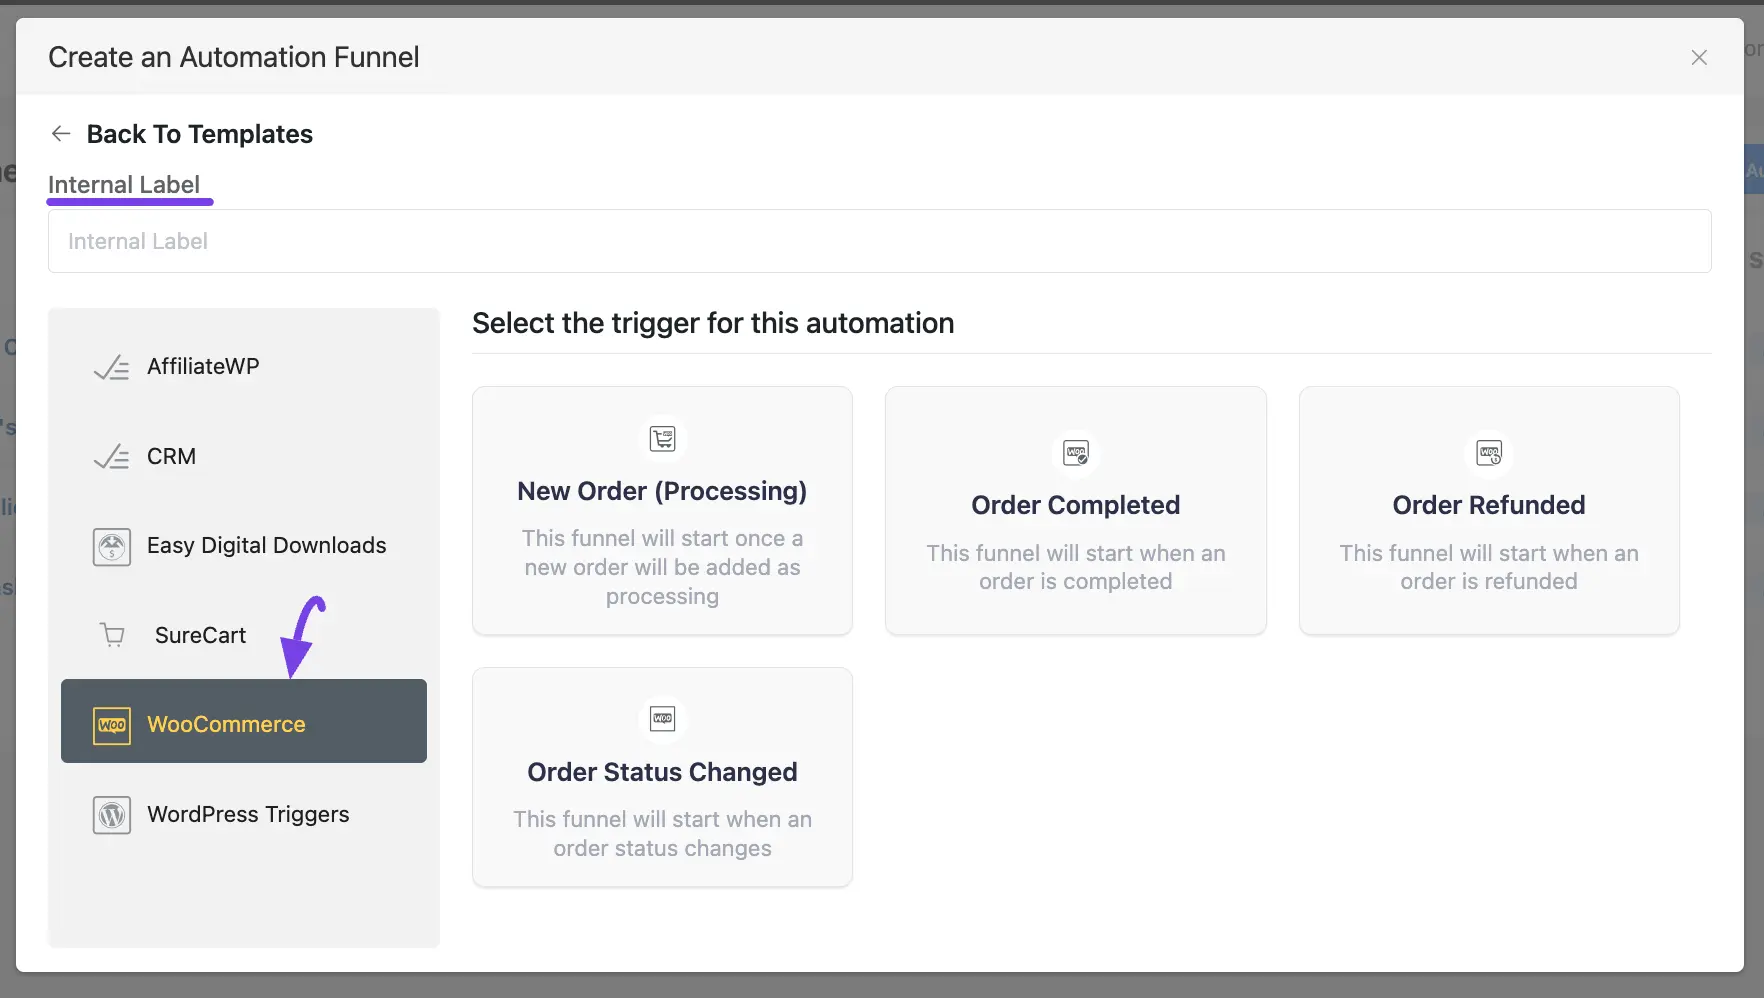
All the E-commerce Triggers for creating an automation funnel are organized under plugin categories in the left sidebar. These are:
- WooCommerce
- SureCart
- Easy Digital Downloads
- AffiliateWP
1. WooCommerce Triggers #
A detailed explanation of the following Triggers is given below –
- New Order (Processing)
- Order Completed
- Order Refunded
- Order Status Changed
Once you select your desired Trigger, click the Continue button, and put a Title under the Internal Label field for this automation funnel so you can easily find it later.
If you leave it blank, it will automatically titled according to its trigger’s name.
New Order (Processing) #
This automation funnel will start once a new order is added as a processing.
Once you select this trigger, a tab will appear on the right-hand side with options to set your trigger.
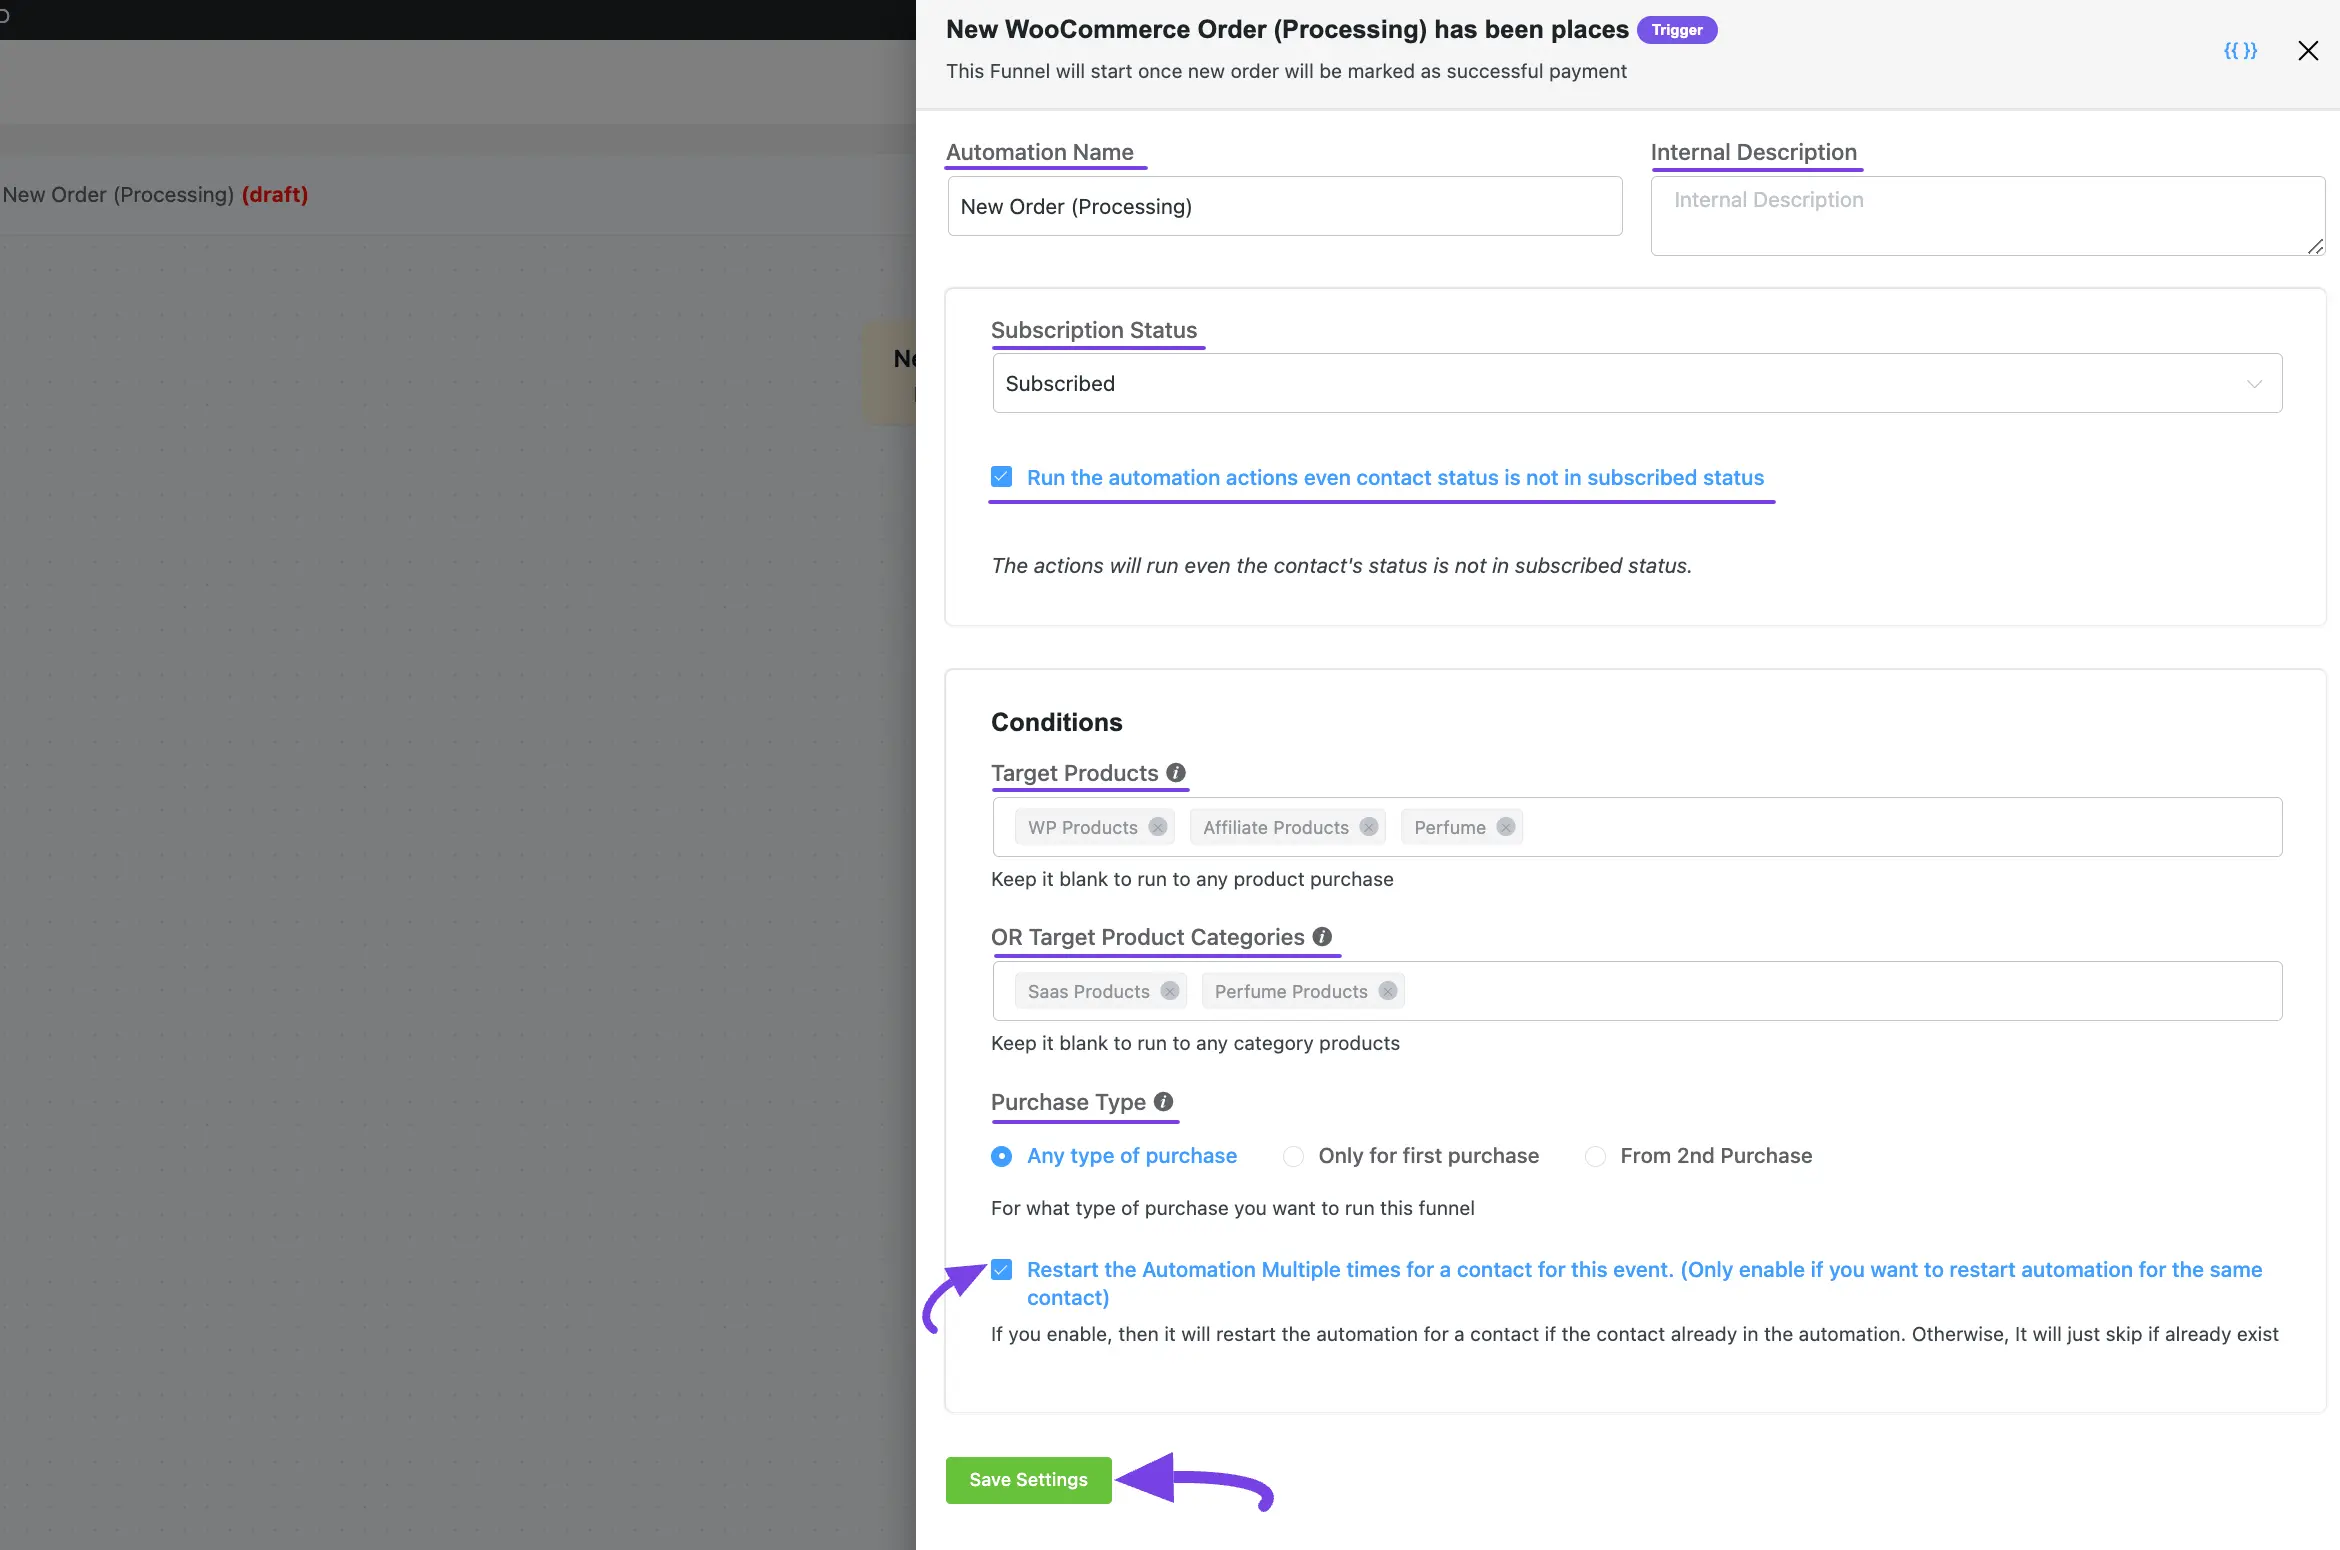
Settings of New Order (Processing) Trigger #
- Automation Name: Provide a Name for the Automation so you can find it later easily.
- Internal Description: Write a description that will be used as a Subtitle in the Block Diagram in the automation editor.
- Subscription Status: Change the subscription status using the dropdown list for the contact that submits the form according to mainflow contact status.
- Run the automation actions even contact status is not in subscribed status: Check this option if you want to run the automation even when the contact’s status is not in subscribed status.
- Target Products: Select which Product (Single or Multiple) will trigger this automation Funnel. Leave blank to run for all product purchases.
- OR Target Product Categories: Or, select which Product Category (Single or Multiple) will trigger this automation Funnel. Leave blank to run for all product categories. Remember, this trigger will run if a contact matches any one condition in either Target Products or Target Product Categories.
- Purchase Type: There are three purchase types available for this action. These are:
- Any type of Purchase: This will include all types of purchases such as first order, second order, or any time the order is placed.
- Only for First Purchase: Select this option to apply the benchmark for a first-time buyer.
- From 2nd Purchase: Choose this option for a returning buyer. This option applies to all purchases except the first one made by the contact for the specified product or product category.
- Restart: Check this option if you Restart the automation multiple times for the same contact that triggers the automation.
Once you are done, click the Save Settings button to save all your changes.
Order Completed #
This automation funnel will start once an order is completed.
Once you select this trigger, a tab will appear on the right-hand side with options to set your trigger.
The settings options of this Order Completed trigger work the same way as the New Order (Processing) trigger. To learn how to use all the settings, read this section. Section.
Order Refunded #
This automation funnel will start once an order is refunded.
Once you select this trigger, a tab will appear on the right-hand side with options to set your trigger.
The settings options of this Order Refunded trigger work the same way as the New Order (Processing) trigger. To learn how to use all the settings, read this section.
Order Status Changed #
This automation funnel will start once an order status changes.
Once you select this trigger, a tab will appear on the right-hand side with options to set your trigger.
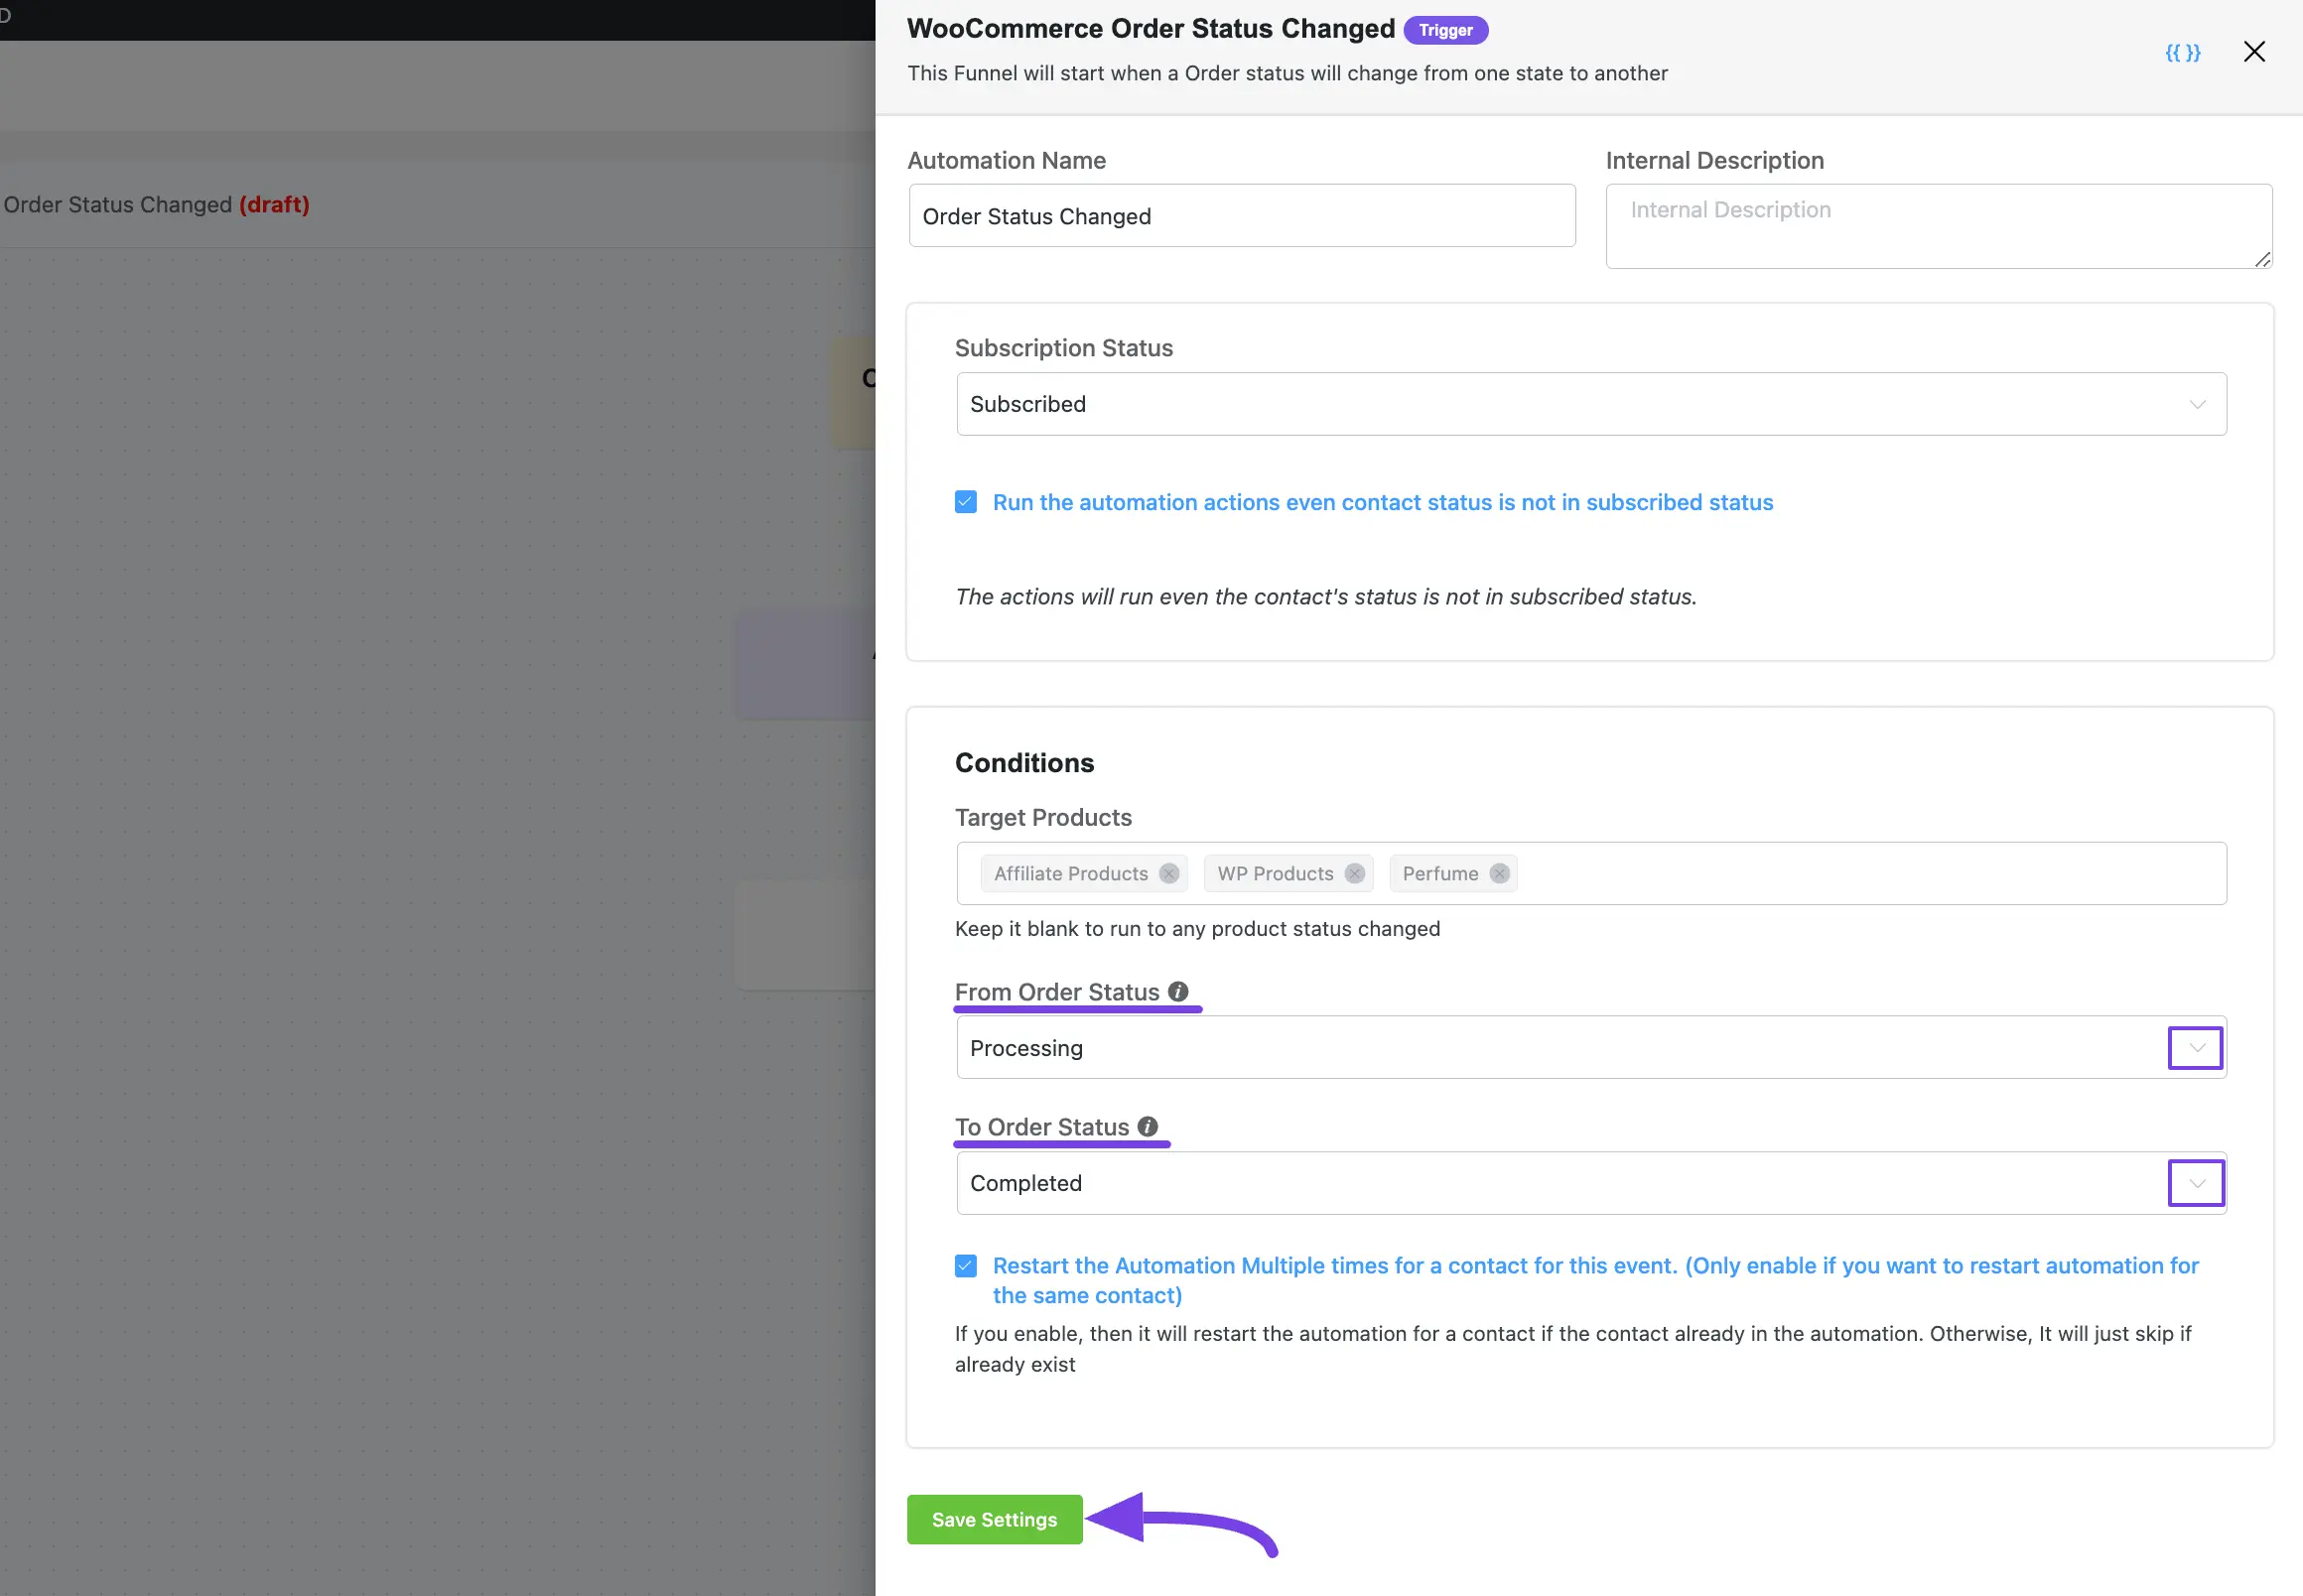
Here, are the Settings of the Order Status Changed Trigger
- From Order Status: Select the Current Order Status using the Dropdown Arrow. And, it will trigger an action when it changes from this status to the “To Order Status”.
- To Order Status: Select the Target Status using the Dropdown Arrow. And, it will trigger an action when the order status changes from the “From Order Status” to this status.
For example, I selected ‘Processing’ as the “From order status” and ‘Completed’ as the “To order status”. This means that once an order’s status changes from Processing to Completed, the trigger will activate.
To learn the use of all the settings mentioned in the screenshot below, read this section.
Once you are done, click the Save Settings button to save all your changes.
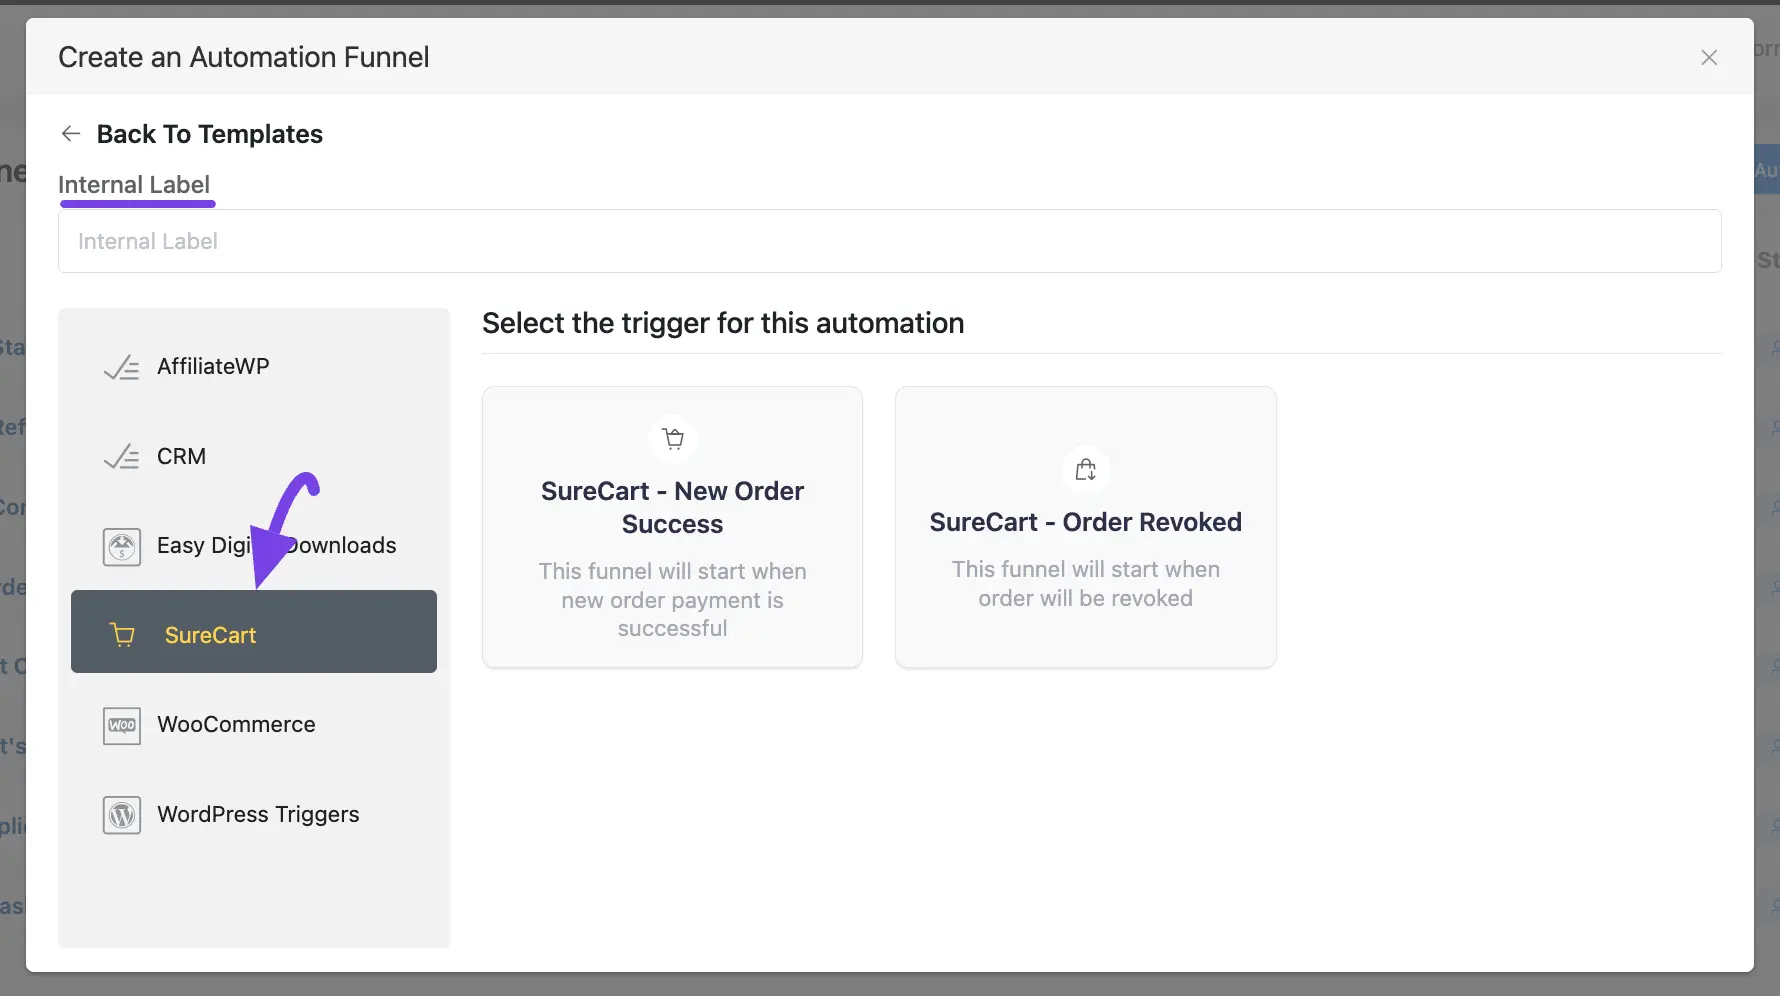
2. SureCart Triggers #
A detailed explanation of the following Triggers is given below –
- New Order Success
- Order Revoked
Once you select your desired Trigger, click the Continue button, and put a Title under the Internal Label field for this automation funnel so you can easily find it later.
If you leave it blank, it will automatically titled according to its trigger’s name.
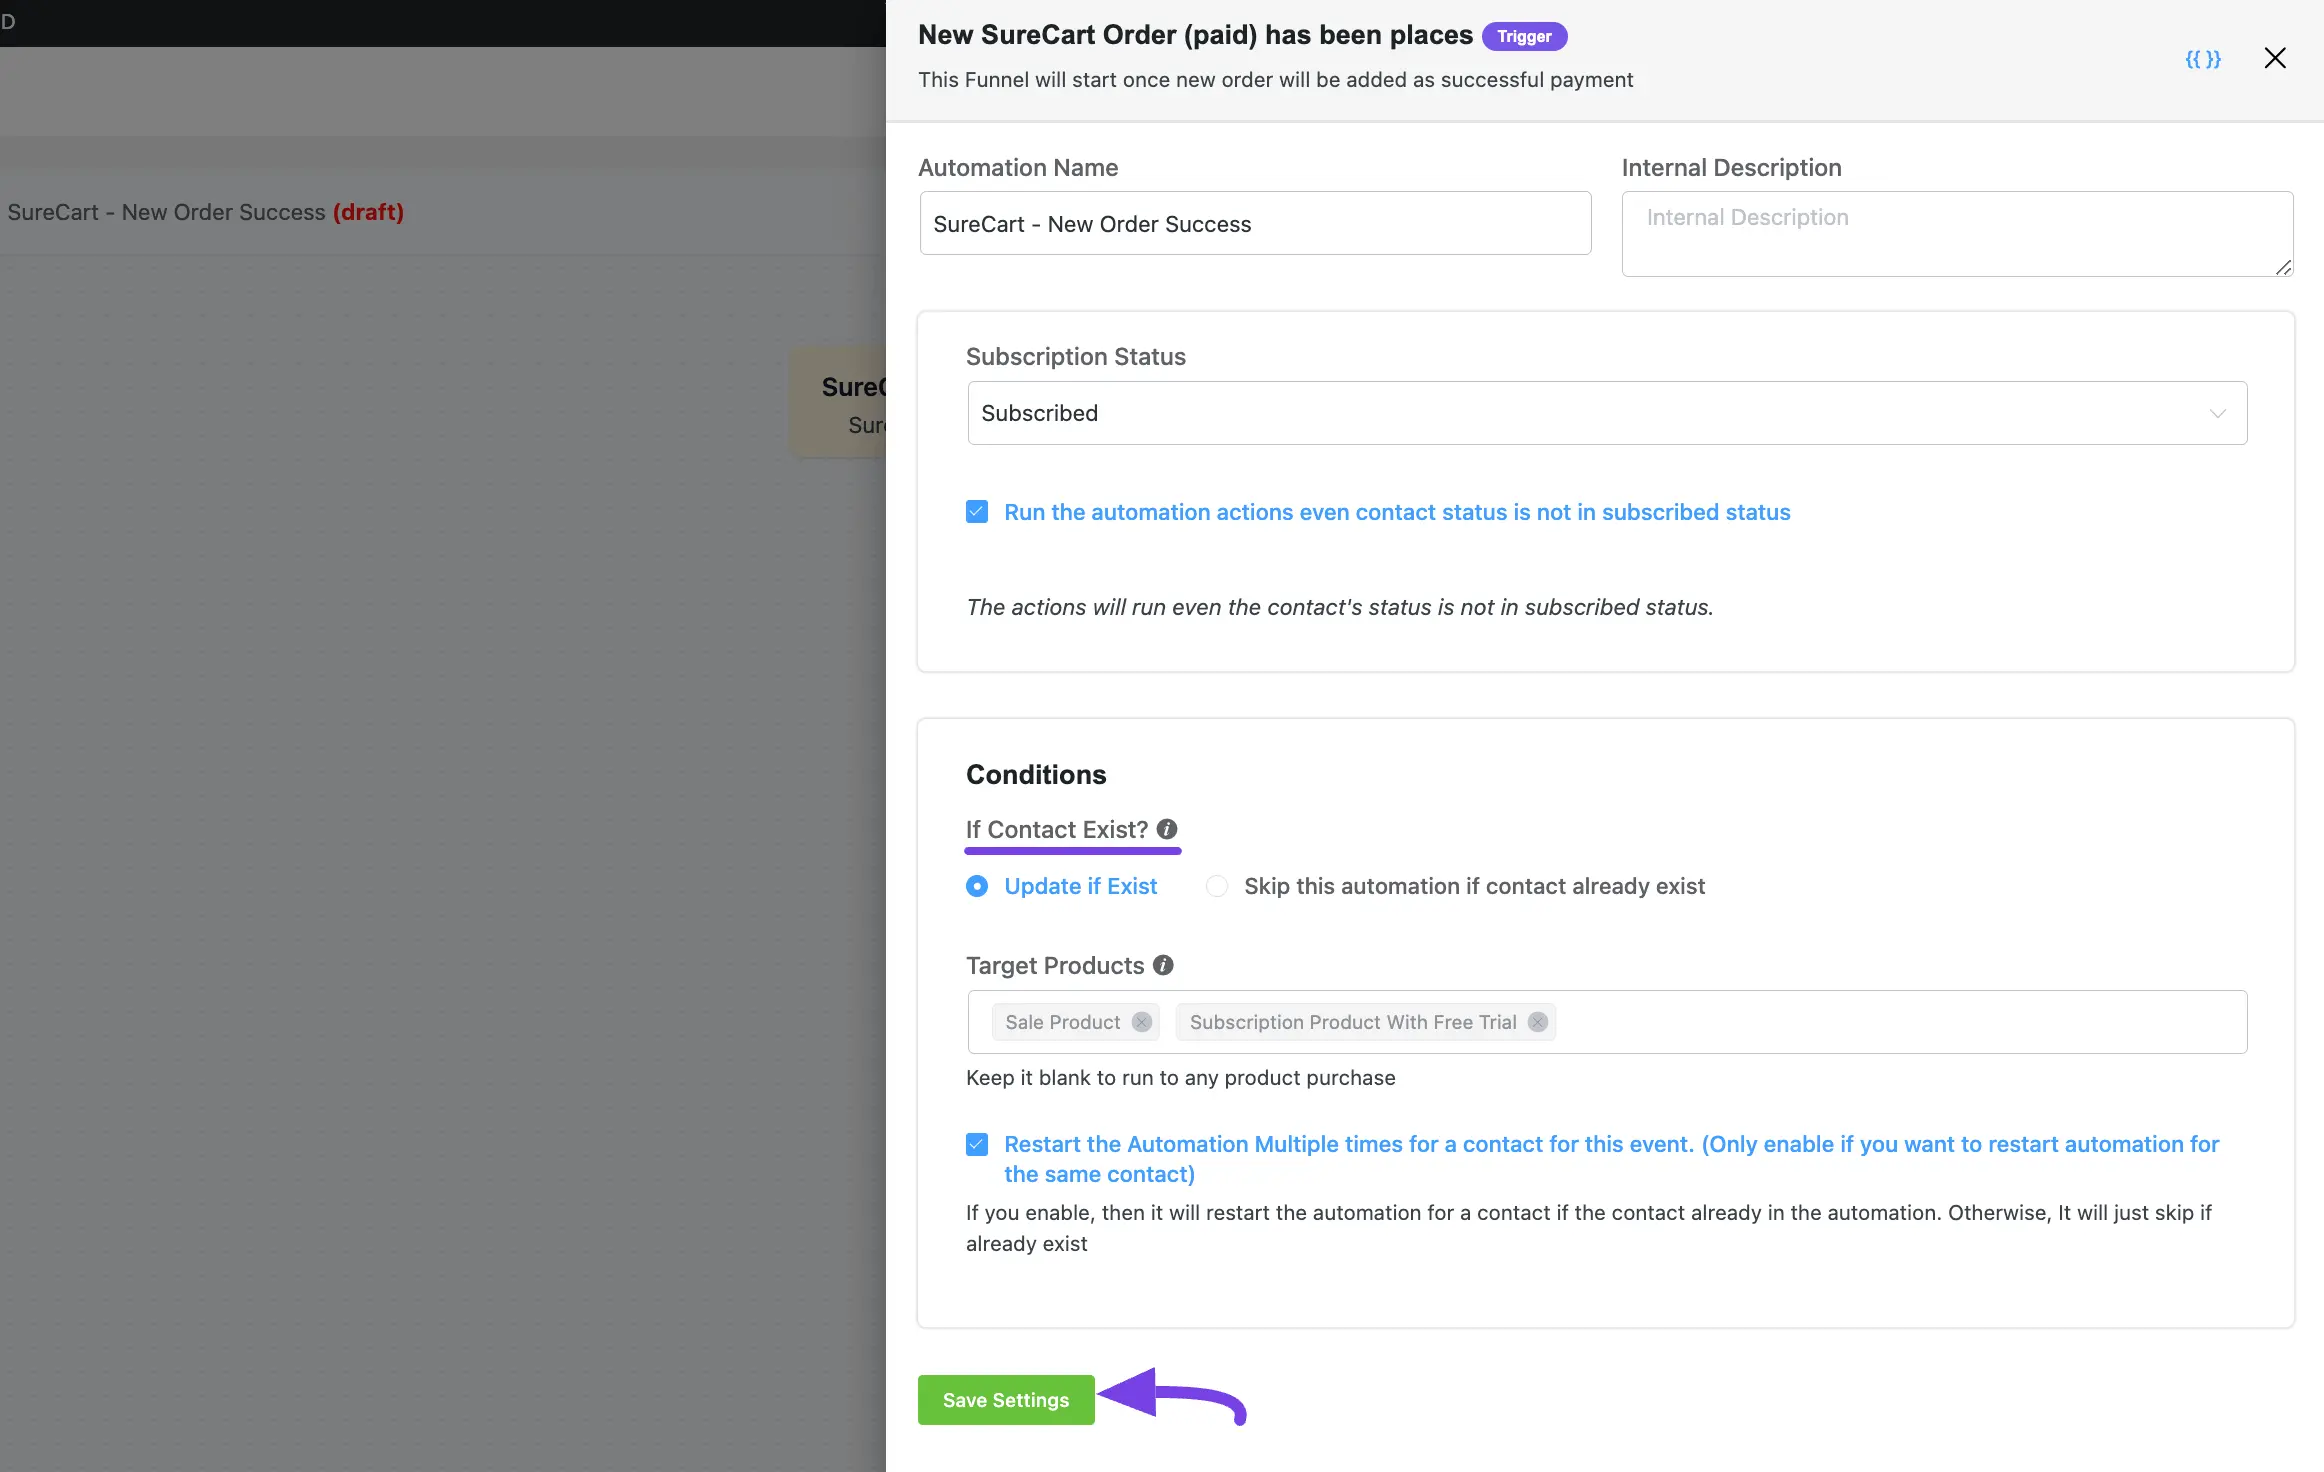
New Order Success #
This automation funnel will start once a new order payment is successful.
Once you select this trigger, a tab will appear on the right-hand side with options to set your trigger.
Here, are the Settings of the New Order Success Trigger
- If Contact Exist?: Specify what will happen if the subscriber already exists in the database. You can either update if the contact is already present in the Mainflow CRM Contacts which means recurring triggering for the automation or Skip the automation for this contact.
To learn the use of all the settings mentioned in the screenshot below, read this section.
Once you are done, click the Save Settings button to save all your changes.
Order Revoked #
This automation funnel will start once an order will be revoked.
Once you select this trigger, a tab will appear on the right-hand side with options to set your trigger.
The settings options of this SureCart – Order Revoked trigger work the same way as the WooCoomerce New Order (Processing) trigger. To learn how to use all the settings, read this section.
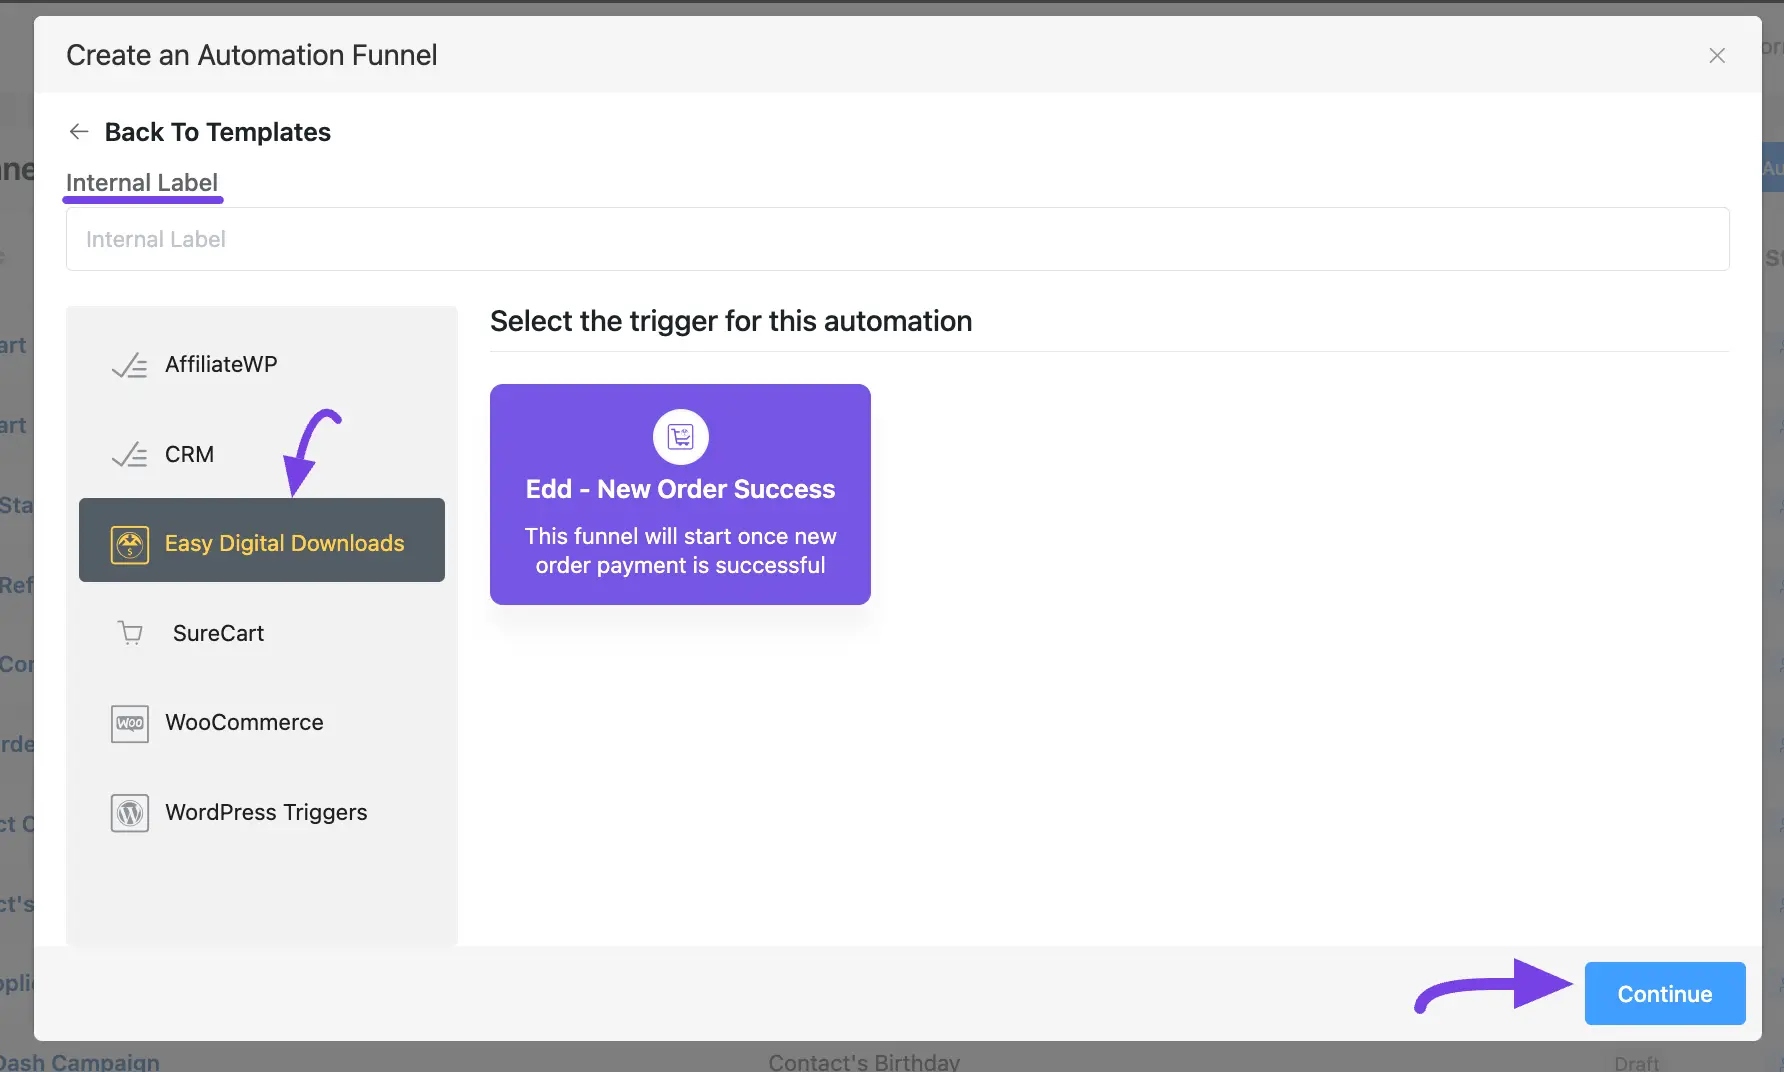
3. Easy Digital Downloads Trigger #
A detailed explanation of the following Trigger is given below –
- Edd – New Order Success
Once you select your desired Trigger, click the Continue button, and put a Title under the Internal Label field for this automation funnel to easily find it later.
If you leave it blank, it will automatically titled according to its trigger’s name.
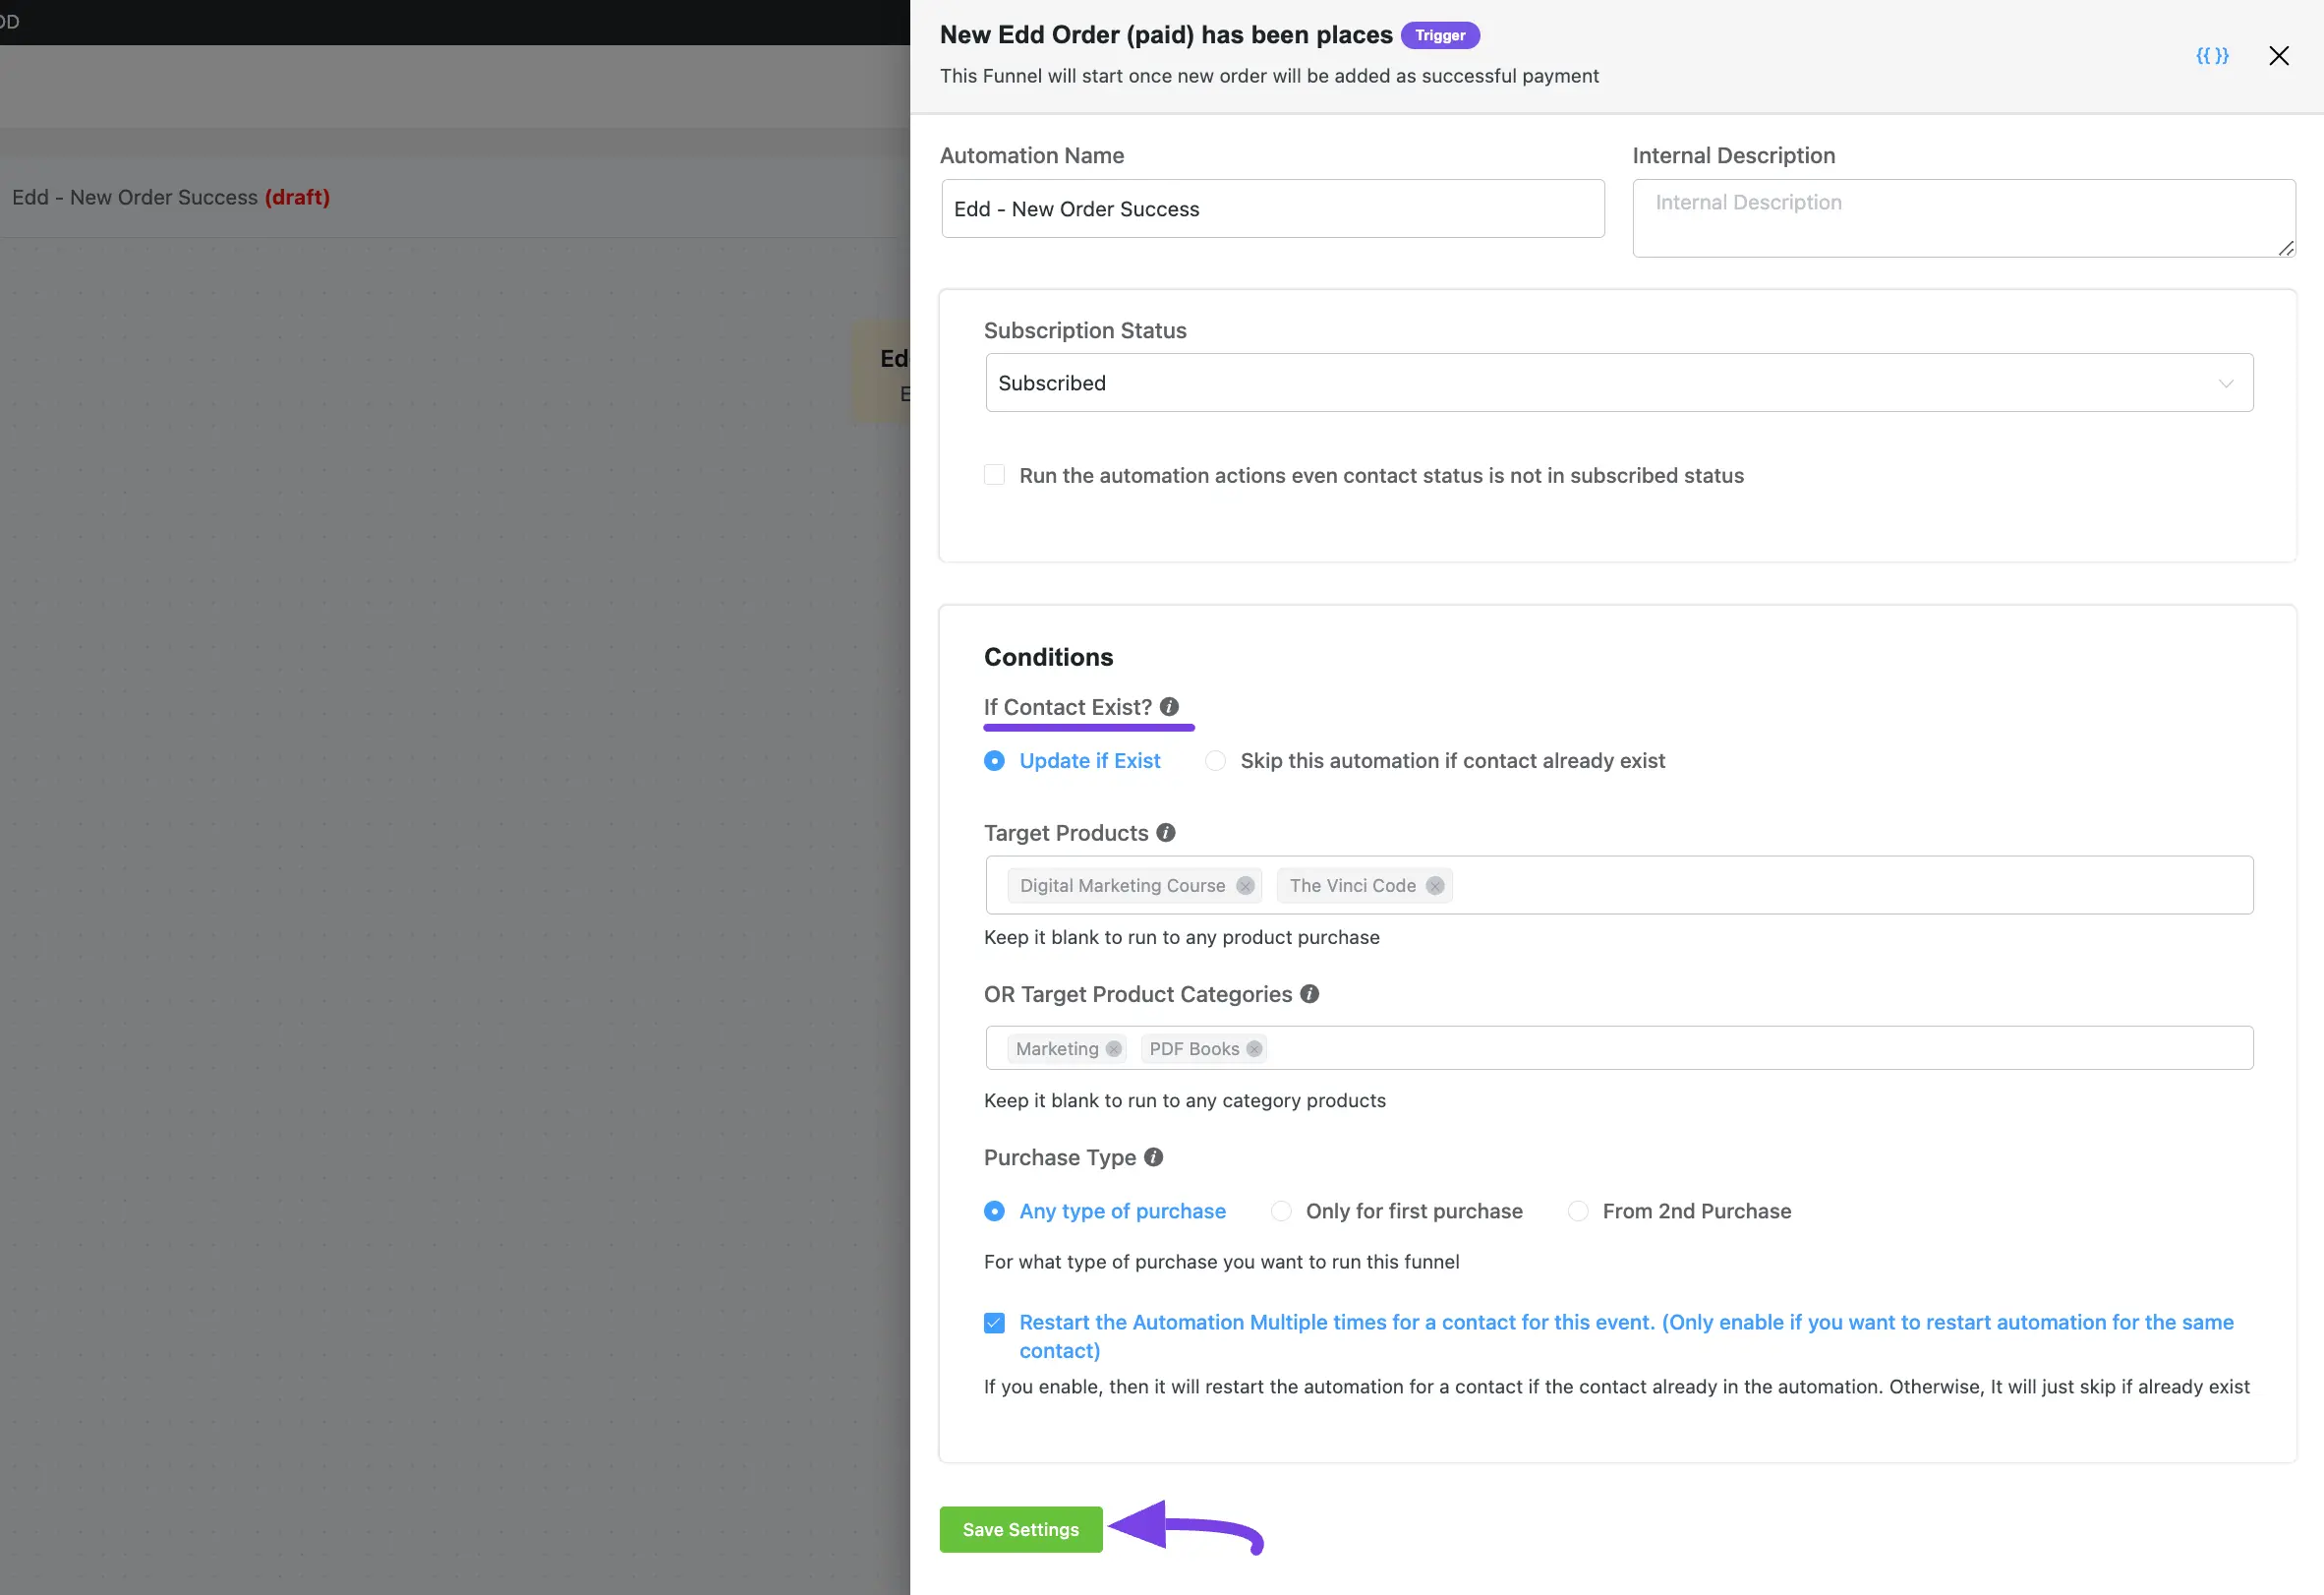
Edd – New Order Success #
This automation funnel will start once a new order payment is successful
Once you select this trigger, a tab will appear on the right-hand side with options to set your trigger.
Here, are the Settings of the Edd – New Order Success Trigger
- If Contact Exist?: Specify what will happen if the subscriber already exists in the database. You can either update if the contact is already present in the mainflow Contacts which means recurring triggering for the automation or Skip the automation for this contact.
To learn the use of all the settings mentioned in the screenshot below, read this section.
Once you are done, click the Save Settings button to save all your changes.
4. AffiliateWP Trigger #
A detailed explanation of the following Trigger is given below –
- New Affiliate Joined
Once you select your desired Trigger, click the Continue button, and put a Title under the Internal Label field for this automation funnel so you can easily find it later.
If you leave it blank, it will automatically titled according to its trigger’s name.
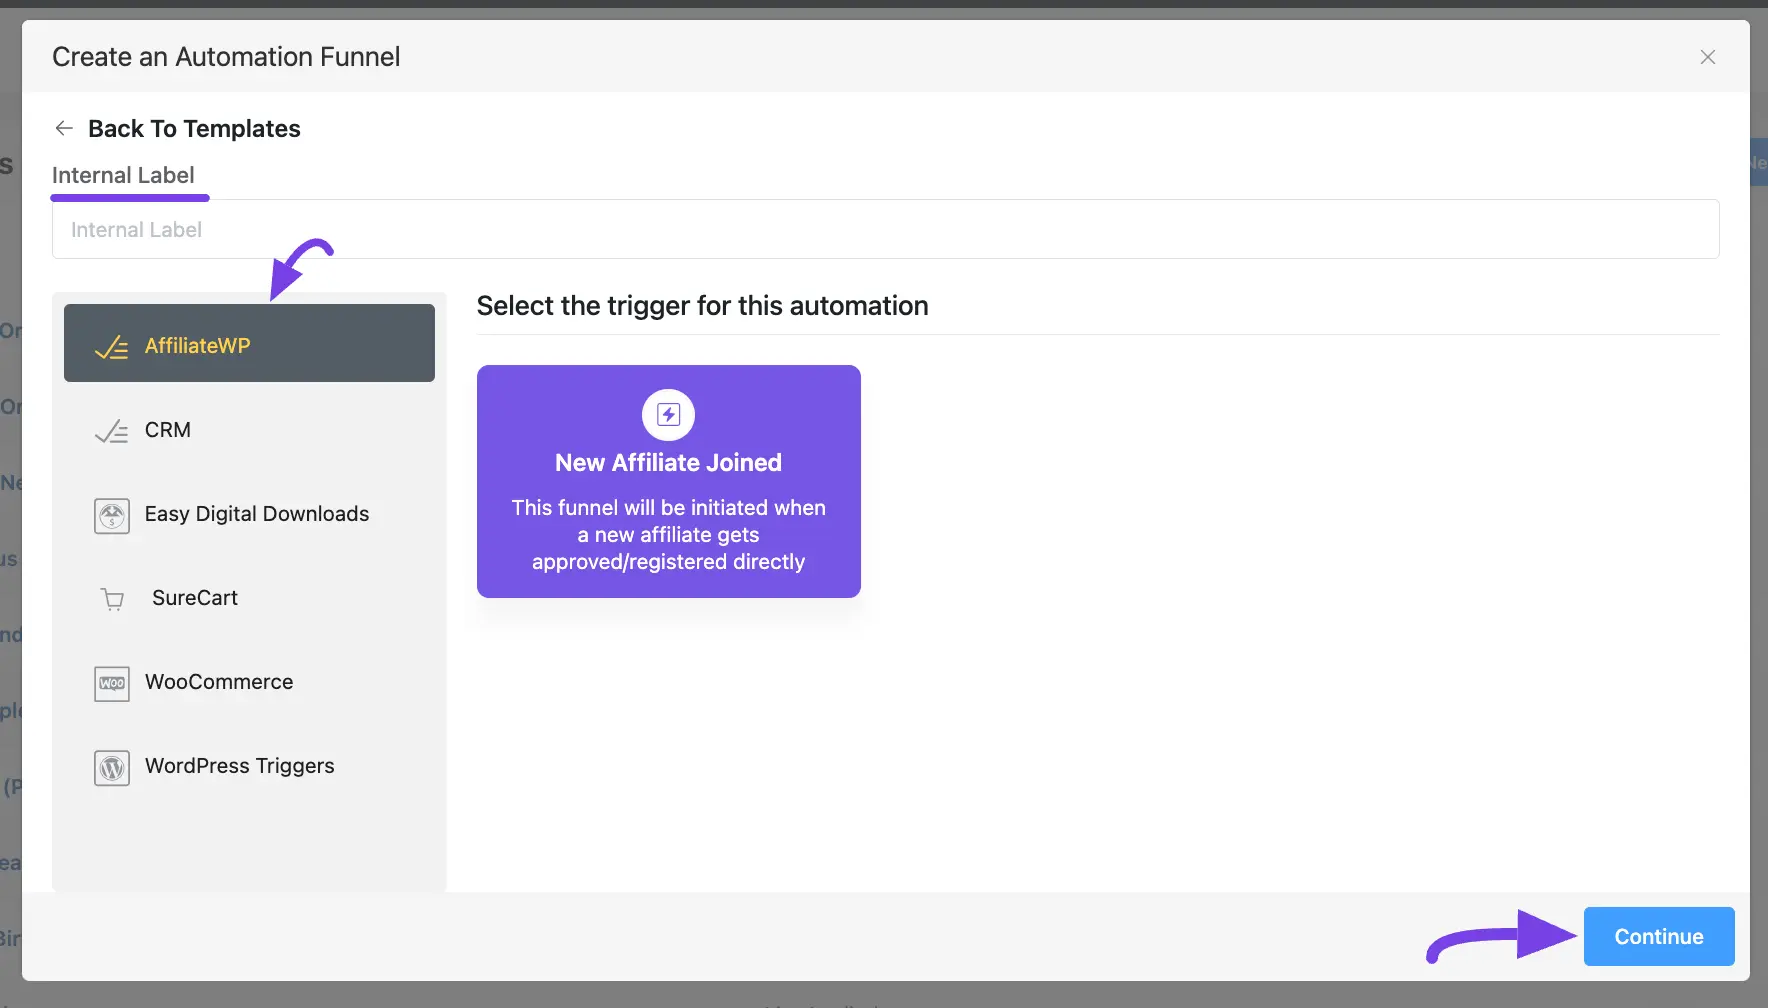
New Affiliate Joined #
This automation funnel will start when a new affiliate gets approved/registered directly
Once you select this trigger, a tab will appear on the right-hand side with options to set your trigger.
Here, are the Settings of the New Affiliate Joined Trigger
- If Contact Exist?: Specify what will happen if the subscriber already exists in the database. You can either update if the contact is already present in the mainflow Contacts which means recurring triggering for the automation or Skip the automation for this contact.
To learn the use of all the settings mentioned in the screenshot below, read this ssection.
Once you are done, click the Save Settings button to save all your changes.”

If you have any further questions, concerns, or suggestions, please do not hesitate to contact our support team. Thank you.


