The Email Settings define the default Mail From email address and Names that will be visible to the recipients of the mainflow communication emails sent. Available options are discussed below:
Default Settings #

| Option Name | Description |
| From Name | The Name that is visible to the recipient as Sender Name. When you send marketing emails to your subscribers, the “From Name” (also known as the email Sender name) tells the recipients who sent them the email. It is very important and a determining factor for the email you will send whether your email will be opened, or get ignored by the recipients. Often it is the company name, or perhaps the product name or service name people have signed up to learn about. |
| From Email Address | The Name that is visible to the recipient is Sender’s Email Address. This is limited to the number of available configured connections in SMTP Plugins if installed like mainflow. This is the email address the user will see when they open the email. There are a number of things to follow when choosing the “From Email” address. Always avoid using free webmail addresses, and also avoid the no-reply address. Use a valid email address that also matches your SMTP email address or this will cause an email delivery issue. |
| Reply to Name | The Name that identifies the Name of the entity that will receive the reply to the sent email. |
| Reply to Email | The email that will receive the reply of the sent email. |
| Maximum Email Limit Per Second | The maximum number of emails attempted per second. It can be lower due to a lot of factors like site performance, security or firewall limits, rules, the number of connections allowed from the remote mail server that delivers the emails, or by default WordPress hosting if no SMTP plugin is installed and configured. |
The above settings will only apply if there is no SMTP Plugin installed and uses the default mailing system. If an SMTP plugin is installed like mainflow and that does not force the Sender Name and Email Address as below then the above settings will be in effect.

But if you have any SMTP plugin installed on your website which takes over the email delivery of the website then you will be able to select your configured email addresses or connections or delivery method from From Email Address option as below:

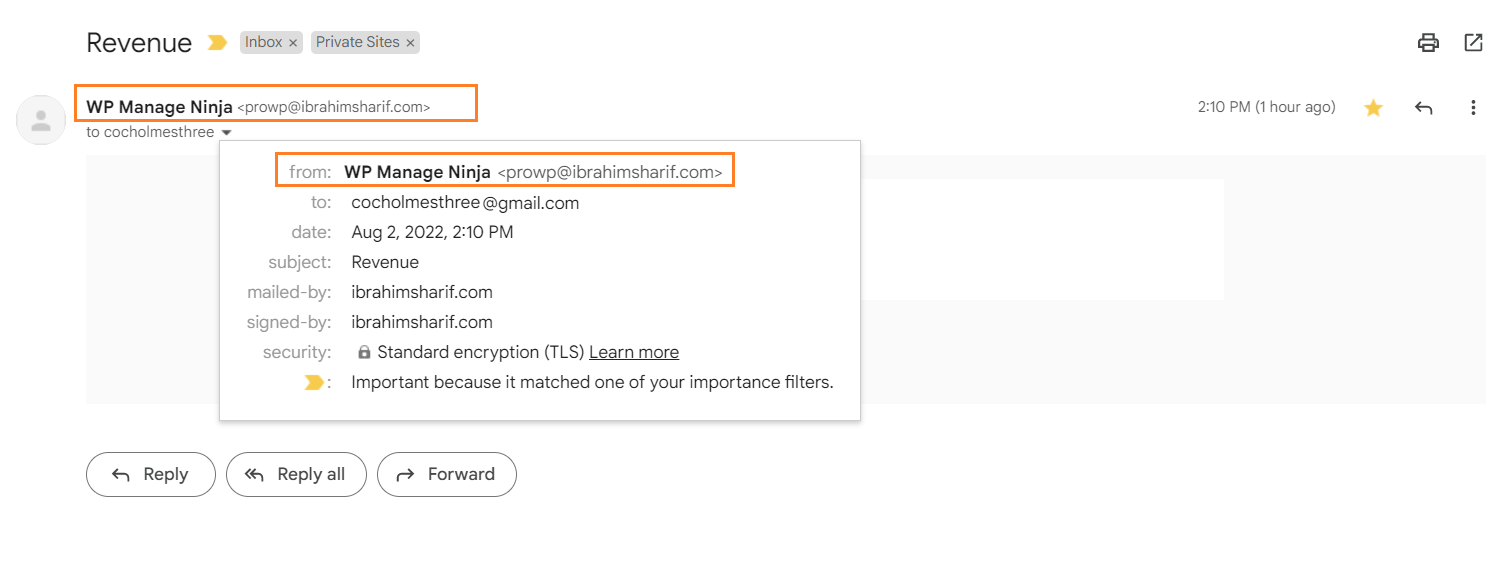
Below is an example of the From Name and From Email Address shown in Gmail Web Client.
Email Footer Settings #
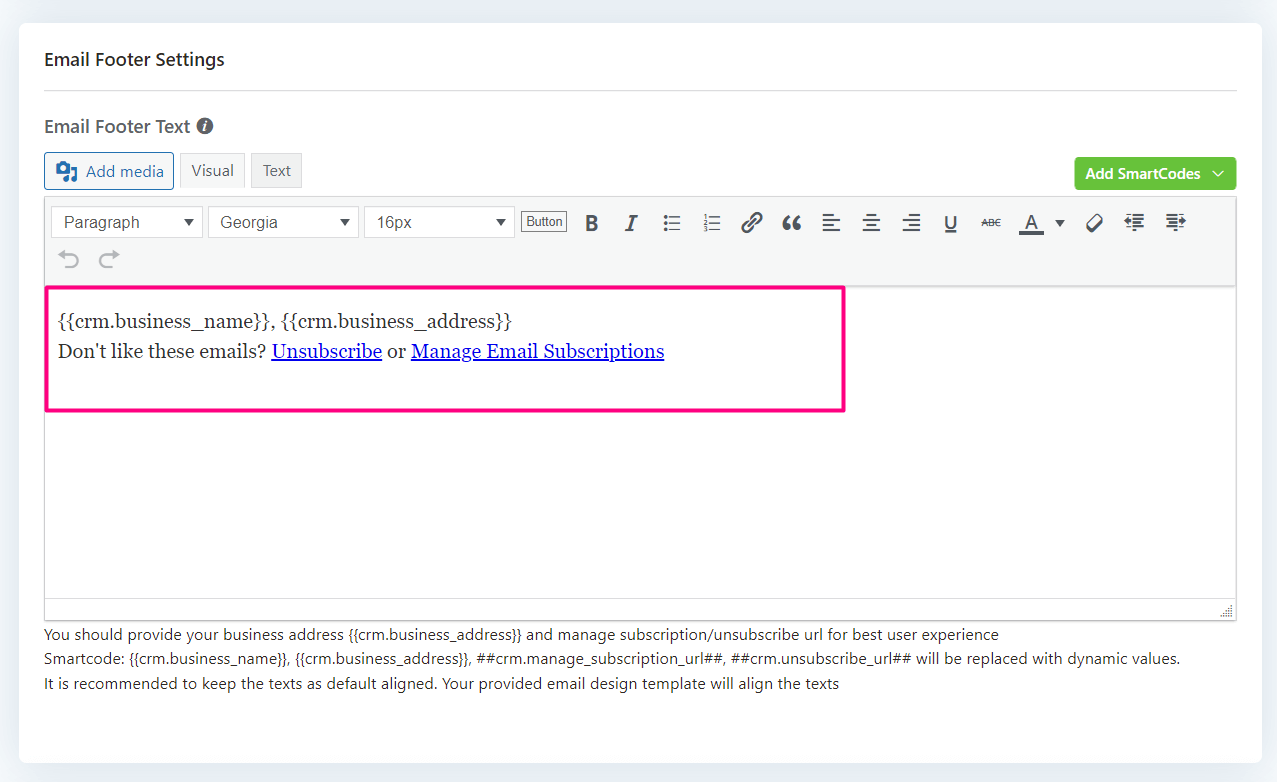
Email Footer Text: The footer section usually contains information about the sender’s unsubscribe link or forward the email. You should provide your business address {{crm.business_address}} and manage the subscription/unsubscribe URL for the best user experience.
Smartcode in Footer: {{crm.business_name}}, {{crm.business_address}}, ##crm.manage_subscription_url##, ##crm.unsubscribe_url## will be replaced with dynamic values. It is recommended to keep the texts as default aligned. Your provided email design template will align the texts.
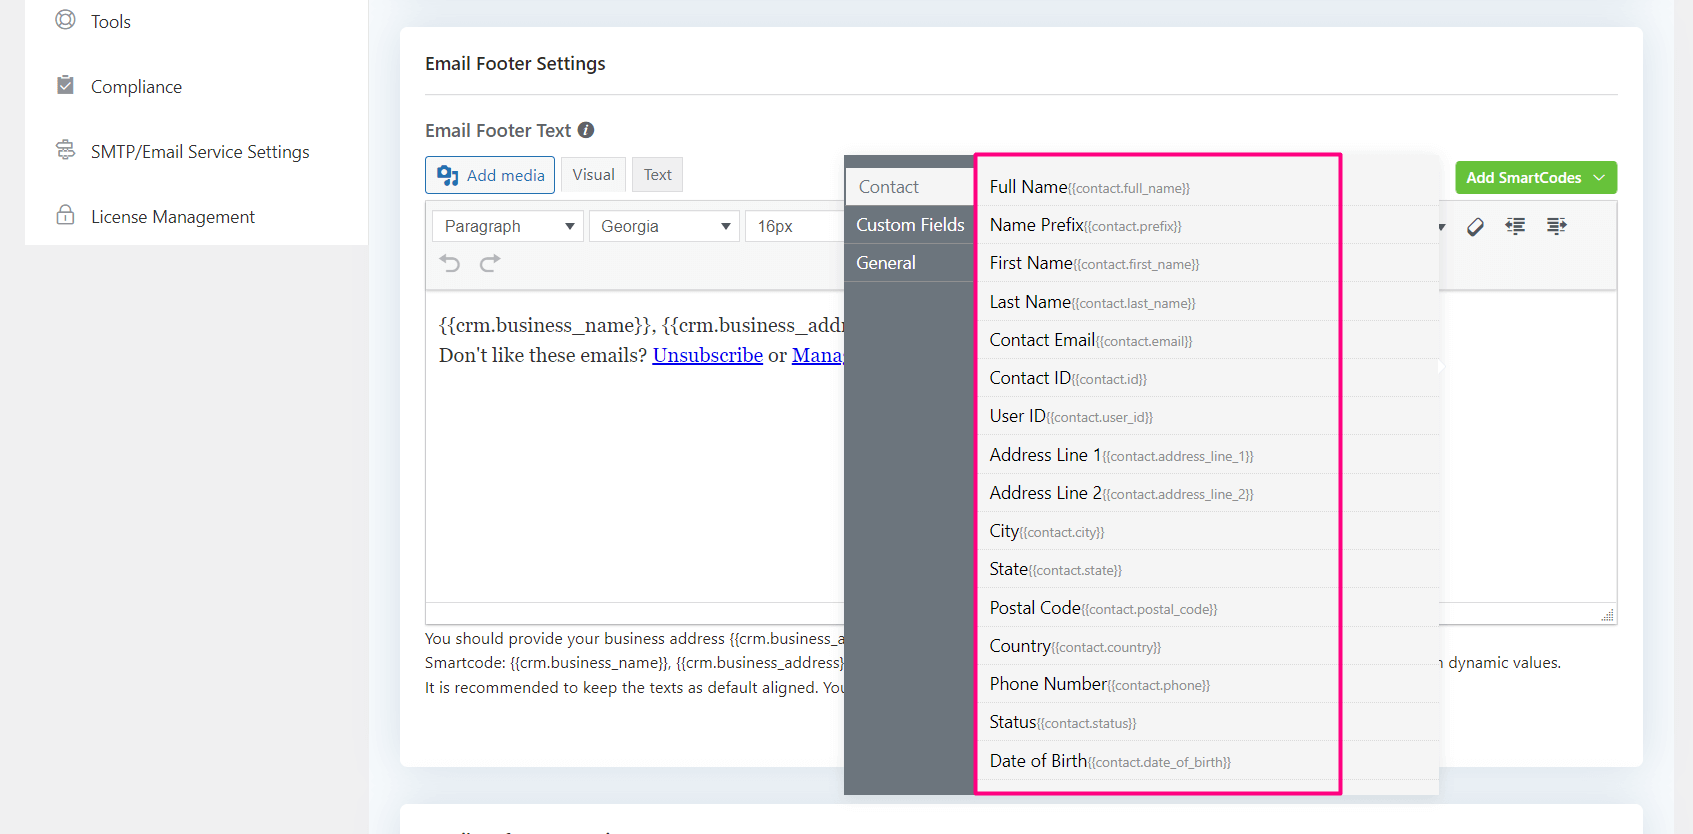
Available SmartCodes: #
Contact #
| Data Field Name | Smart Code |
| Full Name | {{contact.full_name}} |
| Name Prefix | {{contact.prefix}} |
| First Name | {{contact.first_name}} |
| Last Name | {{contact.last_name}} |
| Contact Email | {{contact.email}} |
| Contact ID | {{contact.id}} |
| User ID | {{contact.user_id}} |
| Address Line 1 | {{contact.address_line_1}} |
| Address Line 2 | {{contact.address_line_2}} |
| City | {{contact.city}} |
| State | {{contact.state}} |
| Postal Code | {{contact.postal_code}} |
| Country | {{contact.country}} |
| Phone | {{contact.phone}} |
| Status | {{contact.status}} |
| Date of Birth | {{contact.date_of_birth}} |
Custom Fields #
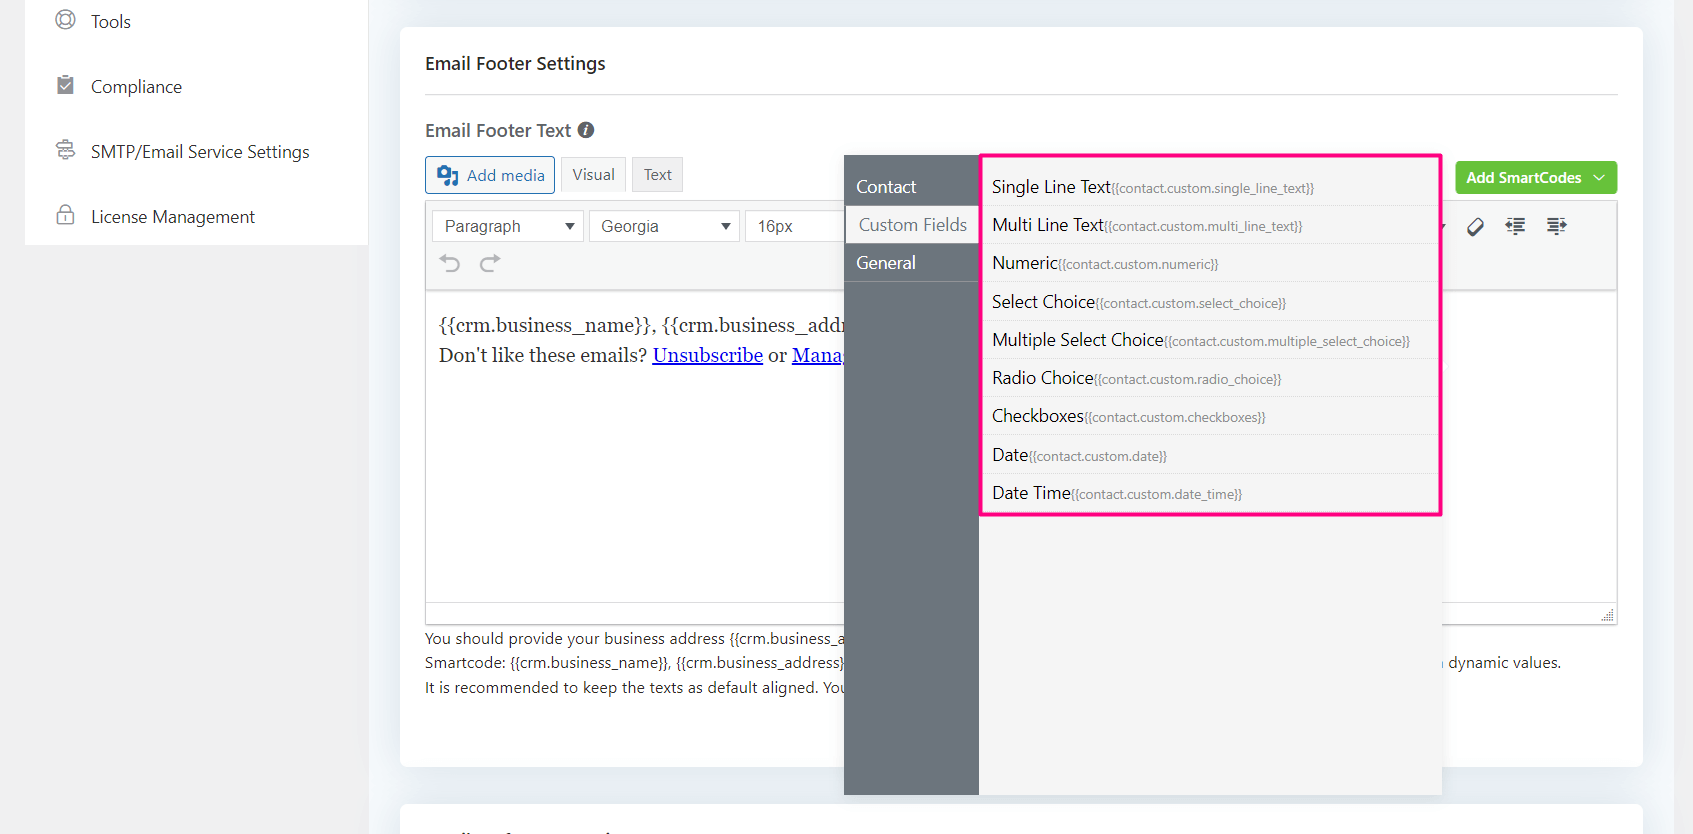
Custom Fields are dependent on the mainflow Settings. You can add as many Custom Fields as you want and then they will be available here. The generic Data Field Name will be as you set in the Label while creation and SmartCode will recognize the slug value of the custom field as below:

The above example screenshot will represent Data Field Name as “Date and Time” & SmartCode would be {{contact.custom.date_time}}
General #
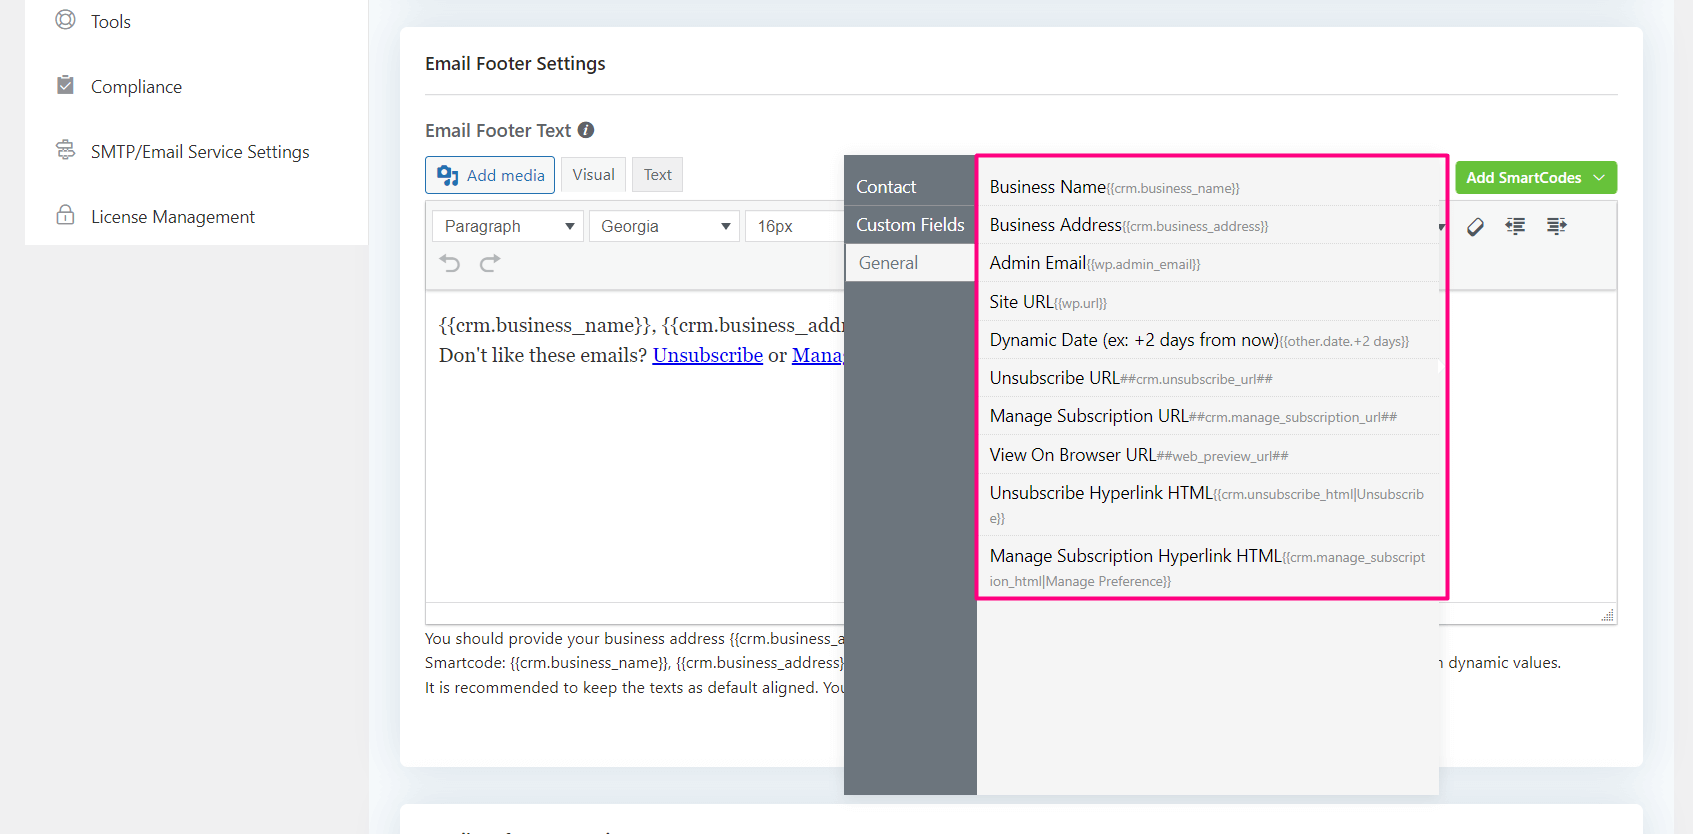
| Data Field Name | Smart Code |
| Business Name | {{crm.business_name}} |
| Business Address | {{crm.business_address}} |
| Admin Email | {{wp.admin_email}} |
| Site URL | {{wp.url}} |
| Dynamic Date (example: +2Days from Now) | {{other.date.+2 days}} |
| Unsubscribe URL | ##crm.unsubscribe_url## |
| Manage Subscription URL | ##crm.manage_subscription_url## |
| View on Browser URL | ##web_preview_url## |
| Unsubscribe | {{crm.unsubscribe_html|Unsubscribe}} |
| Manage Subscription Hyperlink HTML | {{crm.manage_subscription_html|Manage Preference}} |
Email Preference Settings #
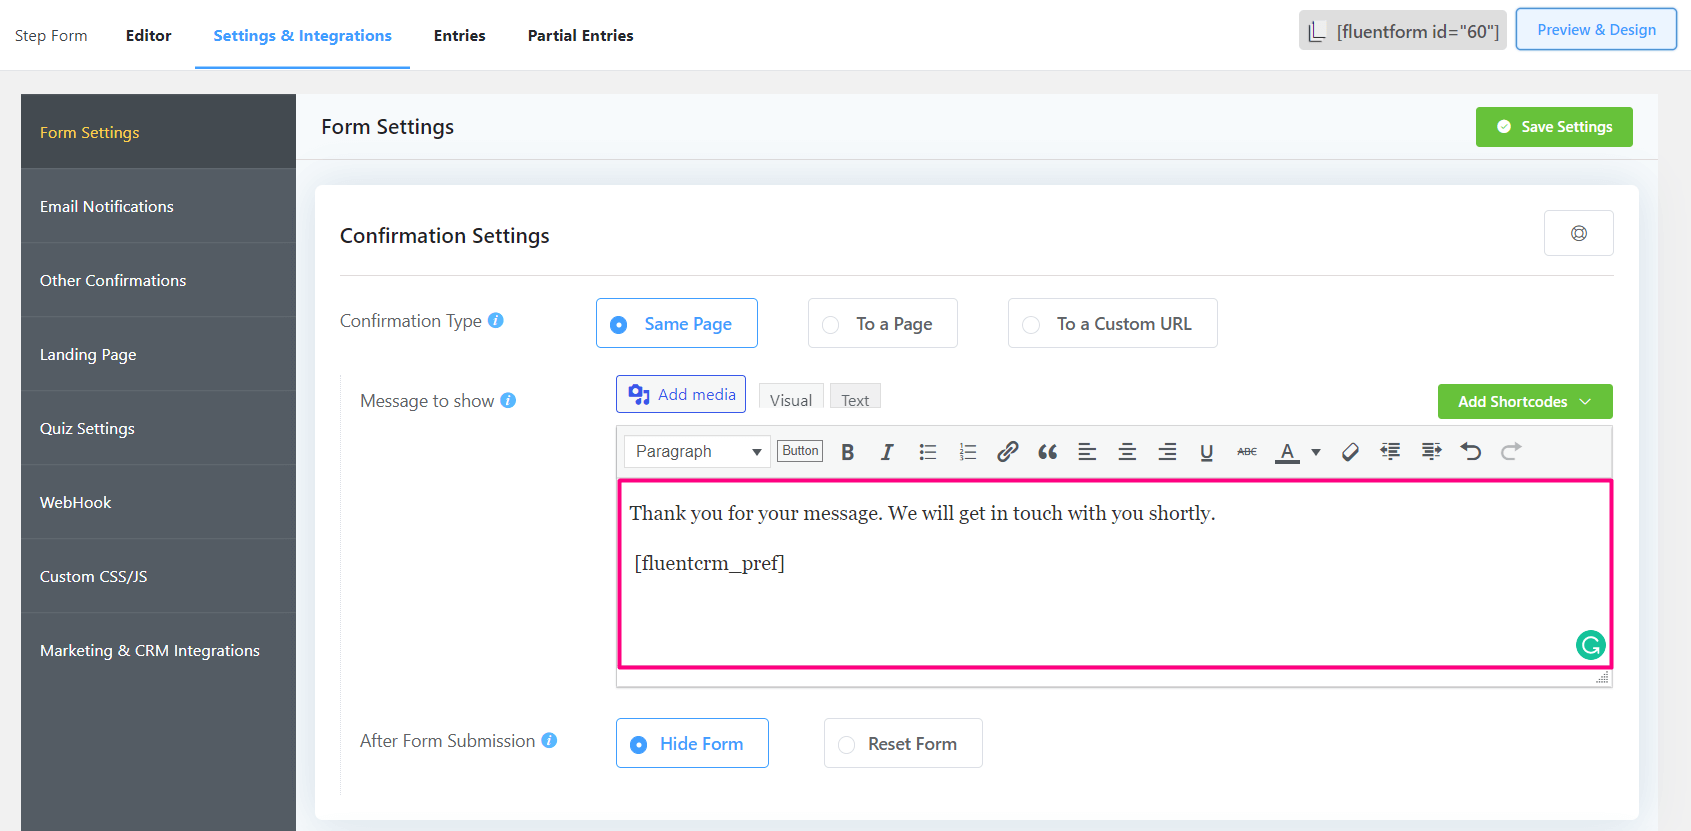
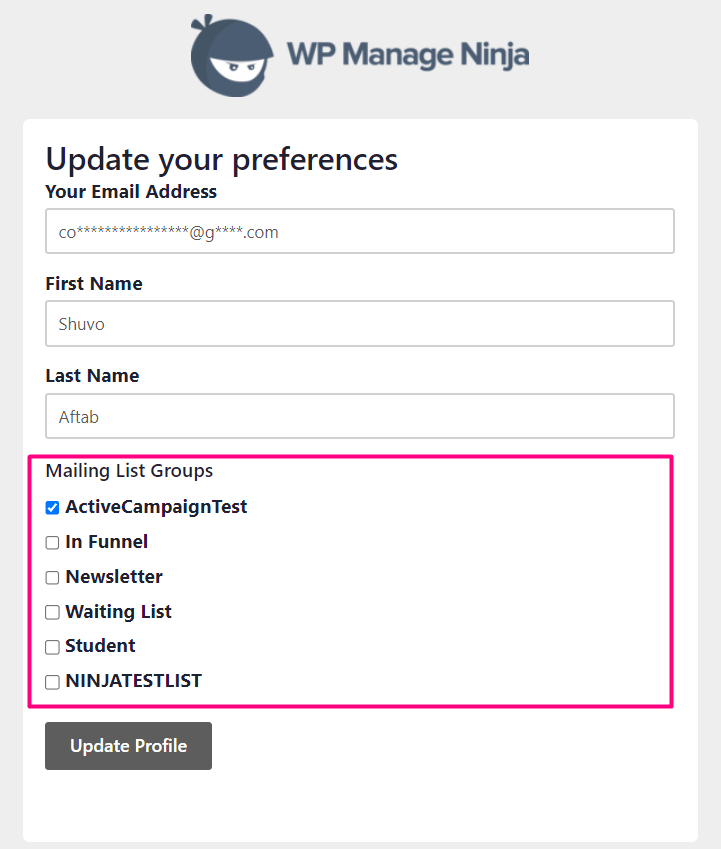
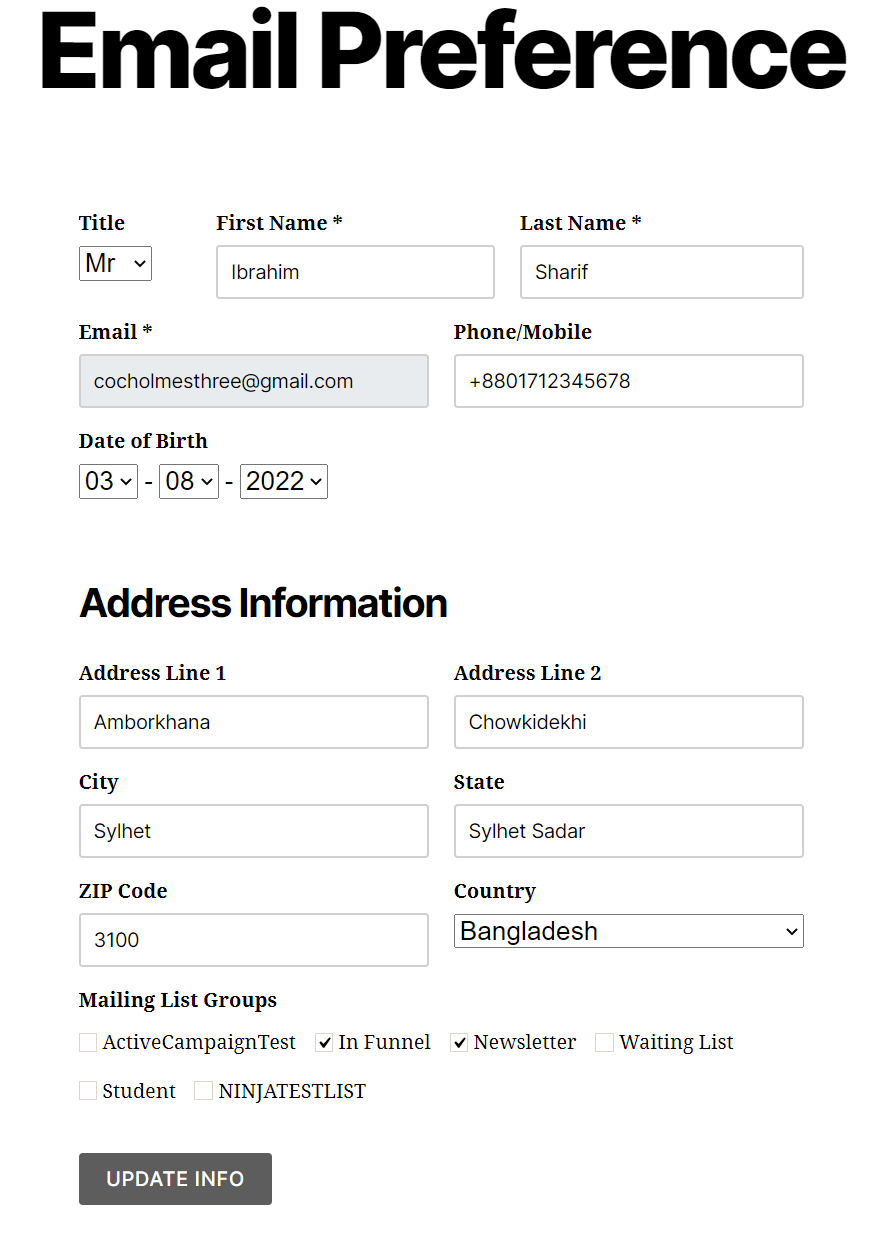
Using The ##crm.manage_subscription_url## SmartCode lets the user manage their subscriptions along with the Lists if defined in Email Preference Settings.

Below is an example email of using this SmartCode where the user will see a link saying Manage Email Subscriptions and this will take the user to a page similar to the below screenshot.
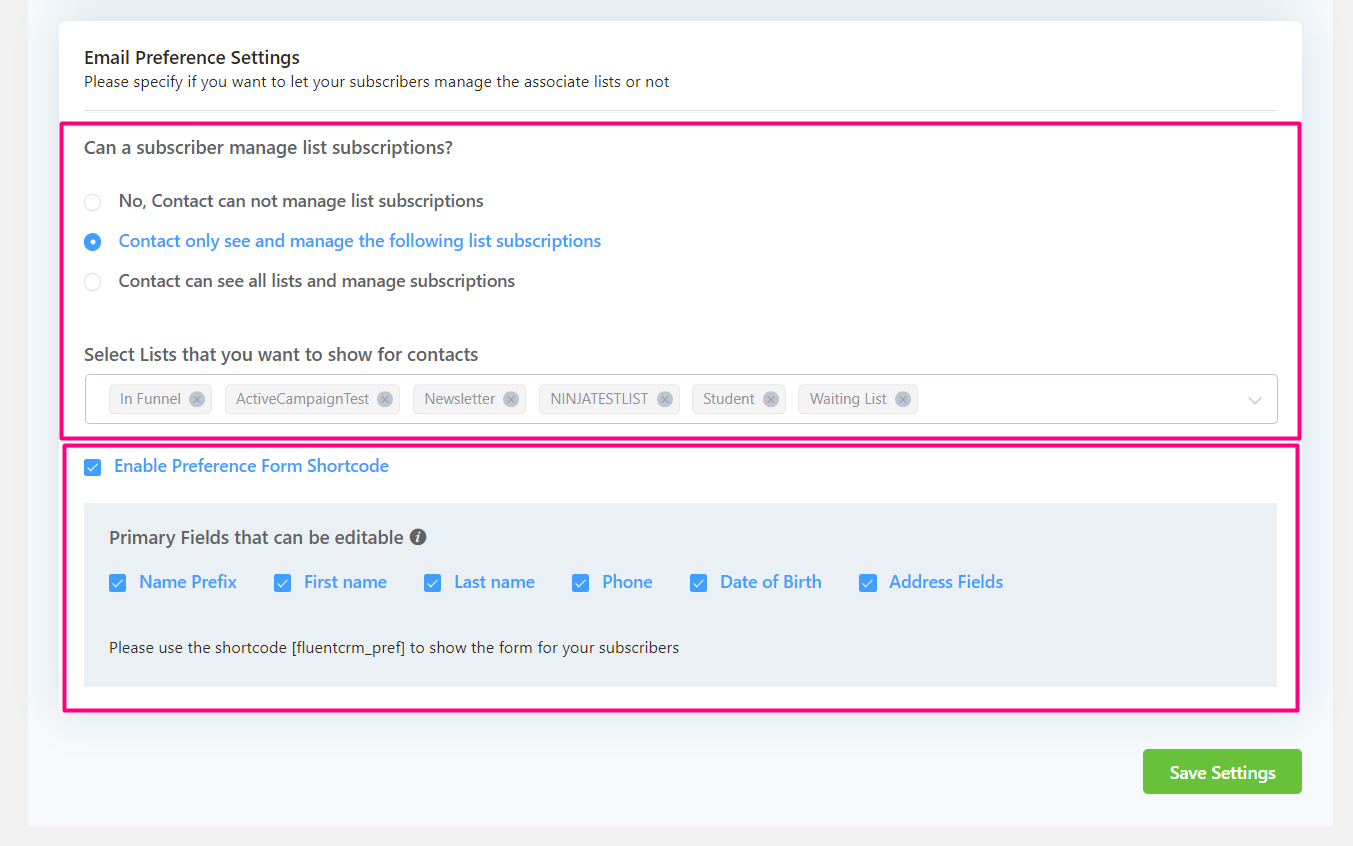
The screenshot below represents the available options of the preferences:
List Subscriptions #
| Option Name | Description |
| No, Contact can not manage list subscriptions | Default Option. This will not let the user manage their list subscription or do not offer any lists to select. |
| Contact only see and manage the following list of subscriptions | This will allow admins to select specific lists for users to manage their list subscriptions. It can be all lists or a number of lists. |
| Contact can see all lists and manage subscriptions | This will allow the user to see all the lists and select any or all of the list’s subscriptions. |
Email Preference Shortcode #
Please use the shortcode to show the form for your subscribers to let them manage these options themselves:
- Name Prefix
- First Name
- Last Name
- Phone
- Date of Birth
- Address Field
- Lists that they are allowed to manage their subscription.
The above shortcode renders the management form on a page as below screenshot:
Adding on a Page #

Adding on a Mainflow Notification #
This can also be used in a mainflow Submission Notification as below:
