Mainflow provides several Goals or Benchmark Actions to set your goals higher by measuring different aspects, actions, or steps you take in the automation. You can add these Goals / Benchmark actions as secondary additional triggers to any automation at any point and measure these steps to change the behavior of the marketing approach, and tasks, or update your concepts.
For example, You can set a benchmark from your campaign emails by tracking when a user clicks a link or makes a purchase, and then taking actions such as adding them to a new list, applying a tag, or sending a new email sequence.
All Goals/Benchmark Actions #
To learn how you can use all the Goals or Benchmark Actions in your mainflow, follow the steps with screenshots below –
First, go to the Automation section from the mainflow Navbar, and open your desired Automation by clicking on its title. Or, create a new one by clicking the + New Automation.
For example, I opened the Tag Applied automation funnel to explain all the Goals/Benchmark actions.

Now, click the Plus Icon, or just hover over it and click the Add Action / Goal option to get all the Goals / Benchmark Actions.

Now, a pop-up page will appear with all the Goals / Benchmark Action blocks of FluentCRM to choose from.
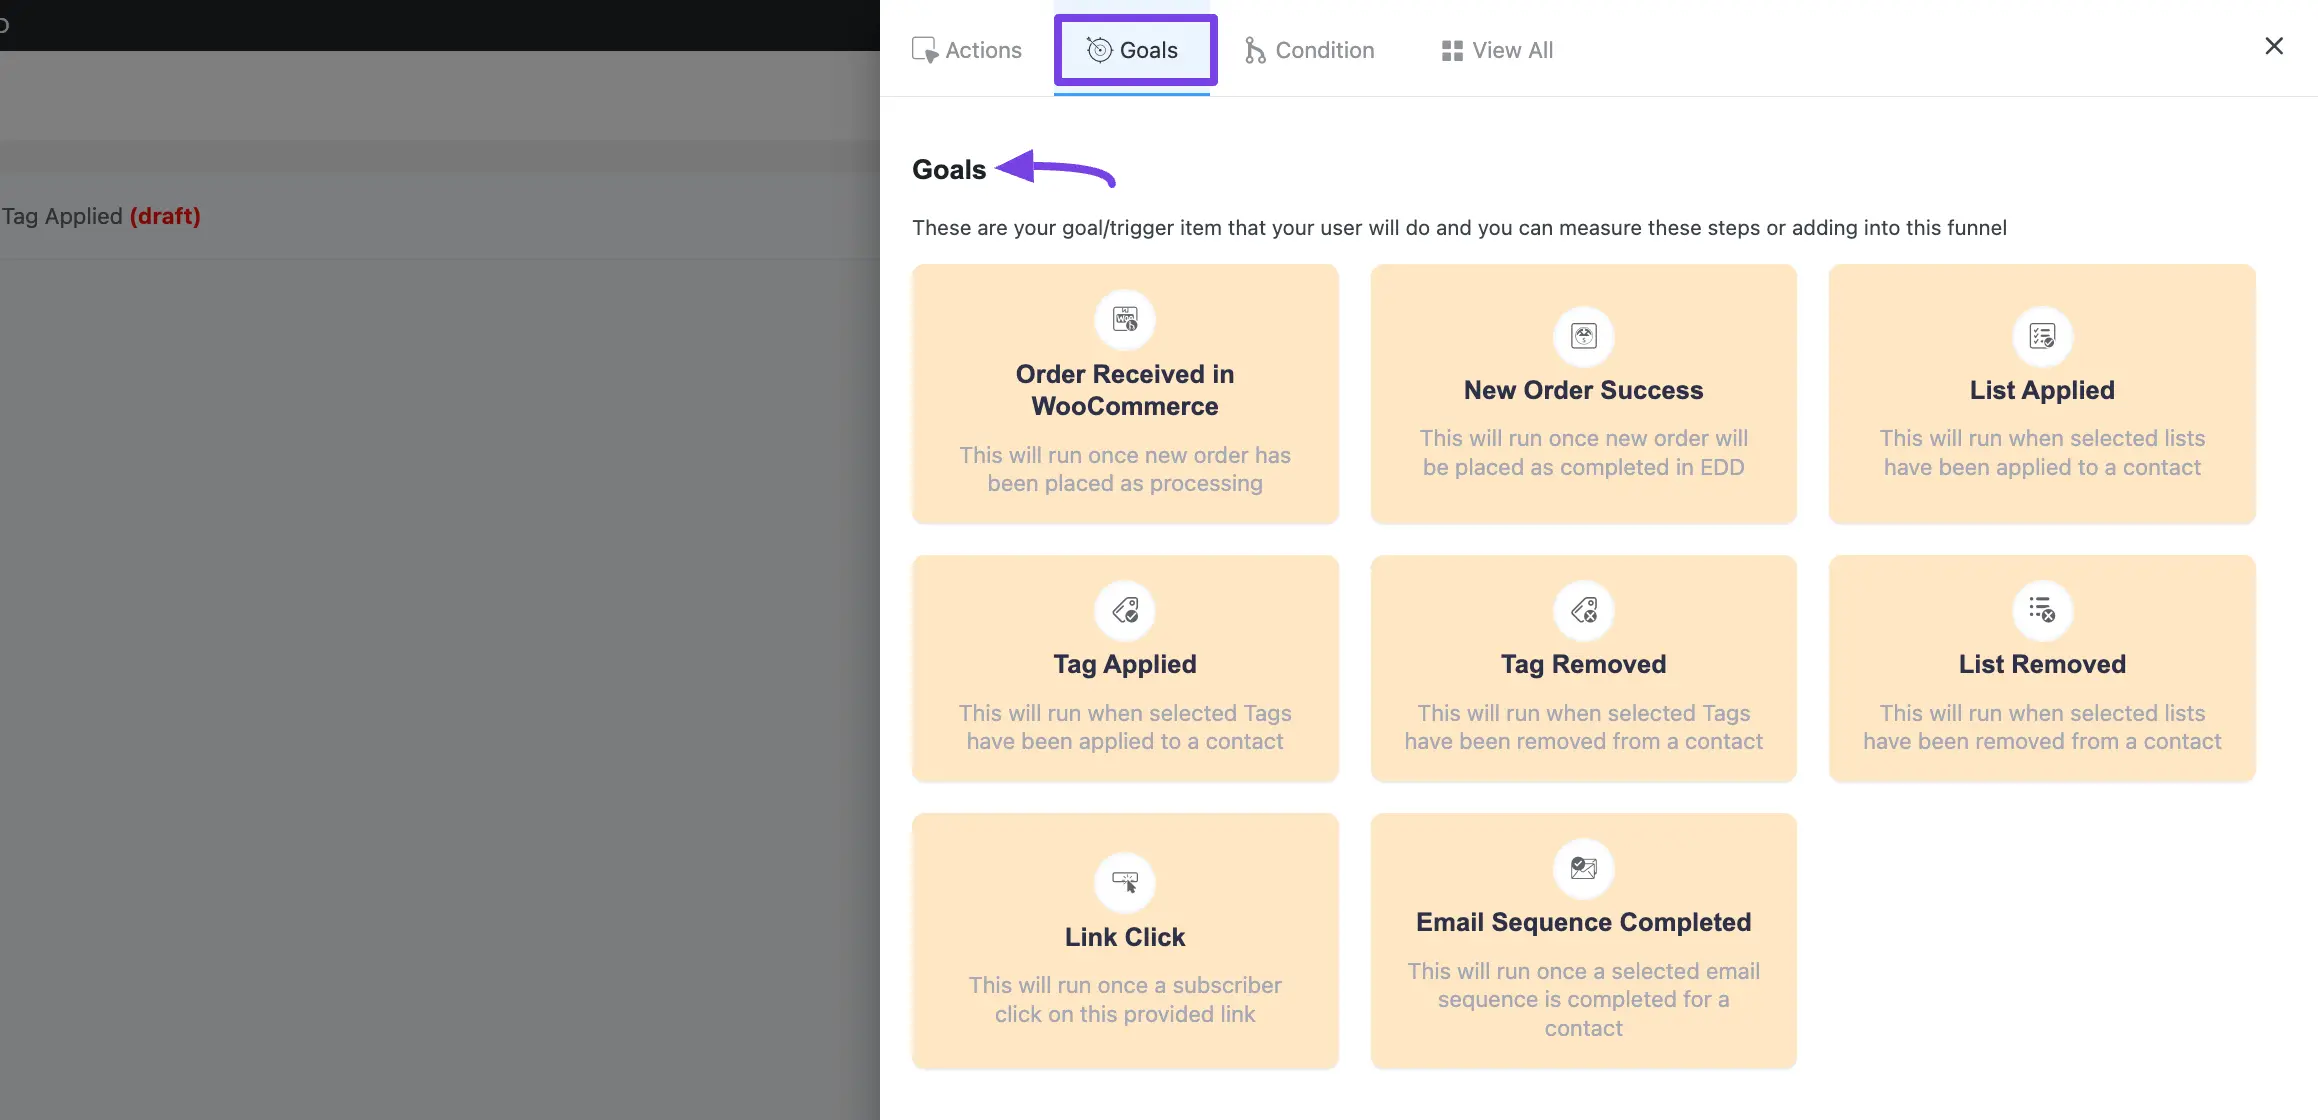
A detailed explanation of the Goals mentioned above is given below –
1. Order Received in WooCommerce #
This action will run once a new order is placed as processing in WooCoomerce. To have this option in your automation, you need to set up WooCoomerce on your site before starting the process. After selecting this Action, a tab will appear on the right-hand side with options to set up your action.
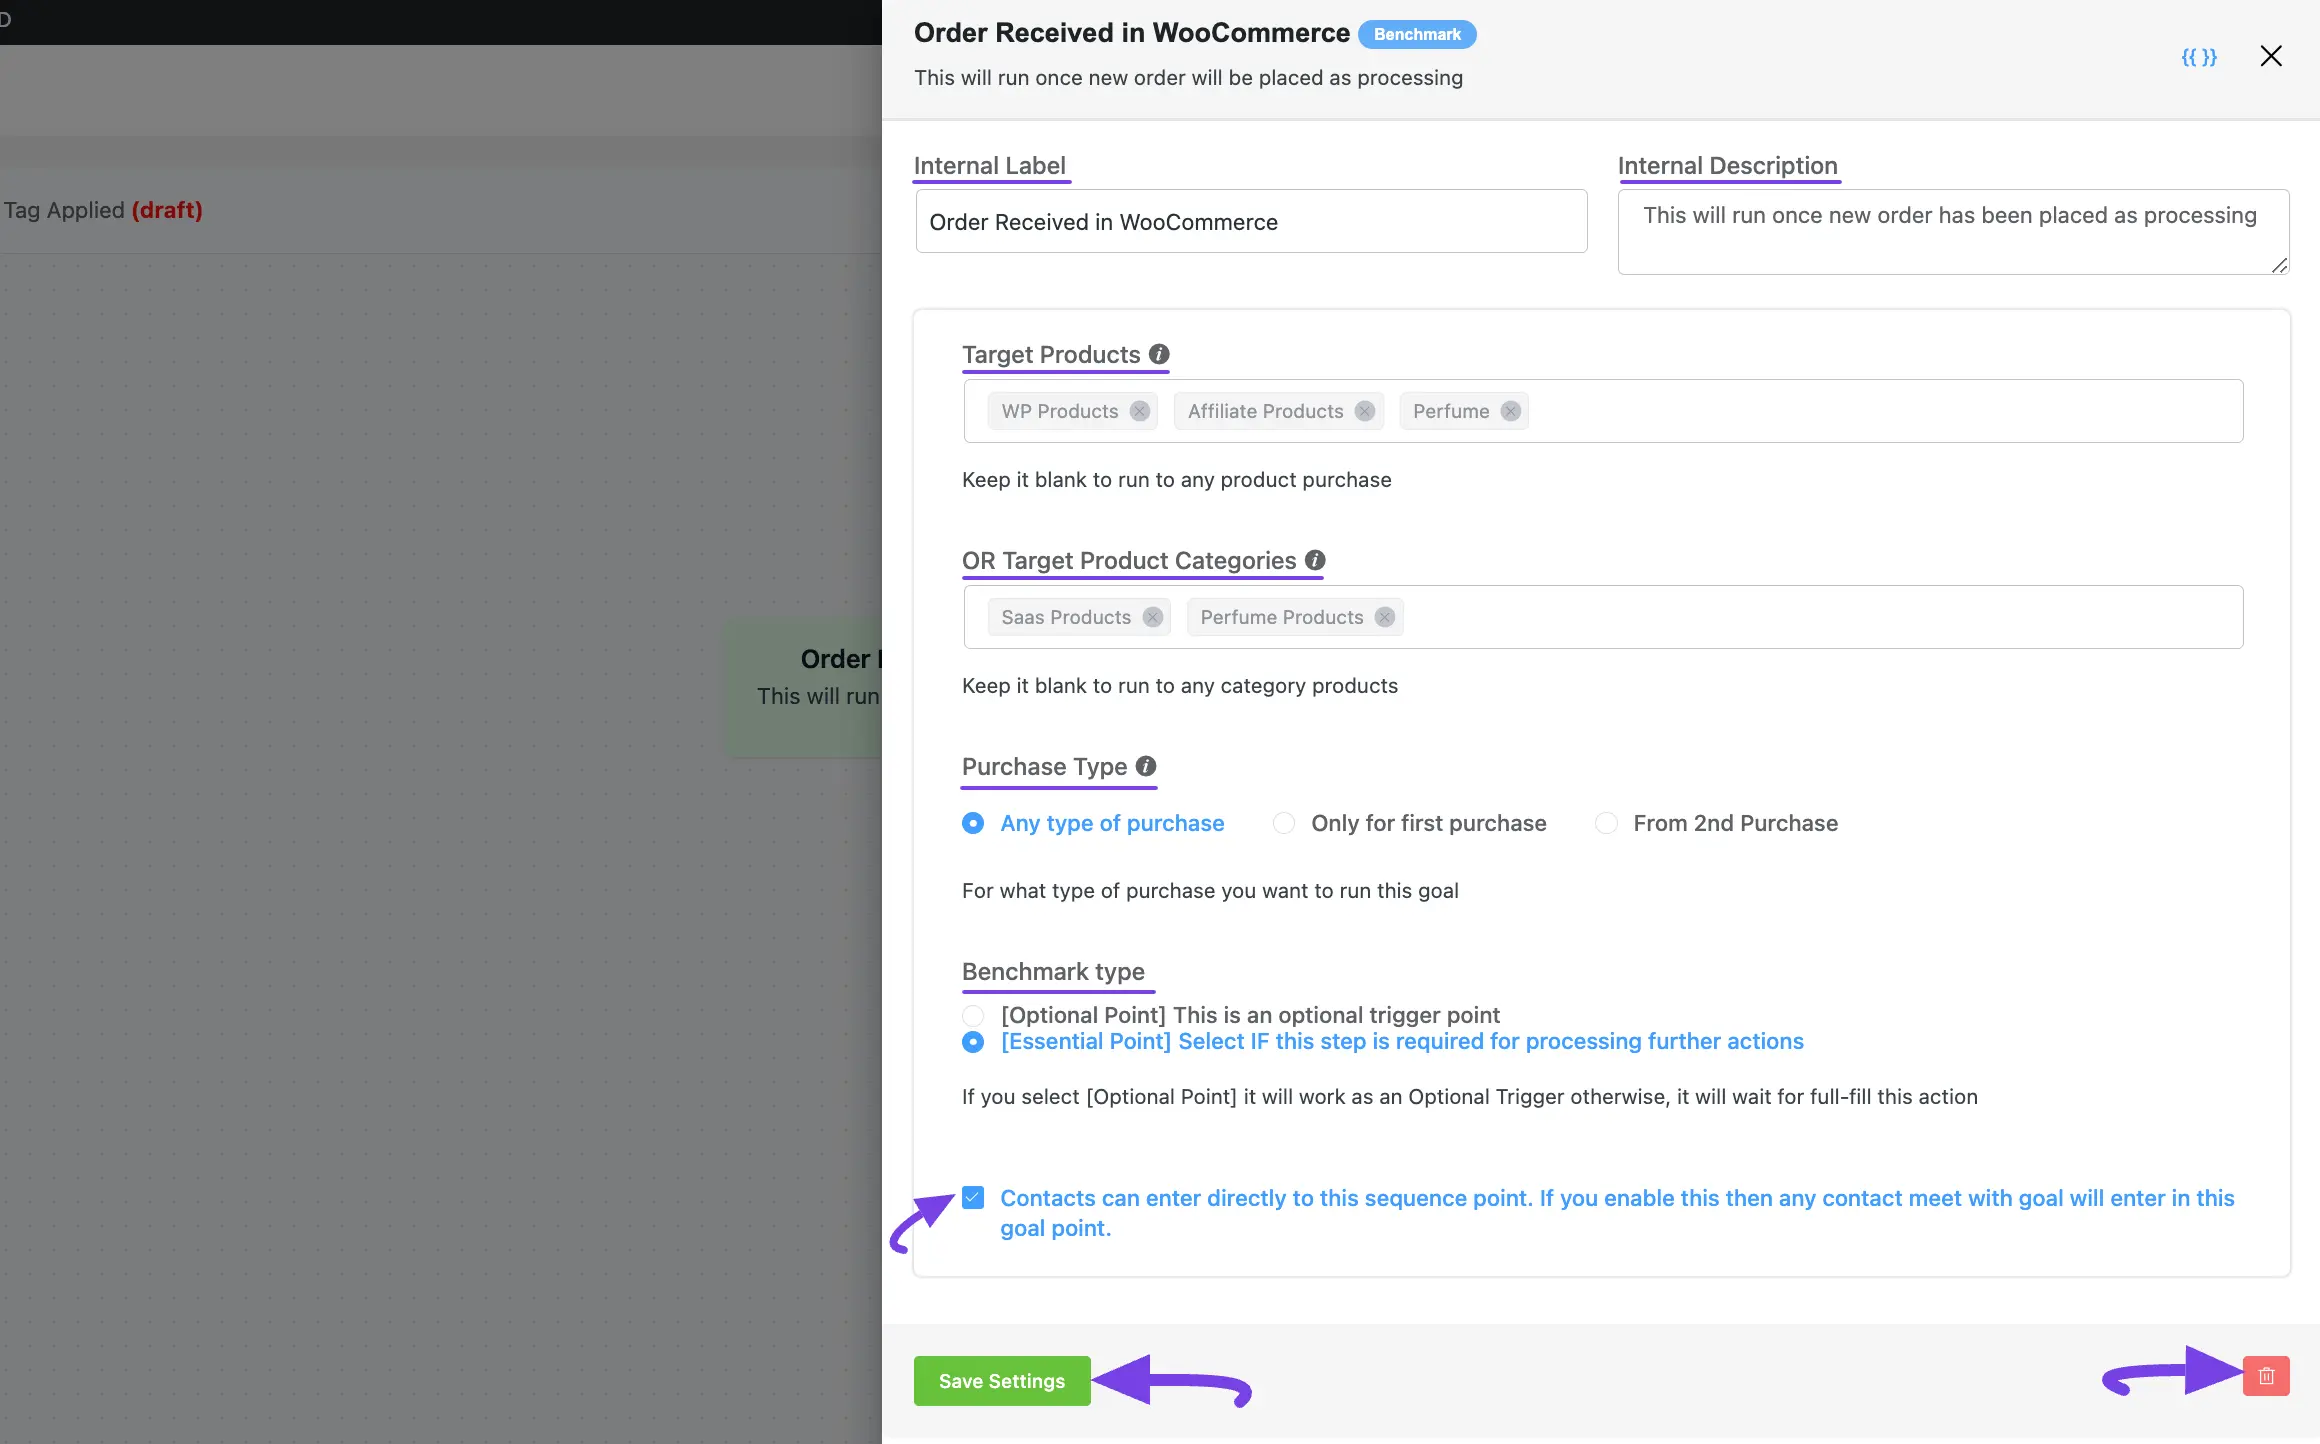
Settings of the Order Received in WooCommerce action: #
- Interval Label: Here, a Name for the Action will be automatically added so you can easily find it later. You can change it according to your needs.
- Internal Description: A description of the action will also be automatically added as a Subtitle. You can also change it according to your needs.
- Target Products: This will list all the available products in your store. Select the targeted product you want to track whether purchased or not from this funnel. Leave it blank to run the action for any product purchased.
- OR Target Product Categories: Or, select which Product Category (Single or Multiple) will trigger this automation Funnel. Leave blank to run for all product categories. Remember, this trigger will run if a contact matches any one condition in either Target Products or Target Product Categories.
- Purchase Type: There are three purchase types available for this benchmark action. These are:
- Any type of Purchase: This will include all types of purchases such as first order, second order, or any time the order is placed.
- Only for First Purchase: Select this option to apply the benchmark for a first-time buyer.
- From 2nd Purchase: Choose this option for a returning buyer. This option applies to all purchases except the first one made by the contact for the specified product or product category.
- Benchmark Type: Select whether the benchmark action is mandatory to run the tasks after the benchmark. If you select Essential Point the next tasks will run only if the benchmark action conditions are met. Otherwise, the next actions will not proceed. Selecting, Optional Point will run the later actions even if the benchmarking action conditions are not met.
- Contact Entry in Goals: If you check this option, any contact who meets the goal can directly enter this goal point sequence.
Once you are done, click the Save Settings button to save all your changes.
You can also Delete the action by clicking the Trash Icon if needed.
2. New Order Success in EDD #
This automation funnel will start once a new order is placed as completed in EDD. To have this option in your automation, you need to set up Easy Digital Downloads on your site before starting the process.
After selecting this Action, a tab will appear on the right-hand side with options to set up your action.
3. List Applied #
This automation funnel will start once the selected lists have been applied to a contact. After selecting this Action, a tab will appear on the right-hand side with options to set up your action.
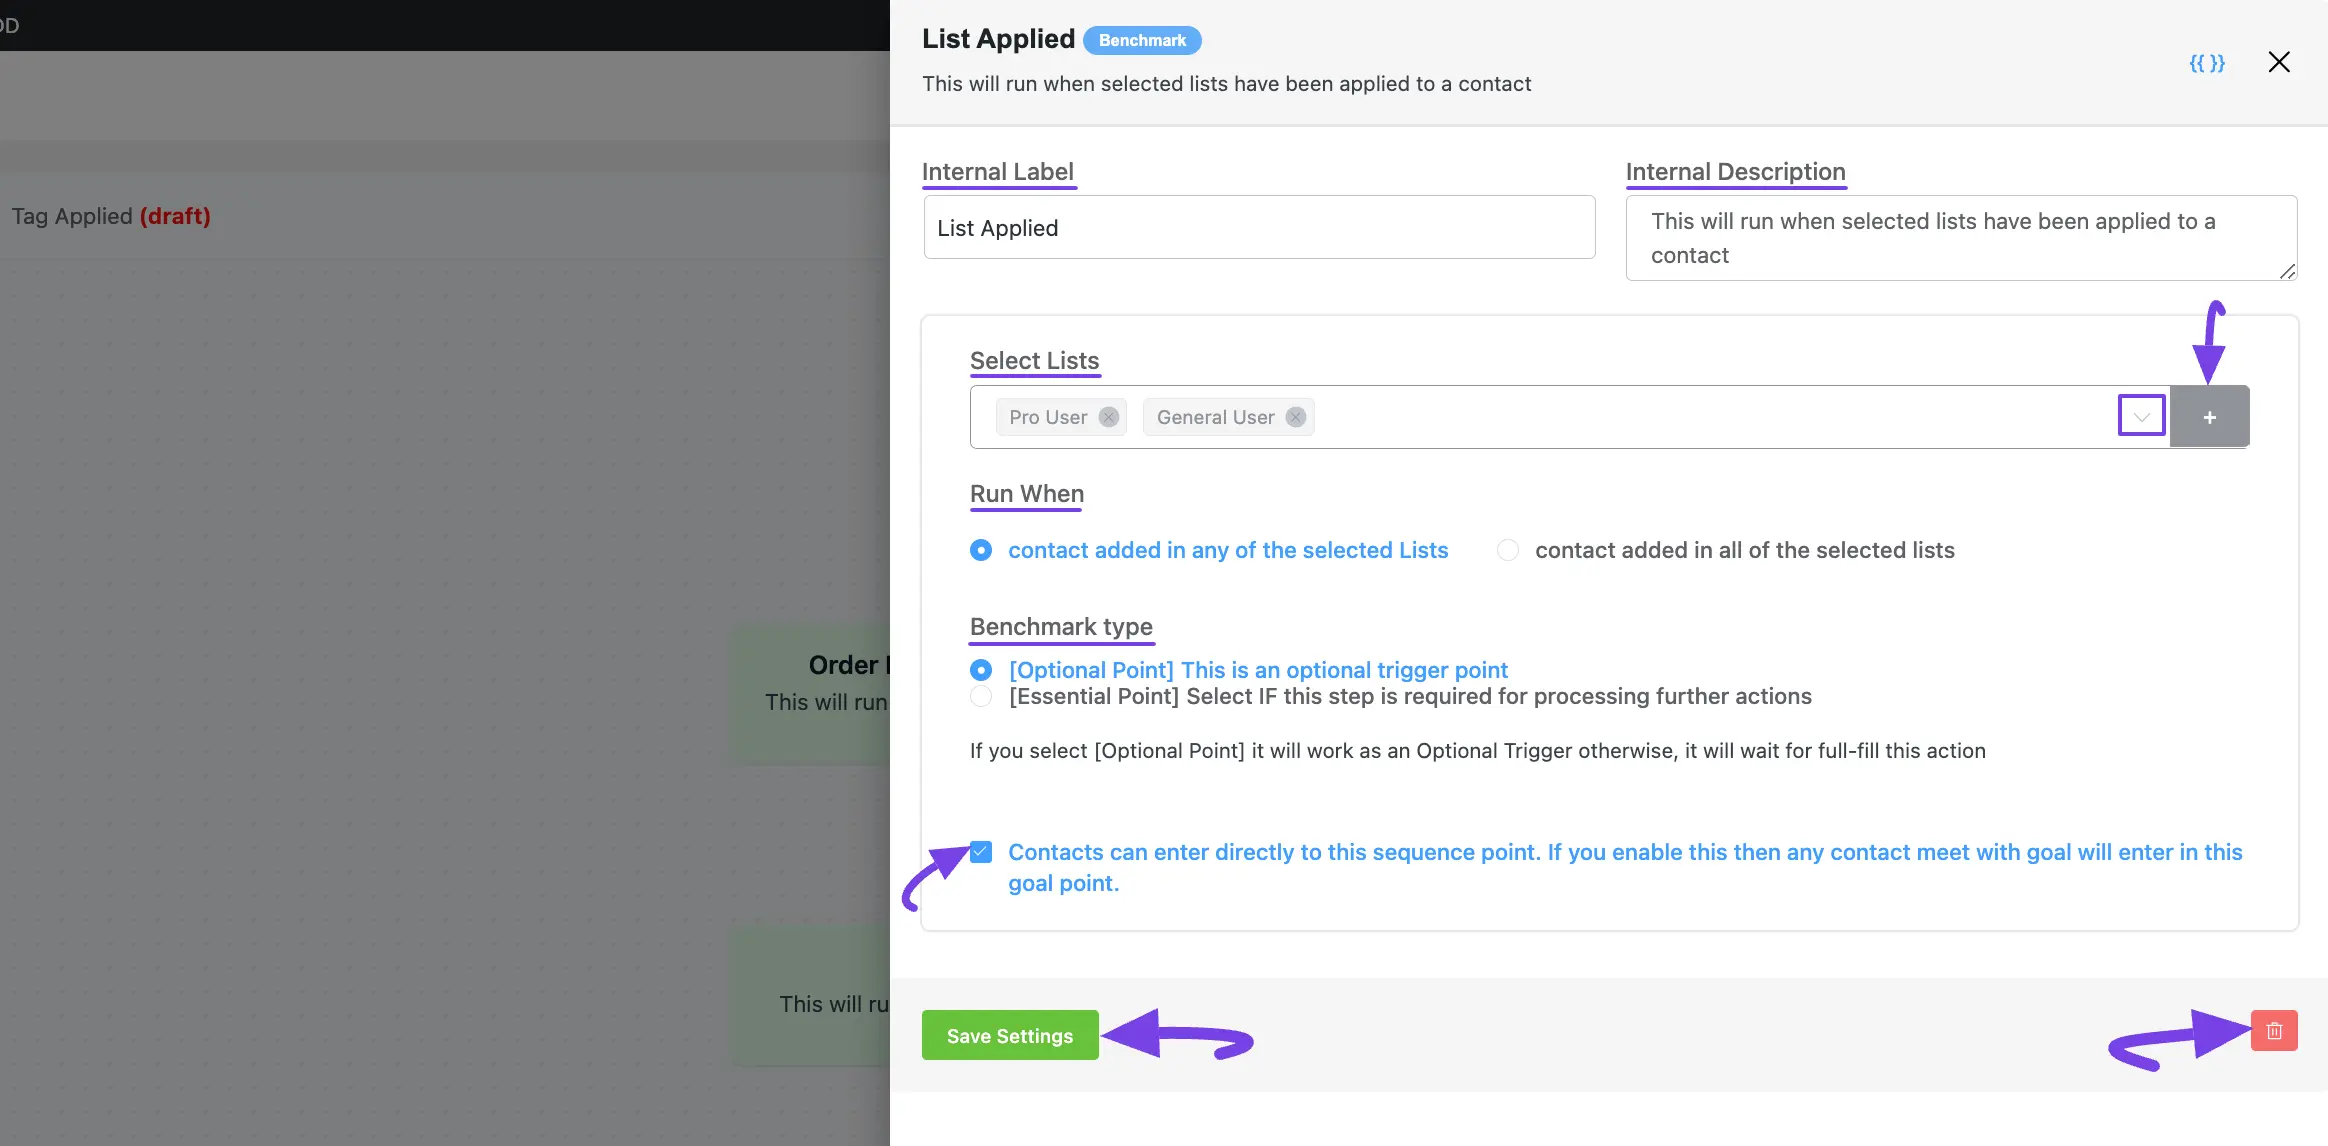
Settings of the List Applied action: #
- Interval Label: Here, a Name for the Action will be automatically added so you can easily find it later. You can change it according to your needs.
- Internal Description: A description of the action will also be automatically added as a Subtitle. You can also change it according to your needs.
- Select Lists: Select the Lists (single or multiple) using the dropdown arrow for which you want to trigger this automation funnel. If you do not have any existing Contact List in your mainflow, you can directly create one from here by clicking the Plus icon.
- Run When: Select whether the contact needs to belong to one list or all of the lists you’ve selected.
- Benchmark Type: Select whether the benchmark action is mandatory to run the tasks after the benchmark. If you select Essential Point the next tasks will run only if the benchmark action conditions are met. Otherwise, the next actions will not proceed. Selecting, Optional Point will run the later actions even if the benchmarking action conditions are not met.
- Contact Entry in Goals: If you check this option, any contact who meets the goal can directly enter this goal point sequence.
Once you are done, click the Save Settings button to save all your changes.
You can also Delete the action by clicking the Trash Icon if needed.
4. List Removed #
This automation funnel will start once the selected lists have been removed from a contact. After selecting this Action, a tab will appear on the right-hand side with options to set up your action.
5. Tag Applied #
This automation funnel will start once the selected tags have been applied to a contact. After selecting this Action, a tab will appear on the right-hand side with options to set up your action.
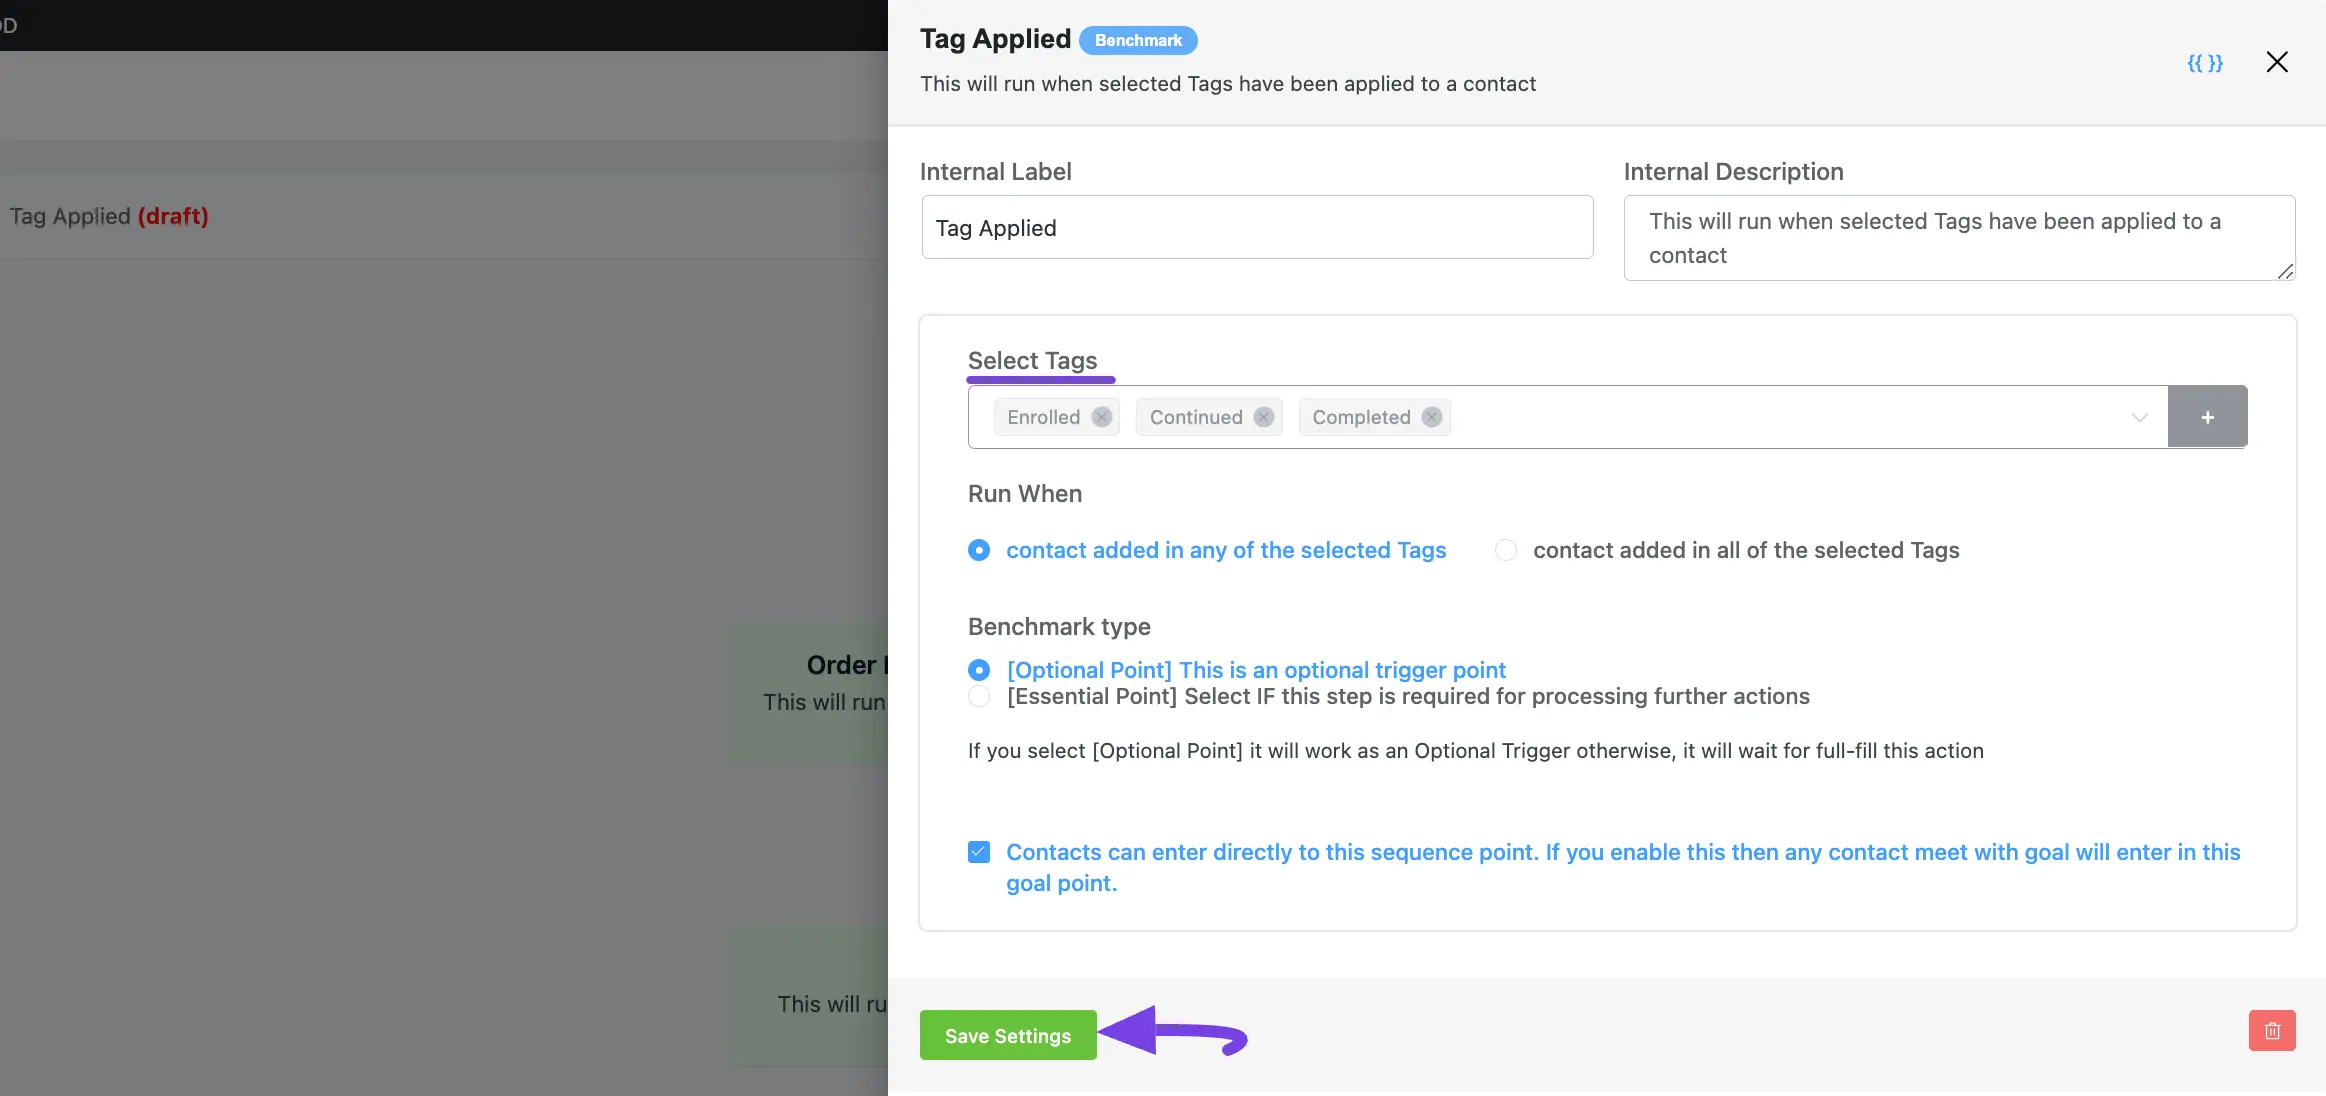
Here are the Settings of the Tag Applied action:
- Select Tags: Select the Tags (single or multiple) using the dropdown arrow for which you want to trigger this automation funnel. If you do not have any existing Tags in your mainflow, you can directly create one from here by clicking the Plus icon in the right corner of the field.
Once you are done, click the Save Settings button to save all your changes.
6. Tag Removed #
This automation funnel will start once the selected Tags have been removed from a contact.
After selecting this Action, a tab will appear on the right-hand side with options to set up your action.
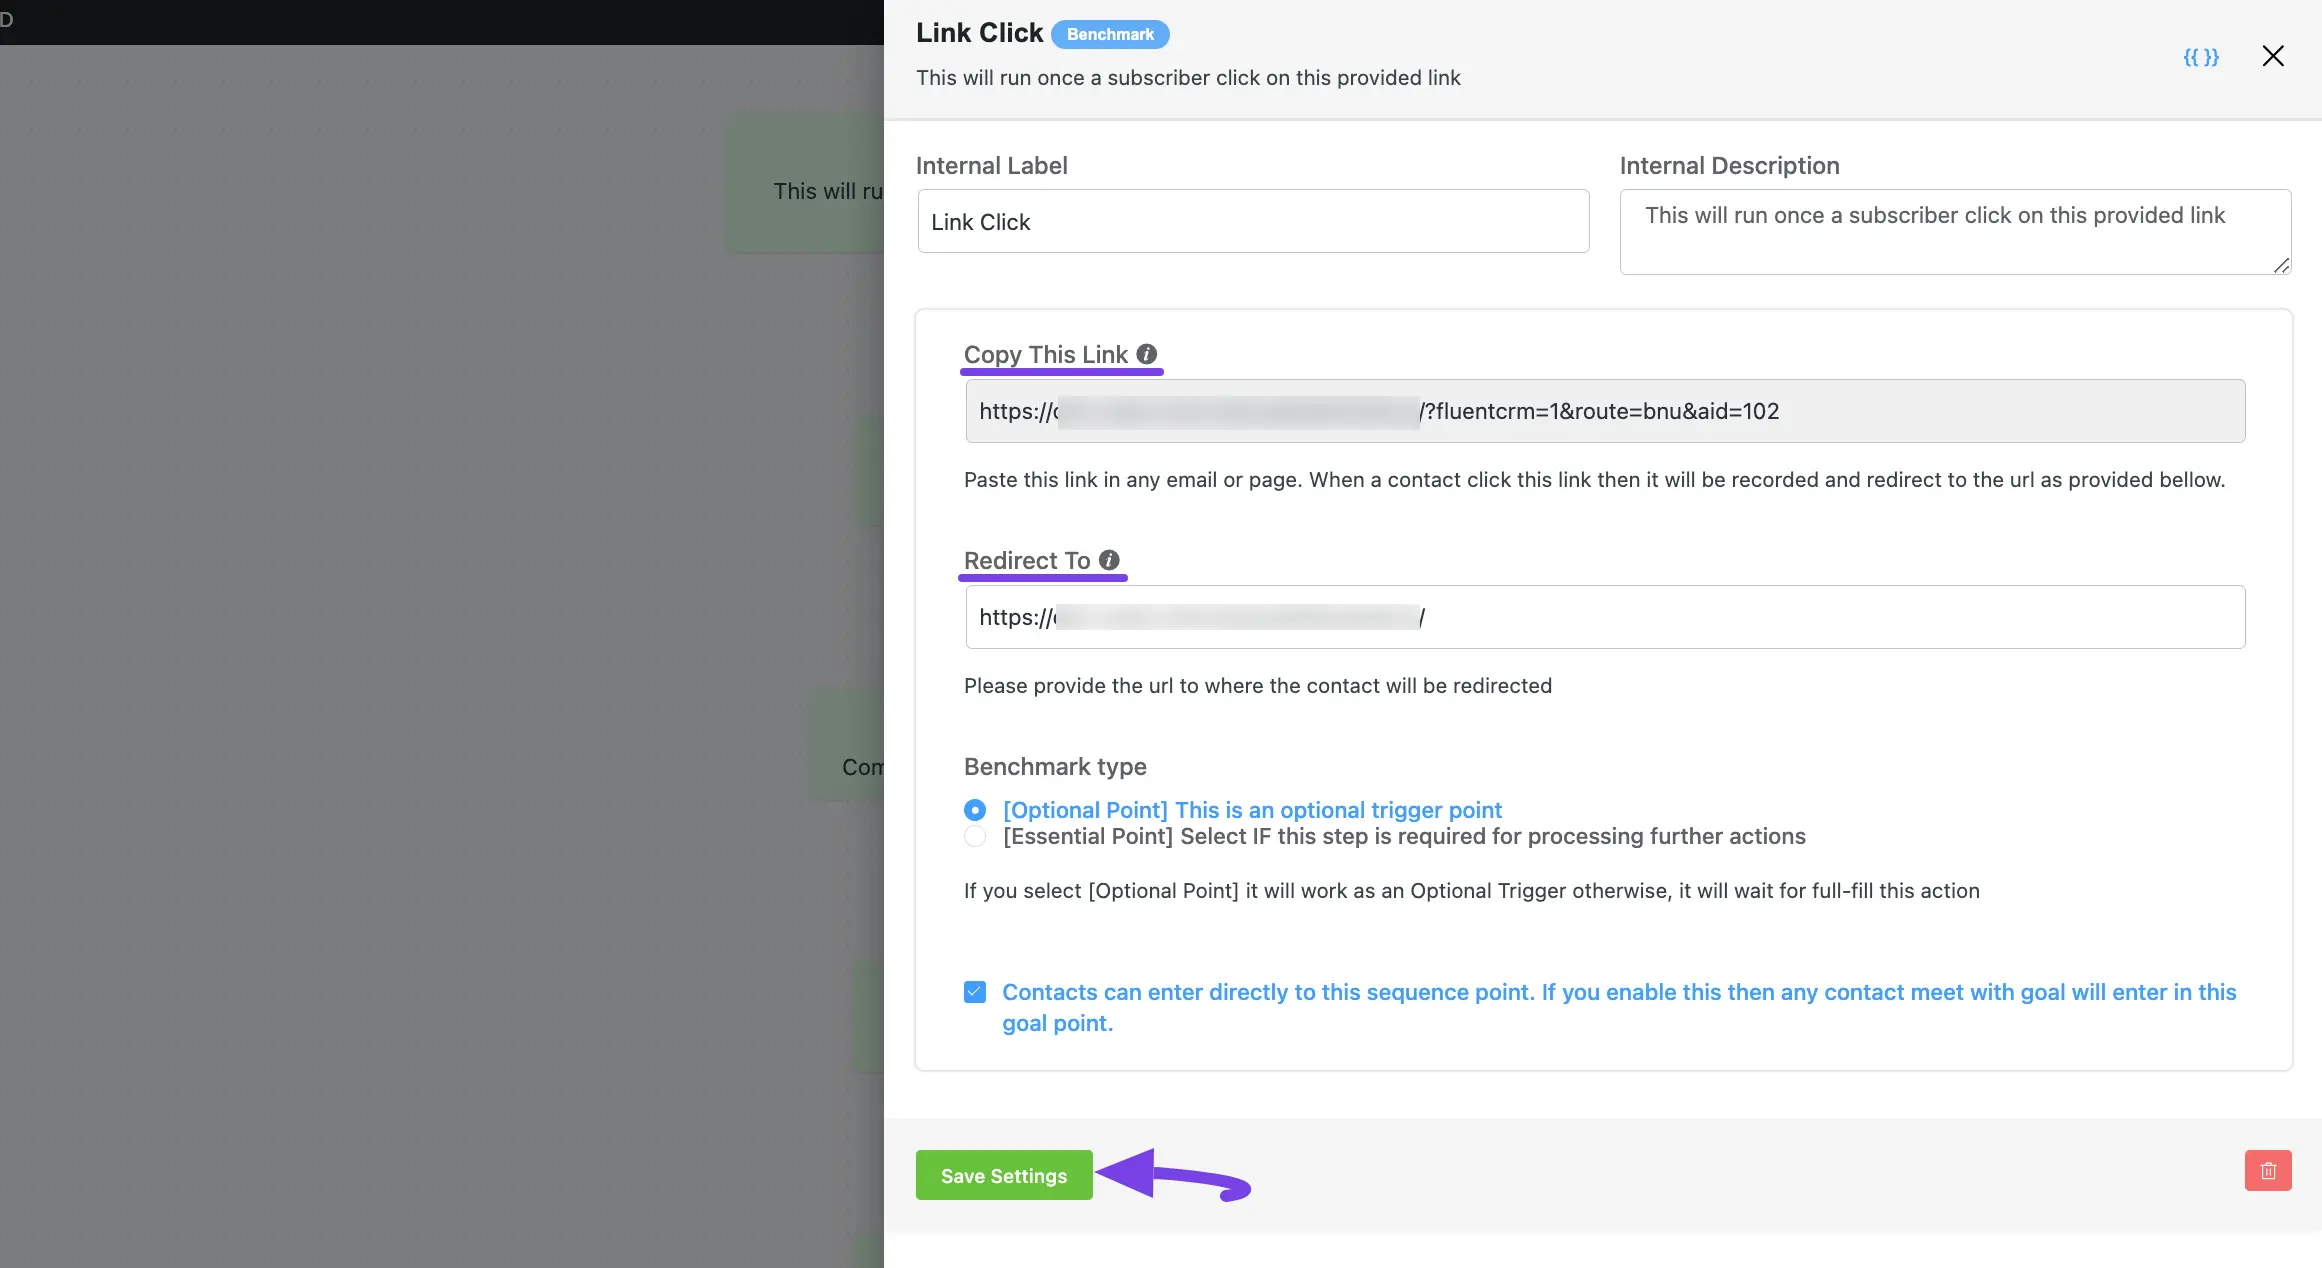
7. Link Click #
This automation funnel will start once a subscriber clicks on this provided link. After selecting this Action, a tab will appear on the right-hand side with options to set up your action.
Here are the Settings of the Link Click action:
- Copy This Link: Mainflow will provide a link that you need to use to trigger this benchmark action. If you do not see the link immediately please save the action and it will generate a link for you.
- Redirect To: Place the destination URL where you want the user to be redirected after clicking the link.
Once you are done, click the Save Settings button to save all your changes.
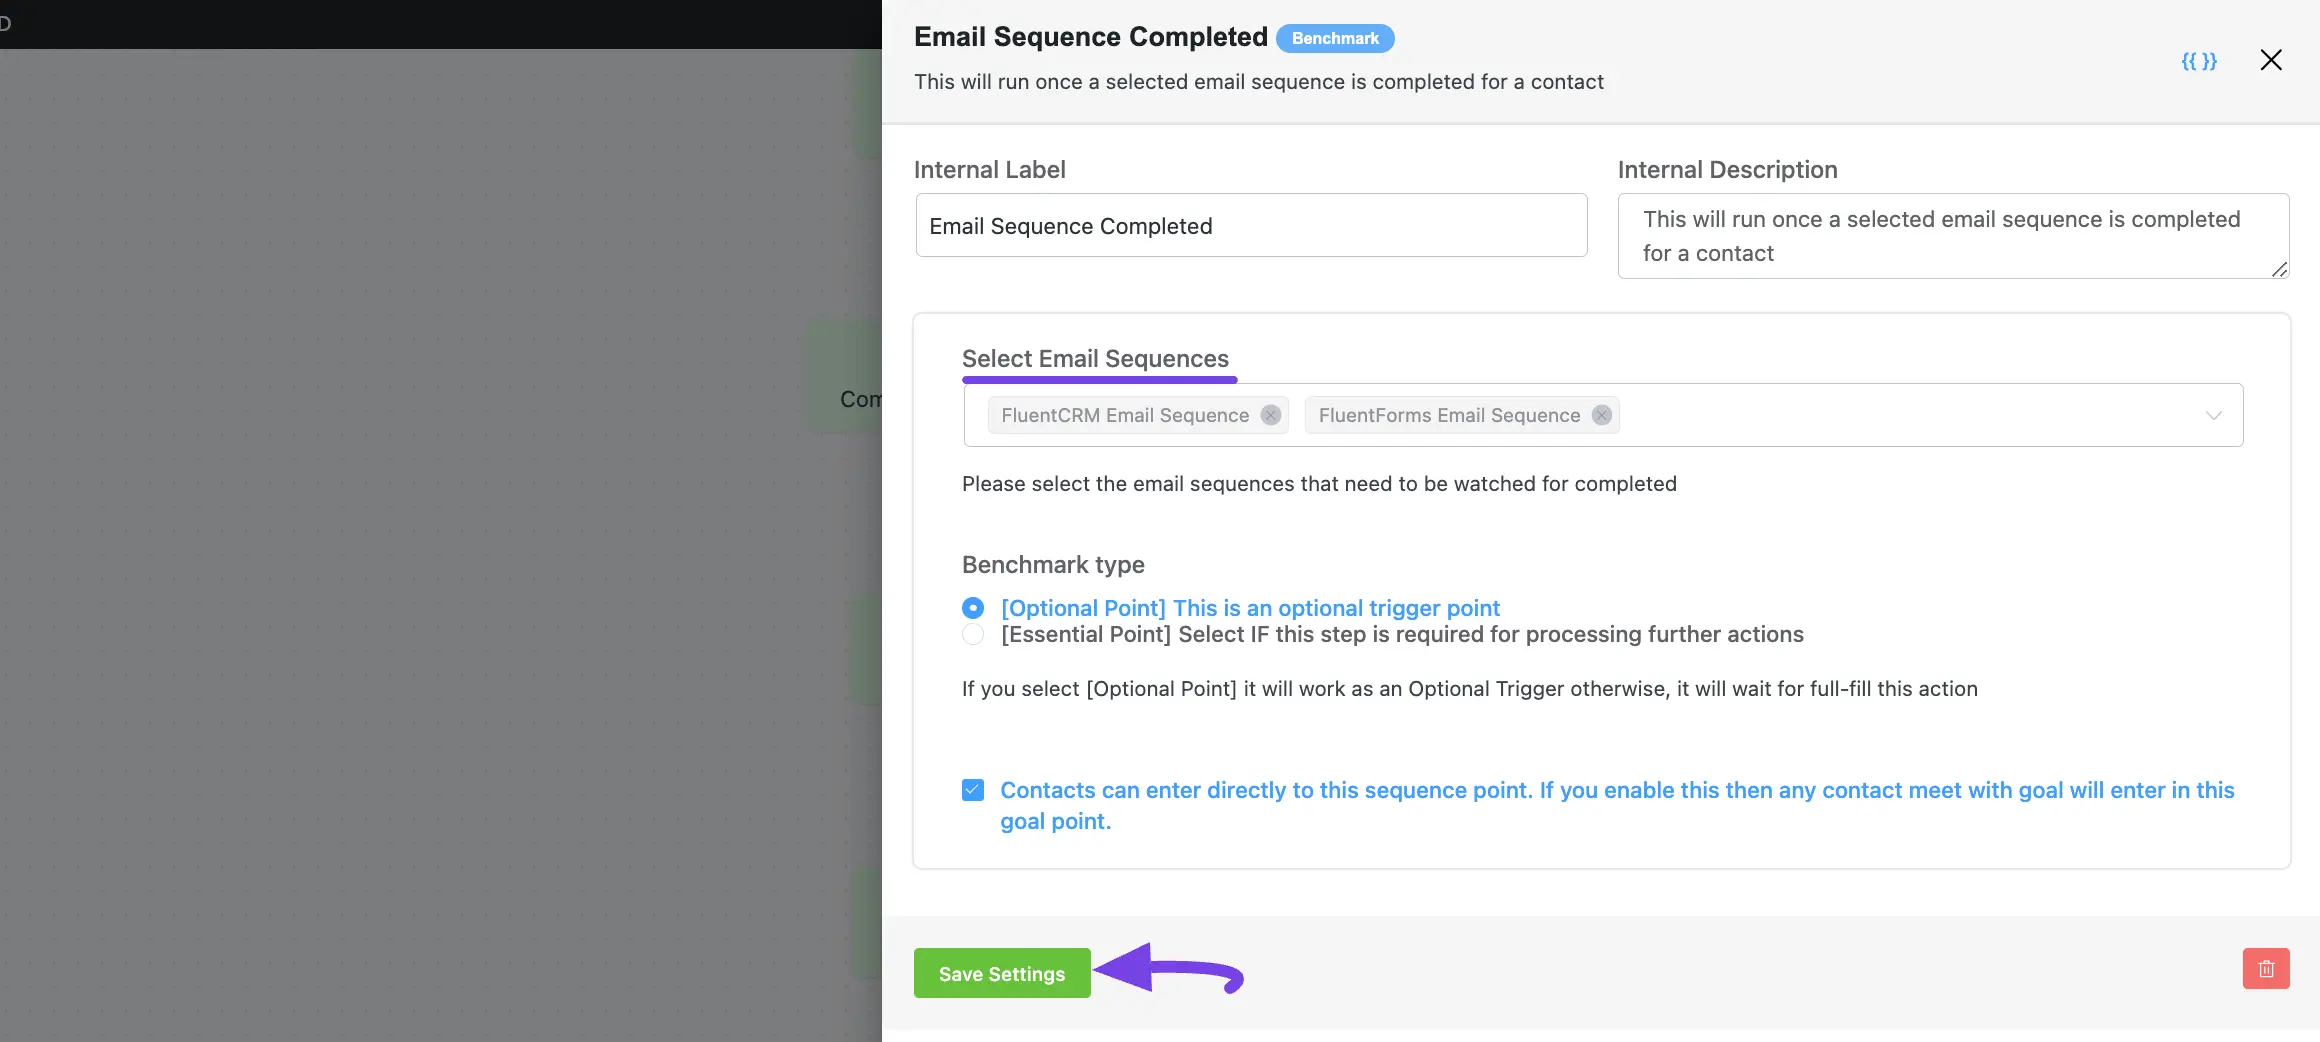
8. Email Sequence Completed #
This automation funnel will run once a selected email sequence is completed for a contact. After selecting this Action, a tab will appear on the right-hand side with options to set up your action.
Here are the Settings of the Email Sequence Completed action:
- Select Email Sequences: Select the email sequence (Single or Multiple) from the dropdown that needs to be completed to trigger this benchmark action.
Once you are done, click the Save Settings button to save all your changes.
If you have any further questions, concerns, or suggestions, please do not hesitate to contact our support team. Thank you.


